
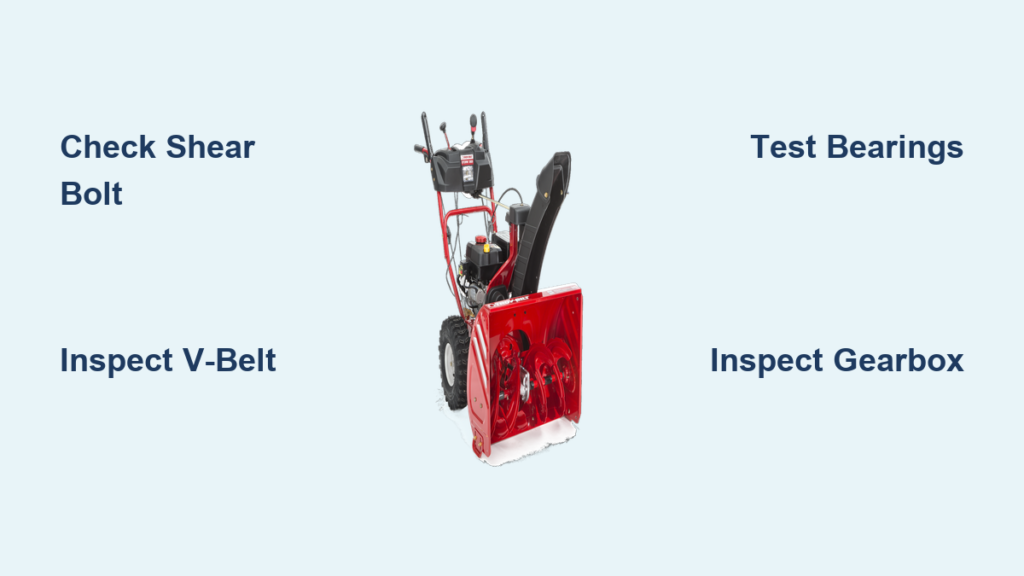
You fire up your Troy-Bilt snow blower, pull the auger lever, and nothing happens. The engine runs fine, but the auger just sits there or spins weakly while snow piles up in front of the housing. This is one of the most common problems Troy-Bilt owners face, especially at the start of the season.
A Troy-Bilt snow blower auger not turning is usually caused by one of five things: a broken shear bolt, a failed V-belt, worn auger bearings, a damaged auger assembly, or stripped gearbox gears. Most of these problems take under 30 minutes to diagnose and under two hours to fix with basic tools.
This guide walks you through each cause in order from simplest to most complex. You will learn how to test each component, what parts to order, and how to avoid the costly mistakes that send most people straight to a repair shop.
Start With the Shear Bolt

How Shear Bolts Protect Your Snow Blower
The shear bolt is a deliberately weak bolt designed to snap when the auger hits a rock, ice chunk, or curb. When it breaks, power to the auger stops instantly while the engine and drive system keep running. This sacrifices a cheap bolt to save an expensive repair.
You will know the shear bolt is the problem if only one auger spins or both stay completely still while the engine runs normally.
How to Find and Replace the Shear Bolt
Start by turning off the snow blower and disconnecting the spark plug wire. Remove the auger housing cover if your model has one, then inspect both ends of the auger shaft. Look for a sheared bolt, a missing bolt, or an empty hole where the bolt should be.
Replacement is straightforward once you find the right size.
Use only Troy-Bilt-approved shear bolts or universal snow blower shear bolts. Common dimensions are 5/16″ or 3/8″. Most hardware stores stock them in the lawn and garden section.
To install:
- Rotate the auger by hand until the hole in the auger lines up with the hole in the axle
- Slide the new shear bolt through both holes
- Thread the lock nut on by hand first
- Hold the bolt head with a Crescent wrench
- Snug the lock nut with a ratchet, but do not over-tighten
Pro Tip: Stock at least four spare shear bolts. They cost almost nothing and save you from being stuck mid-storm.
Inspect the V-Belt Next
Signs the V-Belt Has Failed
The V-belt transfers power from the engine pulley to the auger pulley. When it stretches, cracks, or breaks, the auger loses all power.
Watch for these warning signs:
– Auger does not turn at all
– Burning rubber smell coming from the belt housing
– Snow throwing distance keeps getting shorter over time
– Belt looks cracked, shiny, or frayed when you peek under the cover
How to Check the Belt Safely
Disconnect the spark plug wire first. Remove the belt cover by unscrewing the two 3/8-inch bolts with a 1/4″ ratchet. Inspect the belt for cracks, glazing (shiny spots), and excessive slack. Also check the pulleys for wear while you have access.
Replace the V-Belt Step by Step
Step 1: Remove the Belly Pan
Loosen the four 3/8-inch bolts holding the belly pan in place. Lift the pan off carefully and watch for any fuel drips. Place a rag under the carburetor if needed.
Step 2: Remove the Drive Disc
Use a 9/16″ wrench and a 3/4″ wrench to loosen the central bolt. Lift the drive disc upward to create working room.
Step 3: Remove the Old Belt
Pull the belt off the auger pulley and slide it completely out from between the pulleys. Do not try to leave it partially in place.
Step 4: Install the New Belt
- Route the new belt between the drive disc and the auger pulley
- Guide it around the left pulley, turning it slightly if needed
- While the blower is upright, align the belt with the engine pulley
- Reinstall the drive disc and central bolt
- Tighten securely but do not over-tighten
Adjust the Belt Tension
Depress the auger lever and press down on the belt. It should feel firm but not rock hard.
- If too loose: loosen the 3/8″ nut on the auger cable bracket and slide the bracket down to add tension
- If too tight: slide the bracket up slightly
Critical Safety Check: The belt must stop completely when you release the auger lever. Aftermarket belts that bypass this safety feature are dangerous and should never be used.
Finding the Correct Replacement Belt
Check your model number on the belly pan tag. Numbers starting with 3, 7, or 9 are common.
| Engine Size | Correct Belt Part Number |
|---|---|
| Most 3-stage models | 954-04195 or 754-04195 |
| Engines under 357 cc | 954-040-50 or 754-040-50 |
Test the Auger Bearings

Symptoms of Bad Bearings
Worn or seized auger bearings stop the auger from spinning freely. If belts and shear bolts check out but the auger still binds or grinds, bearings are the next suspect.
Common indicators:
– Loud grinding noise during operation
– Auger feels stiff or catches when turned by hand
– Auger turns for a few seconds then stops
How to Check the Bearings
Remove the auger assembly (covered in detail below), then spin the auger shaft by hand. If it feels rough, sticky, or refuses to turn smoothly, the bearings are bad.
Replace Both Bearings Together
Always replace the left and right bearings at the same time. Use sealed bearings designed for your specific model. While the shaft is out, sand off any rust with fine-grit sandpaper and apply a light coat of grease to help the new seals slide on.
Warning: Too much grease attracts dirt and debris, which can cause the bearings to fail again sooner.
Remove the Auger Assembly for a Full Inspection
When Removal Is Necessary
If the auger still will not turn after checking belts and shear bolts, pull the entire auger assembly out. This is especially important on heavy-duty models like the Troy-Bilt MTD Storm 2620.
Removal Steps
- Pull the pin and remove the wing nut, then lift the chute off the base
- Remove the pulley cover
- Disconnect the idler pulley cable
- Remove the two large bolts joining the front and rear halves in front of the tires
- Support the rear half while pulling it apart; it is heavy and can dent the frame if dropped
- Insert a scrap of wood into the chute to lock the impeller in place
- Remove the rear pulley using a wrench
- Disconnect the auger pivot brackets on both sides
- Slide the auger assembly out cleanly
Note: Pay attention to the cam mechanism that aligns the front and rear sections. Misalignment here causes frustrating reassembly problems.
Diagnose Stripped Gearbox Gears

How the Gearbox Works
In dual-stage Troy-Bilt snow blowers, the gearbox sits between the two auger halves and transfers power from the drive shaft to the auger. It is the most expensive component to replace and a common failure point.
Signs the Gearbox Is the Problem
- Drive shaft spins normally but the auger stays still
- Shear bolts are intact
- You see oil leaking around the gearbox housing
- Metal shavings appear in the grease
How to Open and Inspect the Gearbox
- Remove the impeller
- Take off washers, spacers, and retaining hardware from both ends
- Note the spacer placement carefully (two on one side, one on the other)
- Open the housing and inspect the central brass gear
The brass gear is almost always the first part to fail. Look for stripped teeth, worn bushings, and brass shavings mixed into the grease.
Repair With a Rebuild Kit
A full gearbox replacement can cost several hundred dollars, but a rebuild kit solves the problem for under $100 on eBay. Kits include:
- New auger shaft
- Replacement brass gear
- Bushings, seals, and spacers
- All required hardware
Clean every trace of old sealant from the housing before reassembly. Apply fresh grease, install the new shaft and gear, and reinstall the auger assembly.
Smart Maintenance to Prevent Future Breakdowns
Seasonal Maintenance Checklist
| Task | When to Do It |
|---|---|
| Inspect V-belt for cracks and slack | Pre-season and mid-season |
| Check shear bolts for damage | Before every use |
| Test auger bearings for smoothness | Pre-season |
| Examine auger blades for wear | Pre-season |
| Look for gearbox leaks or shavings | Pre-season |
Lubrication Tips
- Apply a thin film of lithium grease to the drive wheel shaft
- Use wheel bearing grease on the gear mechanism
- Never grease the drive disc or belt, as this causes slippage
Stock These Spares
Keep shear bolts, a spare V-belt matched to your model number, and a rebuild kit on hand for long-term reliability.
Model-Specific Tips for the Troy-Bilt MTD Storm 2620
This heavy-duty model is prone to gearbox gear stripping after two or three seasons of clearing long driveways (300 feet or more). Hitting deep, wet snowbanks at the end of the season is the most common trigger.
A rebuild kit saves $200 or more compared to replacing the entire gearbox assembly, and most owners can complete the repair in a weekend afternoon.
Avoid These Costly Mistakes
- Never substitute a regular bolt for a shear bolt; it will not break under stress and will destroy your gearbox
- Over-tightening bolts strips threads and cracks housings
- Over-greasing causes belt slippage and attracts debris
- Ignoring belt tension shortens belt life dramatically
- Skipping the spark plug disconnect can lead to accidental startup and serious injury
Final Testing After Any Repair
- Reconnect the spark plug boot
- Start the engine and let it warm up
- Engage the auger lever and watch for smooth belt movement
- Confirm both augers turn at full speed
- Listen for grinding or squealing
- Walk to fresh snow and verify proper throwing distance
Stop immediately if you see any of the above in bold:
– Burning smell
– Grinding noise
– Auger stopping under load
Frequently Asked Questions About Troy-Bilt Snow Blower Auger Problems
Why is my Troy-Bilt auger not turning but the engine runs?
The most common cause is a broken or missing shear bolt, which is a safety feature that snaps when the auger hits something solid. Check both ends of the auger shaft for a cracked or missing bolt before inspecting the V-belt or gearbox.
How do I know if my snow blower belt is bad?
Look for cracks, fraying, glazing (shiny spots), or excessive slack under the belt cover. A burning rubber smell and decreasing throwing distance over time are also strong indicators that the V-belt needs replacement.
What size shear bolt does a Troy-Bilt snow blower use?
Most Troy-Bilt models use 5/16″ or 3/8″ shear bolts. Check your owner’s manual or measure the old bolt to confirm the correct size for your specific model.
Can you use a regular bolt instead of a shear bolt on a snow blower?
No. Regular bolts will not break under stress, which means the impact force transfers straight to the gearbox and engine, causing severe and expensive damage. Always use genuine shear bolts or verified universal replacements.
How much does it cost to fix a snow blower auger?
Shear bolts cost just a few dollars. V-belts range from $20 to $60 depending on the model. A gearbox rebuild kit costs under $100, while a complete gearbox replacement can run $300 or more including labor.
Why does only one auger spin on my Troy-Bilt?
When one auger spins and the other stays still, the cause is almost always a broken or missing shear bolt on the stationary side. Replace it with the correct manufacturer model and verify the auger is properly aligned before use.
Key Takeaways for Fixing Your Troy-Bilt Snow Blower
When your Troy-Bilt snow blower auger is not turning, work through the diagnosis in order: shear bolts first, then the V-belt, bearings, auger assembly, and finally the gearbox. This sequence catches the simplest and most common causes before you commit time to complex repairs.
Most fixes take under two hours with basic hand tools, and total repair costs rarely exceed $100 if you use a rebuild kit for gearbox issues. Keep spare shear bolts and a matched V-belt on hand, run through the seasonal maintenance checklist before the first snowfall, and your Troy-Bilt will throw snow reliably for years to come.



