A bumpy lawn isn’t just an eyesore. It creates uneven mowing, creates tripping hazards, and traps water in low spots, leading to dead grass and erosion. If your yard feels like a miniature rollercoaster, you are not alone. Many homeowners face this problem due to soil heaving, poor sod installation, thatch buildup, or surface roots. The good news is that most bumpy lawns can be fixed with the right techniques, tools, and consistent effort. This guide covers the exact step-by-step methods, best materials, and pro tips to restore a smooth, safe, and lush lawn.
Diagnose the Bump Cause
Before grabbing a rake, you need to identify what is causing the unevenness. Applying the wrong fix can waste time and worsen the problem.
Check for Freeze-Thaw Heaving
In late winter and early spring, repeated freeze-thaw cycles lift turf and create bumps. This is especially common in clay or loamy soils. Look for loose sod edges or raised patches after winter. These bumps often settle naturally but may need topdressing to fully correct.
Test for Thatch and Compaction
A spongy lawn often has thatch buildup, which is a layer of dead stems and roots over one-half inch thick. This prevents soil contact and traps moisture. Use the screwdriver test to check compaction. Push a screwdriver into the soil. If it slides in easily past 2 inches, your soil is not compacted. If it resists, compaction is likely your issue.
Inspect for Tree Roots and Clumping Grass
Surface tree roots push up grass and create permanent bumps. Do not bury them under thick soil because this can suffocate the tree. Accept slight unevenness in these areas or use mulch instead. Tall fescue clumps also cause bumps, especially after drought when other grasses die off.
Identify Animal or Construction Damage
Holes, mounds, or sudden dips may point to moles, gophers, or settling soil after landscaping work. Fill animal tunnels with soil and monitor the area. For construction-related settling, expect deeper corrections that may require sod removal and regrading.
Choose the Right Repair Method
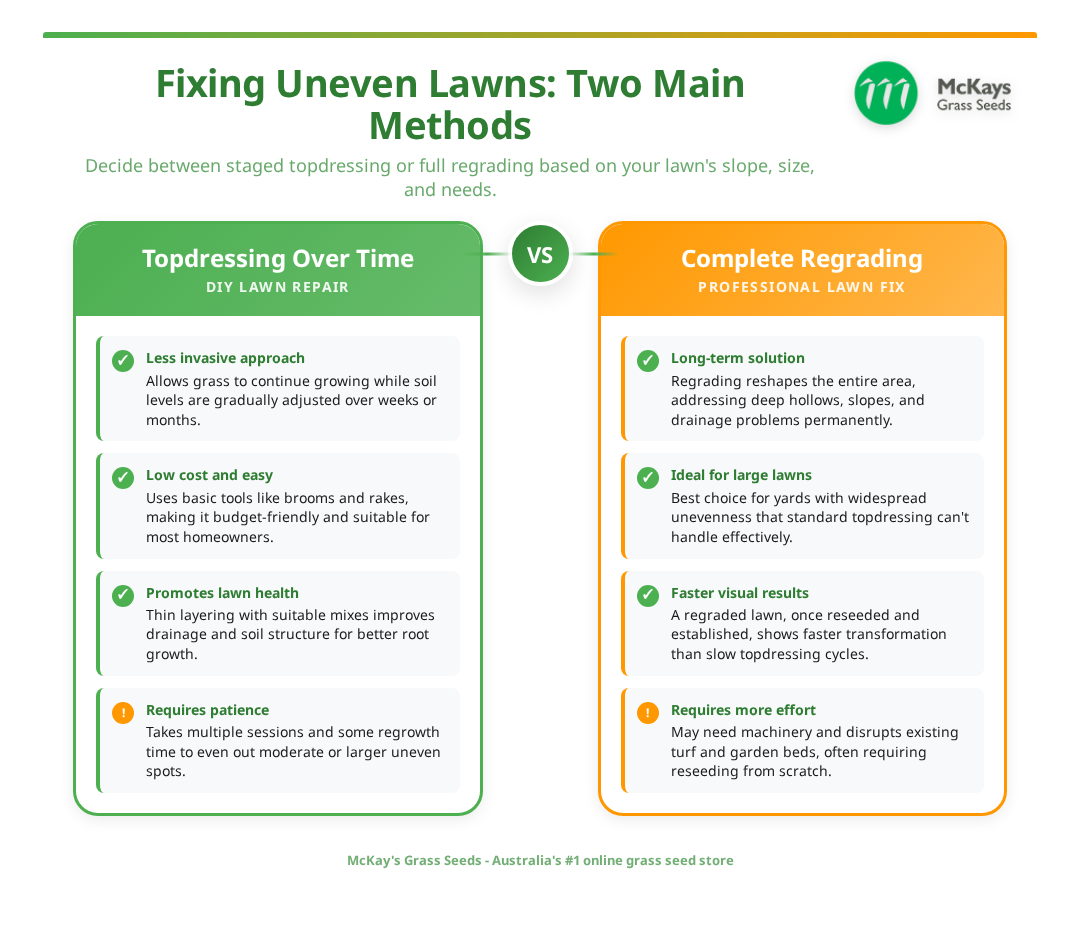
Match your fix to the severity of the problem. Minor bumps need gentle care. Major dips require aggressive reshaping.
Minor Bumps Under One Inch: Topdress and Aerate
This is the most effective method for slight unevenness. It avoids turf disruption while improving soil structure.
Mow Low to Reveal True Terrain
Cut grass to 1 to 1.5 inches to see hidden contours. Make a second pass at a perpendicular angle to ensure all high spots are exposed. Avoid scalping outside of repair work. This is only for diagnosis and preparation.
Dethatch for Better Contact
Use a power rake or scarifier to break up thatch. This clears the way for topdressing to reach the soil. Remove loosened debris with a leaf rake. If moss is present, scarify thoroughly to reveal the real surface before leveling.
Core Aerate for Deep Relief
Rent a core aerator in spring or fall when grass is actively growing. Water the lawn 24 hours prior to soften the soil. Aerate in two directions for full coverage. Leave the soil plugs on the lawn because they break down over months and return nutrients to the soil.
Pro Tip: Aeration relieves compaction, improves drainage, and creates holes for topdressing to sink into, doubling the leveling effect.
Moderate to Severe Bumps Over One Inch: Reshape with Sod Removal
For deep hollows or raised areas, surface fixes will not work. You need to access the soil beneath.
Cut and Lift Sod
Use a sharp spade or sod cutter to remove turf from affected zones. Roll it up and keep it in shade if you plan to reuse it. This gives full access to the soil beneath for proper correction.
Adjust Soil Level
Loosen the base with a garden fork. Add or remove soil to match the surrounding grade. For large fill areas, use a mix of 60 percent topsoil, 30 percent compost, and 10 percent sand. This balances fertility and drainage. Ensure a slight slope of 1 to 2 percent away from your home to prevent water pooling.
Reinstall and Press Down
Replace the sod or lay new pieces, pressing firmly to eliminate air pockets. Overlap edges slightly and water immediately. If reseeding, use turf-type tall fescue or Kentucky Bluegrass depending on sun exposure.
Warning: Never apply more than one-half inch of topsoil at once over existing grass. This can smother and kill it.
Severe Cases: Full Scarification and Precision Leveling
For lawns choked with moss, thatch, or long-term unevenness, go pro-style.
Use a Scarifier to Strip the Surface
This machine removes moss, dead grass, and thatch, exposing the true soil grade. After scarifying, the lawn will look bare, but that is the point. You need to see the real surface to level it properly.
Measure with Moasure Pro 2 for Accuracy
This GPS-enabled tool scans your lawn and calculates the exact topsoil volume needed. No guessing is involved. One user needed 2.08 cubic meters for major hollows. Use this data to order the right amount of fill.
Layer and Compact Gradually
Apply topsoil in 1 to 2 inch layers, walking over each to settle it. Let it dry slightly, then drag a chain mat or wooden board to smooth. Repeat until the surface is level.
Seed and Feed for Recovery
Overseed with a shade-appropriate or sun-appropriate blend. Apply seaweed extract and iron to boost root growth and density. Water daily until new grass reaches mowing height.
Use the Best Topdressing Mix
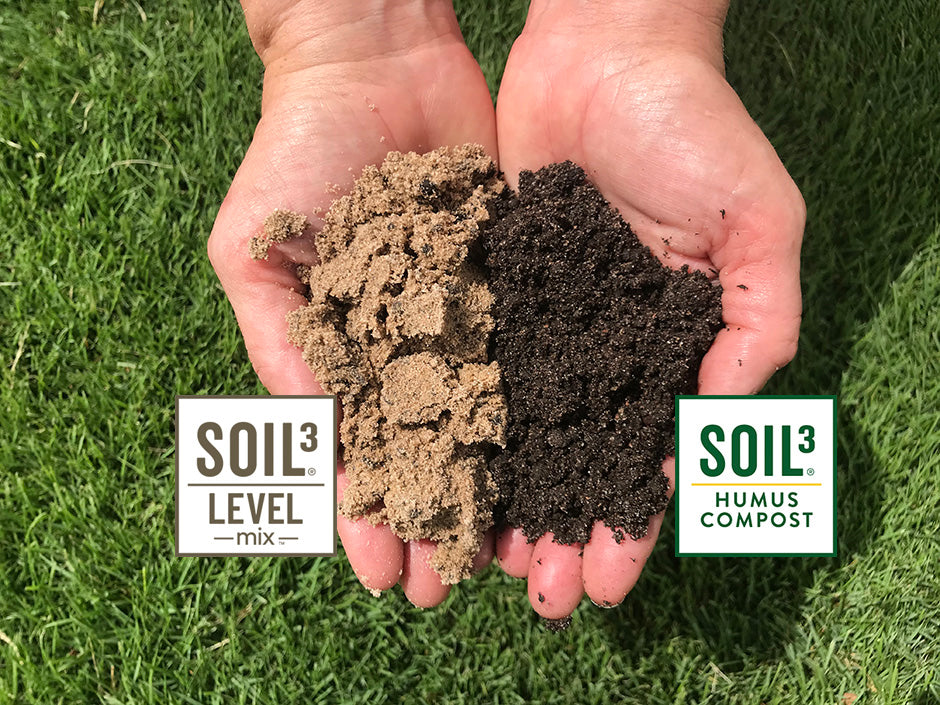
The right blend ensures stability, drainage, and grass survival. Using the wrong material can make the problem worse.
Ideal Topdressing Formulas
A mix of 60 percent topsoil, 30 percent compost, and 10 percent sand provides the best all-around results. It offers nutrient support and structural integrity. A 50/50 sand and compost mix works well for moderate dips and overseeding. A turf blend of 50 percent sand and 50 percent topsoil is ideal for holes over 1 inch because it drains well without compacting.
Avoid pure sand on large areas. It shifts and does not support roots. Save it for one-fourth-inch surface layers after base leveling is complete.
Apply in Thin, Safe Layers
Apply no more than one-half inch per application. Wait 7 to 10 days between layers for settling. Never exceed three-fourths inch total depth over living grass. Use a leveling rake or bow rake to spread evenly. Work in small sections, focusing on low spots. Brush material into aeration holes for deeper penetration.
Avoid Common Mistakes
Even well-intentioned efforts can backfire. Steer clear of these pitfalls to save time and money.
Do Not Use Heavy Lawn Rollers
A water-filled rear roller can gently settle soil, but heavy rolling compacts soil and harms grass. It kills beneficial microbes and reduces oxygen flow. Use foot traffic or a light drag instead.
Do Not Bury Tree Roots
Adding thick soil over exposed roots strangles trees by blocking oxygen and moisture. Instead, add no more than 1 to 2 inches of soil gradually over time. Or mulch the area with 2 to 3 inches of wood chips.
Do Not Overseed in Summer
Kentucky Bluegrass and other cool-season grasses will not germinate in hot weather. Seed in early fall or spring when soil temperatures are 50 to 65 degrees Fahrenheit. Summer seeding wastes seed and invites weeds.
Do Not Ignore Drainage
If water pools in low spots, leveling alone will not help. Regrade the area or install a French drain to redirect runoff. A flat lawn that floods will erode again.
Maintain a Smooth Lawn Long-Term
Fixing bumps is only half the battle. Prevent them from coming back with consistent maintenance.
Aerate Annually
Schedule core aeration every fall to prevent compaction. It keeps soil loose, roots deep, and water moving. Pair it with topdressing for ongoing leveling throughout the year.
Dethatch When Needed
Check thatch depth yearly. If it exceeds one-half inch, power rake in early fall. This prevents sponginess and ensures future topdressing works effectively.
Mow and Water Consistently
Mow at the right height, which is 2.5 to 3.5 inches for most grasses. Alternate mowing patterns to avoid ruts. Water deeply but infrequently, aiming for 1 inch per week to encourage deep roots.
Pro Tip: Attach a rear roller to your mower after mowing to gently firm the surface. This helps maintain smoothness without over-compacting.
Treat Pests in Fall
Leatherjackets and grubs can cause dips by loosening soil. Apply pest control in October if you notice patches of thinning grass or increased bird activity.
Know When to Call a Pro
Some problems need more than DIY effort. Know your limits to avoid wasting money.
Hire a Professional If
Bumps exceed 2 inches across large areas. You suspect subsidence or structural issues. Tree roots require pruning or relocation. Full regrading or sod installation is needed. You have tried multiple fixes with no improvement.
Professionals have access to laser grading tools, heavy-duty compactors, and sod-laying equipment for flawless results.
Set Realistic Expectations
A perfectly flat lawn takes time and repetition. Most methods deliver drastic improvement, not instant perfection.
Minor fixes show results in 4 to 6 weeks. Sand capping may take 2 to 3 seasons of layering. Full renovation is sometimes the only permanent solution after years of patchwork. Even partial leveling dramatically improves mowing ease, safety, and curb appeal.
Frequently Asked Questions About Fixing a Bumpy Lawn
What causes a bumpy lawn to develop over time?
Bumpy lawns develop from freeze-thaw cycles, thatch buildup, poor sod installation, tree root growth, animal activity, and soil settling after construction. Identifying the specific cause helps you choose the right repair method.
Can I fix a bumpy lawn myself, or do I need a professional?
You can fix most bumpy lawns yourself using topdressing, aeration, and overseeding for minor to moderate issues. Hire a professional for bumps over 2 inches, structural problems, or when full regrading is needed.
How long does it take to fix a bumpy lawn?
Minor bumps improve in 4 to 6 weeks with topdressing and aeration. Moderate to severe cases may take multiple seasons of layering and maintenance. Full renovation can take an entire growing season.
Can I use sand to level my lawn?
Use sand only in thin layers up to one-fourth inch after the base is relatively level. Pure sand does not support roots well and can shift. For larger dips, use a blend of topsoil, compost, and sand.
How often should I aerate my lawn to prevent bumps?
Aerate your lawn annually in the fall to prevent compaction and maintain a smooth surface. This keeps soil loose, encourages deep root growth, and helps topdressing materials reach the soil.
Key Takeaways for Fixing Your Bumpy Lawn
Fixing a bumpy lawn requires diagnosing the root cause first, then choosing the appropriate method based on severity. Minor bumps under 1 inch respond well to topdressing combined with core aeration. Moderate to severe bumps require sod removal and soil reshaping. Severe cases may need full scarification and precision leveling with proper equipment.
Use the right topdressing mix. A blend of 60 percent topsoil, 30 percent compost, and 10 percent sand provides the best balance of nutrients, structure, and drainage. Apply in thin layers no thicker than one-half inch at a time to avoid smothering grass.
Avoid common mistakes like heavy rolling, burying tree roots, overseeding in summer, and ignoring drainage. Maintain your smooth lawn annually through aeration, dethatching, proper mowing, and consistent watering.
Be patient. Lawn leveling is a process, not a one-day fix. Start with aeration and topdressing for minor issues. Tackle major bumps with sod removal and reshaping. Use the right materials, avoid heavy compaction, and maintain annually. With patience and precision, you will transform your bumpy yard into a smooth, safe, and stunning lawn ready for play, pets, and pride.