
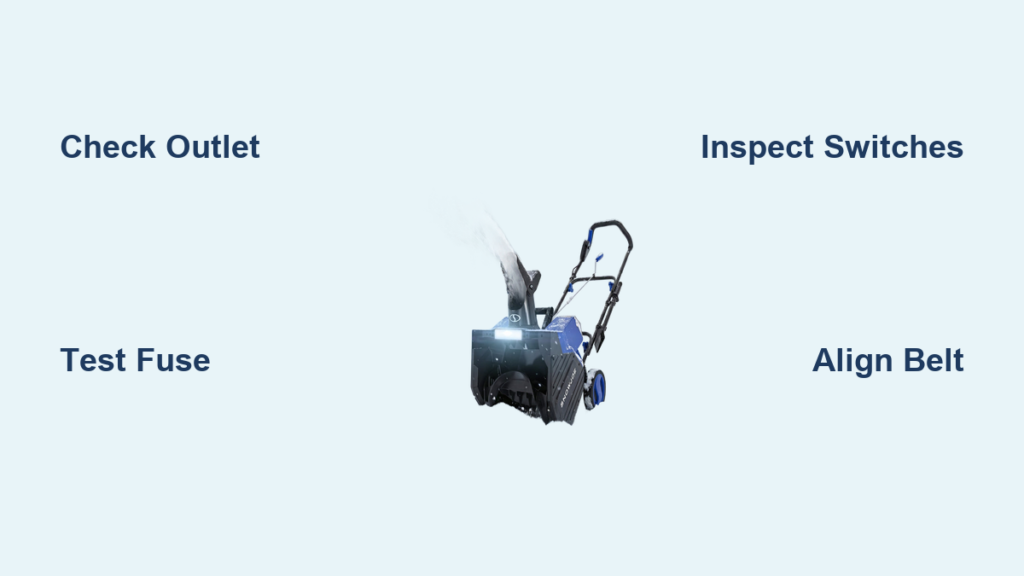
Few winter frustrations match the disappointment of a Snow Joe snow blower that refuses to start on a snowy morning. Before you assume the worst, know that most issues trace back to a handful of simple causes: loose wires, blown fuses, tripped breakers, and misaligned belts. These problems are often fixable with basic tools and a clear diagnostic path. This guide walks you through every step, from power checks to motor testing, so you can revive your Snow Joe in under an hour and keep it running reliably for seasons to come.
Diagnose Power Supply Problems First
Test the Outlet and Circuit Breaker
A dead outlet is the most overlooked cause of no-power symptoms. Before touching the machine, plug in a lamp or phone charger to confirm the outlet works. If nothing powers on, check your GFCI outlet or household circuit breaker. Snow Joe blowers frequently trip breakers, especially after a motor stall. Reset any tripped breakers and test again. Many users waste time troubleshooting the motor only to discover the breaker had flipped off.
Use a Suitable Extension Cord
Using the wrong extension cord can prevent your Snow Joe from starting or cause intermittent operation. Match your cord to these specifications:
- Up to 50 ft: 16 AWG minimum
- 50 to 100 ft: 14 AWG minimum
- Never exceed 100 feet (30 m)
A worn, frayed, or undersized cord increases resistance and reduces voltage at the motor. Replace damaged cords immediately. Always route the cord through the cord retainer at the rear of the blower to prevent accidental disconnection during use.
Check the Ground Wire
A loose ground connection under the housing can cause complete power failure. Open the housing and verify the ground wire is tight and secure. Vibration from regular use can loosen this connection over time.
Test Safety Switches Before Going Deeper
Understand the Two-Step Start System
Snow Joe blowers require two simultaneous actions to start: press the safety button on the side while pulling the trigger lever. If either action does not engage properly, the motor will not start. This safety design prevents accidental operation but can fail when debris, ice, or wear interferes.
Inspect and Clean Each Switch
Manually press each switch and listen for a distinct click. If a switch feels stiff, mushy, or silent, it may be stuck or damaged. Common culprits include:
- Snow or ice packed around the chute deflector switch
- Debris blocking the handlebar trigger
- A worn safety button that no longer makes contact
Clean around switches with a dry cloth or compressed air. Never bypass these switches because they are critical for safe operation.
Use the Headlight as a Diagnostic
If the headlight turns on but the motor will not spin, power is reaching the safety circuit. That means the switches are likely working and the problem lies elsewhere. This simple observation saves significant diagnostic time.
Check the Fuse and Thermal Protection

Locate and Test the Handle Fuse
Inside the housing near the handlebar sits a small 15A glass fuse, a frequent failure point. To check it:
- Unplug the blower
- Open the handle housing
- Remove and inspect the fuse
If the fuse appears blackened or the filament is broken, replace it with a new 15A glass fuse. This fix resolves many no-power issues, especially after a motor stall or electrical surge.
Diagnose Thermal Overload Protection
Some models include a thermal overload device in the wiring harness that cuts power when the motor overheats. To test it:
- Let the blower cool for at least 30 minutes
- Reconnect and run for over 30 seconds
- If it runs without tripping, the device is functional
If the blower starts after cooling but dies again quickly, the motor may be overheating due to mechanical resistance or worn bearings.
Trace Wiring Issues When the Motor Won’t Spin
Perform the Jostle Test
If the headlight works but the motor won’t spin, wiring is the likely culprit. Try this quick diagnostic:
- Hold the safety switch down
- Gently shake or twist the wire bundle near the handle
- If the motor starts or flickers, you have found a loose connection
This jostle test reveals intermittent faults caused by vibration or poor crimps.
Inspect Terminal Connections
Open the housing and examine all wiring carefully:
- Are wires at the motor terminals fully seated?
- Are crimps in the wiring harness loose or corroded?
- Were zip ties securing wires disturbed during use?
Vibration from operation can loosen connections over time. Re-crimp any suspect terminals using a proper crimping tool, then seal with heat shrink tubing for long-lasting durability.
Test Voltage at Motor Terminals
Use a multimeter to check for voltage at the motor terminals while the trigger is pulled. Voltage present but the motor does not spin points to a dead motor. No voltage means you need to trace back through switches and wiring to find the break.
Fix Mechanical Issues That Strain the Motor
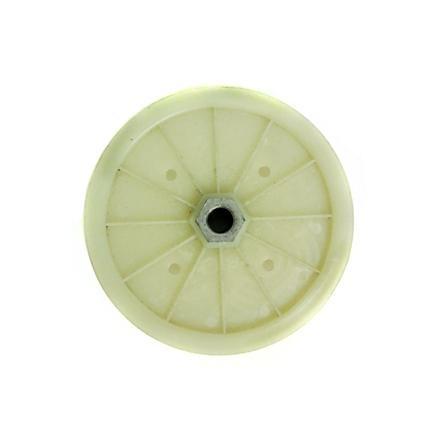
Align the Drive Belt
A misaligned drive belt is a silent motor killer. It slips off the pulley slightly, creating friction and extra load. Watch for these symptoms:
- Motor straining or stalling under load
- Unusual noise from the drive system
- Reduced snow-throwing power
Open the drive housing and reposition the belt so it sits flush on the pulley. Ensure no part of the belt rubs against the housing. After realignment, the motor should run faster and smoother.
Lubricate Stiff Bearings
Remove the drive end caps secured with 17mm and 8mm bolts to access the bearings. Spin them by hand. Smooth rotation means the bearings are fine. Gritty or resistant bearings need attention. Spray them with WD-40 to restore smooth movement. Even slightly stiff bearings increase motor load, leading to overheating and premature failure.
Check for Mechanical Drag
Inspect all moving parts for resistance, including the impeller shaft, chute rotation mechanism, and auger. Any drag forces the motor to work harder. Address binding components before assuming the motor is faulty.
Fix Common Design Flaws
Secure a Loose Rotating Base
Many users report the rotational base wobbles or unlocks during use because the factory screw does not fit snugly. To fix this:
- Remove the base
- Test different screw sizes
- Install a tighter-fitting screw or add a second one
- Ensure the base locks firmly to the main plate
This simple modification eliminates vibration and improves stability during operation.
Stop Static Electricity Shocks
The plastic impeller rubbing against the housing generates static electricity, which travels through the metal handle and shocks the user. The fix is straightforward:
- Wrap the handle with rubber electrical tape (not vinyl)
- Cover all metal contact points
Rubber tape insulates better and lasts longer than vinyl. This modification eliminates shocks completely and remains safe for ongoing use.
Work Around Limited Throw Distance
These blowers typically throw snow only about 5 feet, which is insufficient for long driveways. Workarounds include:
- Starting near the house and working outward
- Making multiple passes in the same area
- Clearing snow frequently before it piles deep
For packed or wet snow, reduce depth per pass. While you cannot increase throw distance mechanically, proper technique maximizes performance.
Know When to Repair vs Replace
Repair If:
- The issue is a loose wire, blown fuse, or misaligned belt
- You have confirmed power reaches the motor
- The unit is relatively new or well maintained
- Replacement cost exceeds $100
Consider Replacement If:
- The motor is dead and not repairable
- Multiple internal components are damaged
- The blower is old with frequent issues
- Repair time exceeds 2 hours
Snow Joe blowers are budget-friendly tools, often purchased for under $200. With minimal investment, most can be revived, but know when to cut your losses.
Preventive Maintenance Tips
Before Each Use
- Inspect extension cord for damage
- Ensure all screws and fasteners are tight
- Verify safety switches click properly
After Each Use
- Wipe down housing and chute
- Check belt alignment
- Store in a dry place
Seasonal Maintenance
- Test fuse and connections
- Lubricate bearings if needed
- Re-tighten rotational base screw
- Wrap handle with rubber tape if shocks occur
Frequently Asked Questions About Snow Joe Snow Blower Troubleshooting
Why won’t my Snow Joe snow blower start at all?
Start by checking the outlet and circuit breaker, then inspect the extension cord for damage or incorrect gauge. Verify the power cord is fully plugged in and the ground wire is secure. If power reaches the unit, test the 15A fuse in the handle housing and confirm both safety switches click when pressed.
What causes a Snow Joe blower to run but not throw snow?
A misaligned drive belt is the most common cause. Open the drive housing and reposition the belt so it sits flush on the pulley. Also check for stiff bearings or mechanical drag in the impeller shaft that can reduce throwing power.
How do I fix static electricity shocks from my Snow Joe?
Wrap the metal handle with rubber electrical tape, covering all metal contact points. The plastic impeller generates static as it rubs against the housing, and rubber insulation breaks the electrical path to your hands.
Can I bypass the safety switch on my Snow Joe blower?
Never bypass the safety switches. They prevent accidental startup and serious injury. If a switch is stuck or not engaging, clean around it with a dry cloth or compressed air. Test for continuity with a multimeter and replace the switch if faulty.
How long do Snow Joe snow blowers typically last?
With proper maintenance and prompt repairs, Snow Joe blowers can last several seasons. They are budget-friendly tools, so longevity depends heavily on care, storage conditions, and how quickly you address small issues like loose wires or belt misalignment.
Key Takeaways for Snow Joe Snow Blower Troubleshooting
Most Snow Joe snow blower problems stem from simple, fixable issues: a tripped breaker, blown fuse, loose wire, or misaligned belt. By following a logical diagnostic path starting with power, then safety switches, then wiring and mechanics, you can resolve most issues in under an hour. Do not discard a “dead” blower too soon. With a multimeter, a few basic tools, and this guide, you can bring it back to life. Add smart modifications like securing the base and insulating the handle, and you will prevent common frustrations while extending your blower’s life for many winters ahead.



