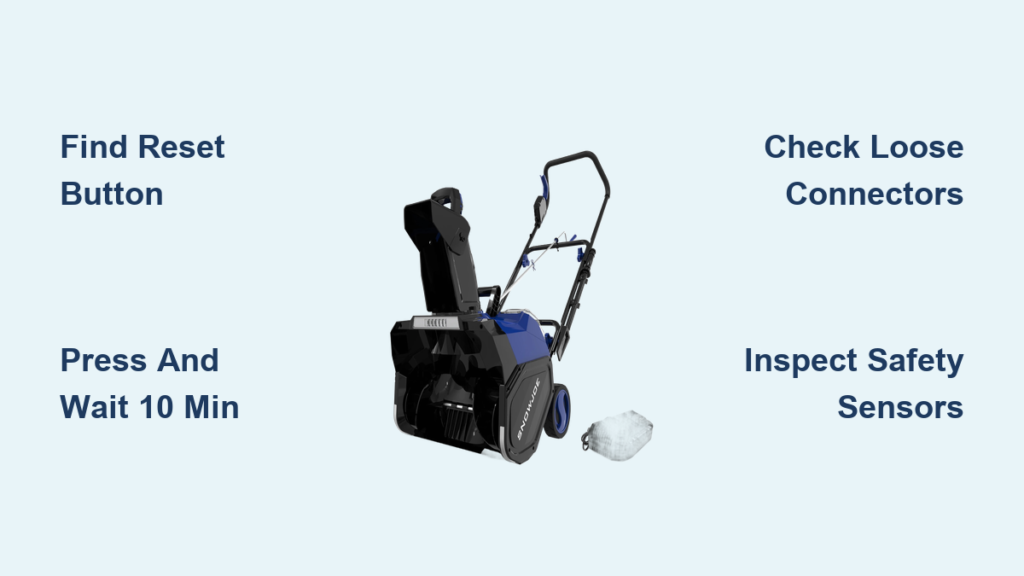
Your Snow Joe snow blower suddenly quits mid-driveway, leaving you staring at a dead machine while snow piles up. This frustrating scenario happens more often than you might think, especially during heavy storms or after storage. The cause is usually a tripped safety mechanism or a loose connection rather than a major breakdown. In this guide, you’ll learn how to reset your Snow Joe snow blower step by step, what to do if the reset doesn’t work, and how to prevent future issues so you’re never stuck in the cold again.
Find the Reset Button on Your Snow Joe Snow Blower

Where the Reset Button Is Located
The reset button is your first stop when troubleshooting a Snow Joe snow blower that has lost power. It works as a built-in circuit breaker, automatically tripping when the motor overheats or experiences electrical strain from snow jams or power surges. You can typically find this small button (often red or black) on the motor housing near the base of the unit, sometimes slightly recessed into the plastic casing.
How to Perform a Snow Joe Snow Blower Reset
Follow these steps to complete a proper reset:
1. Turn off the machine completely.
2. Unplug the unit (corded models) or remove the battery (cordless models).
3. Press the reset button firmly until it clicks into place.
4. Wait 10 minutes before attempting to restart. This cooling period allows internal components to reset fully.
Warning: If the button pops out again immediately after starting, stop pressing it. Repeated tripping signals an underlying issue like a jam, short circuit, or failing component that needs deeper inspection.
Fix Power Problems After Reset
No Power at All? Start Here
When your Snow Joe shows zero signs of life, work through this checklist:
– Test the outlet with another device to confirm power is flowing.
– Inspect the plug and cord for visible damage, kinks, or fraying, especially near bends.
– Check the handle switch with a multimeter. A faulty switch may look fine but fail to complete the circuit.
– Verify safety sensors are engaged: the handle must be fully down, and the chute must be properly aligned.
If everything looks good but power is still absent, you’ll need to inspect the internal components.
Clicking But Won’t Start (Cordless Models)
A clicking or popping noise when you press the start button is a serious red flag. This sound usually means a loose electrical connector near the motor or control board is arcing, creating heat and potentially melting surrounding plastic.
How to Inspect and Fix Internal Connectors
- Remove the side panel using a screwdriver.
- Locate the small electrical connector near the motor.
- Look for these warning signs:
– Burnt insulation
– Melted plastic caps
– Discoloration or charring - If damaged, disconnect the battery and replace the connector.
- If only loose, reseat it firmly and wrap it tightly with electrical tape to prevent future loosening.
After this repair, the unit should start smoothly without hesitation or noise.
Intermittent Power? Try a Full Reboot
For models that cut out randomly during use:
– Unplug the unit or remove the battery for 10 minutes.
– This clears temporary faults in the circuitry.
– Reconnect and test the machine.
If the issue returns, inspect for loose wiring, moisture damage, or overheating components before using the blower again.
Check Safety Sensors and Interlocks

Handle Release Sensor Inspection
Snow Joe blowers have safety interlocks that prevent operation unless the handle is fully engaged. If your machine won’t start:
– Ensure the handle is fully lowered into the operating position.
– Check the sensor mechanism for ice, debris, or misalignment.
– Clean gently and verify the connection is secure.
A dirty or loose sensor can mimic a dead motor, so don’t skip this step.
Chute Position Sensor Test
Some models include a chute sensor that blocks startup if the chute isn’t properly seated:
– Rotate the chute manually to ensure it moves freely.
– Look for ice buildup around the pivot point.
– Confirm the snap locks engage securely.
If the chute is blocked or the sensor is disconnected, the unit may refuse to power on, even with a good battery or working outlet.
Inspect and Secure Electrical Connections
Prevent Loose Wire Failures
Loose connections are a leading cause of failure in Snow Joe blowers. Over time, vibration and temperature changes loosen connectors, creating high resistance and dangerous heat buildup.
Key Areas to Inspect:
- Battery terminal connections
- Motor-to-control board wiring
- Power switch harness
Ensure each plug is fully seated, then reinforce with electrical tape, especially on parts exposed to high vibration.
Protect Against Moisture and Heat Damage
Moisture leads to corrosion, while heat causes melting. Both destroy electrical performance over time.
Prevention Tips:
- Store the unit dry and covered.
- Wipe down the machine after use in wet snow.
- Apply dielectric grease on connectors to repel moisture.
- Look for discolored wires or burnt smells, which are signs of past overheating.
Replace any damaged parts before using the blower again.
Repair Common Mechanical Issues
Secure a Loose Rotating Base
If the base shifts or spins during operation, the locking screw may be missing or too loose:
– Install a snug-fitting screw into the base mounting hole.
– Add a second screw for extra stability if needed.
– Tighten just enough to hold firm. Over-tightening can crack the plastic housing.
Stop Annoying Static Shocks
Many users report mild shocks from the handle due to static buildup from the plastic impeller rubbing the housing. A simple fix is to wrap the metal handle with rubber electrical tape. Rubber insulates better than vinyl and effectively blocks static discharge, improving both comfort and safety.
Maintain the Chute Control System

Keep the Crank Mechanism Clean
The hand-crank chute control is one of Snow Joe’s standout features, offering smooth and precise adjustment. But ice and debris can jam the mechanism over time.
Maintenance Steps:
- Clear snow from the chute after each use.
- Lubricate moving parts with silicone spray (never use oil).
- Check snap locks regularly to ensure they hold position firmly.
A clean, well-lubricated chute ensures accurate snow direction and reduces strain on the motor.
Apply Model-Specific Fixes
iON21SB-PRO Cordless Model Issues
This popular 40V model commonly suffers from clicking but no start. The root cause is typically a loose connector between the battery and motor control board that overheats and melts.
Repair Procedure:
- Remove the side panel.
- Locate the small black connector near the motor.
- Reseat it firmly.
- Wrap with electrical tape.
- Test the unit.
Monitor performance through the season. If it fails again, replace the connector or consult Snow Joe support for further diagnosis.
Corded Models: Power Cord Inspection
Internal wire breaks are common in corded Snow Joe blowers, especially if the cord is frequently bent or run over.
Test for Continuity:
- Use a multimeter to check each wire inside the cord.
- Wiggle the cord while testing to catch intermittent breaks.
If you find a break, replace the entire cord or splice in a new section with proper insulation.
Follow a Preventative Maintenance Schedule
Pre-Season Checklist
Before winter arrives, spend 15 minutes on this quick checkup:
– Press the reset button to test function.
– Inspect all electrical connections.
– Test the switch and safety sensors.
– Clean and lubricate the chute.
– Check for frayed wires or damaged plugs.
This small investment of time prevents breakdowns when you need the machine most.
Best Practices During Use
- Avoid overloading the intake by clearing heavy snow in multiple passes.
- Stop immediately if the motor strains or jams.
- Let the unit cool after 15 to 20 minutes of continuous use.
- Listen for unusual sounds like clicking, grinding, or popping.
Early detection prevents costly repairs down the road.
Post-Season Storage Tips
After winter ends:
– Clean the housing and chute thoroughly.
– Dry completely to prevent rust and mold.
– Store in a dry garage or shed.
– Remove the battery (cordless models) and store at 50% charge.
– Coil the cord loosely. Never kink it.
Proper storage doubles the lifespan of your blower.
Know When to Repair vs. Replace
Motor Failure: Repair or Buy New?
If the motor is dead and all else checks out, weigh your options:
– Replacement motors cost $80 to $150.
– Labor and tools add time and complexity.
– A new Snow Joe model typically costs $200 to $300.
For older units, replacement is often more cost-effective than repair.
When to Call a Professional
Consider professional service if:
– The control board is damaged.
– You see visible charring or melted circuitry.
– You feel uncomfortable working with electrical components.
Most fixes, like switch replacement or connector repair, are straightforward DIY jobs requiring only basic tools.
Follow Essential Safety Rules
Electrical Safety
- Always unplug or remove the battery before inspection.
- Never operate with a damaged cord or exposed wires.
- Use only UL-rated extension cords for corded models.
- Never bypass safety sensors, even temporarily.
Operational Safety
- Keep hands and feet away from the auger and impeller.
- Clear the area of rocks, sticks, and debris before starting.
- Wear gloves and eye protection.
- Never point the chute at people, vehicles, or windows.
Access Support and Replacement Parts
Contact Snow Joe Support
If troubleshooting fails, visit the Snow Joe website for manuals and videos, call customer service for model-specific help, and check your warranty status. Some repairs may be covered at no cost.
Buy Genuine Replacement Parts
Purchase from the Snow Joe official store, authorized dealers, or verified Amazon sellers. Common replacement parts include:
– Handle switches
– Power cords
– Connectors
– Motor assemblies
Avoid cheap aftermarket parts that often fail quickly and can void your warranty.
Frequently Asked Questions About Snow Joe Snow Blower Resets
Where Is the Reset Button on a Snow Joe Snow Blower?
The reset button is typically located on the motor housing near the base of the unit. It is a small button, often red or black, that may be slightly recessed into the plastic casing. It functions as a circuit breaker that trips when the motor overheats or experiences electrical strain.
How Long Should You Wait After Pressing the Reset Button?
Wait approximately 10 minutes after pressing the reset button before attempting to restart the machine. This allows internal components to cool down and the circuitry to reset fully. Restarting too soon can cause the button to trip again immediately.
Why Does My Cordless Snow Joe Click But Not Start?
A clicking or popping noise without motor engagement usually indicates a loose or damaged electrical connector near the motor or control board. The connection arcs, overheats, and may melt surrounding plastic. Inspect internal connectors for burn marks, reseat them firmly, and wrap with electrical tape to fix the issue.
Can I Bypass the Safety Sensors on My Snow Joe?
No. Bypassing safety sensors is dangerous and not recommended. It risks fire, electrical shock, or serious injury. Safety interlocks exist to protect you, and disabling them may also void your warranty. Always address the root cause of sensor issues instead.
How Often Should I Perform Maintenance on My Snow Joe?
Perform a basic pre-season checkup once per year, inspect connections before and after storage, and address any unusual sounds or behaviors immediately during use. Regular maintenance every few uses during winter helps catch small issues before they become major problems.
When Should I Replace My Snow Joe Instead of Repairing It?
Consider replacement when motor failure occurs, repair costs approach the price of a new unit, or the machine is more than a few years old with multiple issues. If you see visible charring on the control board or the motor is completely dead, a new purchase may be more cost-effective than repair.
Key Takeaways for Resetting Your Snow Joe Snow Blower
Knowing how to reset your Snow Joe snow blower starts with locating the reset button on the motor housing and allowing a 10-minute cooling period after pressing it. If the reset doesn’t solve the problem, the most common culprit is a loose internal connector, especially in cordless models like the iON21SB-PRO. Inspect connections for burn damage, reseat them firmly, and reinforce with electrical tape.
For lasting reliability, commit to a simple maintenance routine: check connections before each season, keep the unit dry, and store it properly during off-months. These small habits prevent the majority of breakdowns and keep your blower ready when the next storm hits.
Your next step: Locate your reset button now, before the next snowfall. Test that it clicks properly so you know exactly where to find it when you need a quick reset in the cold.