
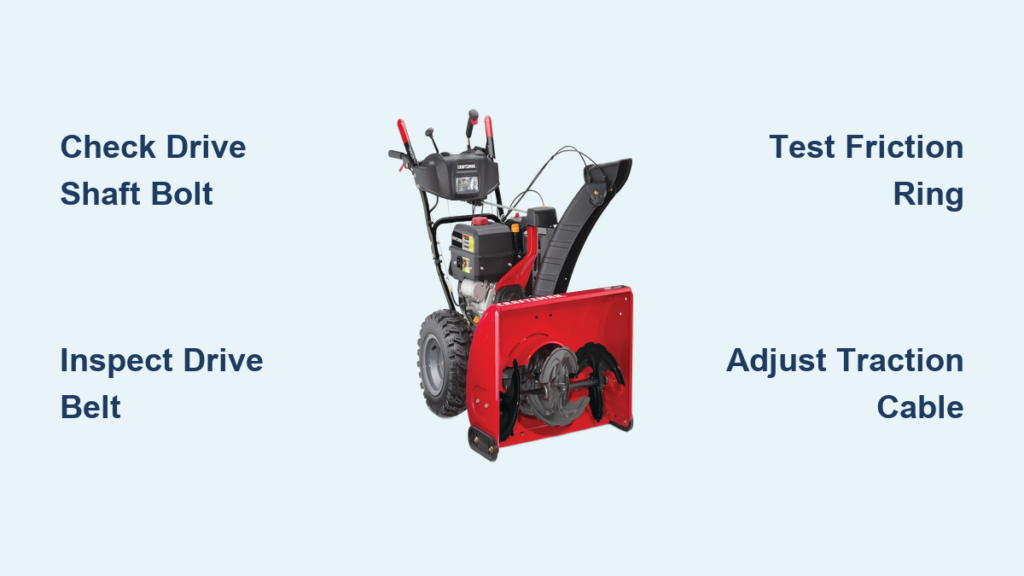
You pull the starter cord, the engine roars to life, and you grip the handle to clear your driveway. Then you realize the wheels are not turning. The engine runs perfectly, but your snow blower refuses to drive itself. Now you are pushing a 200-pound machine through heavy snow, and frustration sets in fast.
If your snow blower self propelled not working, you are far from alone. This ranks among the most common snowblower complaints homeowners face each winter. The good news? The cause is usually simple and inexpensive to fix. In many cases, a missing drive shaft bolt is the entire problem, costing under $3 and taking about 15 minutes to repair.
This guide covers every common cause, from broken bolts and worn belts to misadjusted cables and failed friction rings. You will learn how to diagnose the exact problem and get your machine moving again before the next storm hits.
Check the Drive Shaft Bolt First

Why a Missing Bolt Stops All Movement
The most common reason a self-propelled snowblower stops driving is a missing or broken bolt that connects the drive sprocket to the drive shaft. When this small fastener fails, the sprocket spins freely on the shaft without transferring any power to the wheels.
Look under your machine. You may spot the 1/4-inch bolt sitting on the garage floor where it fell. On Craftsman and Murray-built models, the original part is often a shear pin designed to break under extreme stress. In practice, these pins fail from vibration and weak thread engagement, not from overload.
Upgrade to a Grade 8 Bolt for a Permanent Fix
Replace the factory bolt with a 1/4-inch diameter, 2-inch-long Grade 8 bolt, which you can identify by the six notches stamped on the head. Pair it with a nylon lock nut to prevent loosening from engine vibration.
This upgrade works so well because:
– Grade 8 steel handles high torque without snapping
– The 2-inch length ensures the nut seats fully
– A nylon lock nut resists backing out
– Total cost stays under $3
On one machine, this simple swap lasted over 5 years with no issues. With proper installation, it can last 15 to 20 years or longer.
Add a Tack Weld for Extra Security
If bolt failure keeps recurring, add one or two small tack welds between the sprocket and shaft. This locks everything in place even if the bolt loosens over time. To remove the weld later, use an angle grinder with a cutting disc for clean cuts that protect the shaft.
Inspect the Drive Belt for Wear
How Belt Problems Disable the Drive
Many snowblowers rely on a drive belt to transfer engine power to the wheels. The belt connects to a drive disc, and when you engage the drive lever, tension increases and the belt begins to spin the friction ring.
Watch for these warning signs:
– Squealing noises when you pull the drive lever
– Wheels that turn slowly or not at all
– Visible cracks, fraying, or stretching on the belt
Replace Damaged Belts the Right Way
Before inspecting the belt, disconnect the spark plug to prevent accidental starts. Remove the belly pan and examine the belt closely.
If the belt shows wear:
– Swap it for an OEM or manufacturer-recommended replacement
– Verify proper routing around all pulleys
– Check that tension is correct
– Confirm alignment with adjacent components
A fresh belt restores full drive power and reduces strain on other drivetrain parts.
Test the Friction Ring for Wear
A Worn Ring Means Loss of Traction
The friction ring (also called a friction wheel) presses against the drive disc to turn the wheels. After years of use, especially on icy or hard-packed surfaces, the rubber surface wears down and loses grip.
Common symptoms include:
– Wheels spin freely but the machine does not move
– Slow or inconsistent forward motion
– Visible flat spots, glazing, or cracks on the ring
Replace the Ring in Minutes
Remove the retaining clip or housing (the process varies by model) and slide off the worn ring. Install the new one, making sure it seats fully and aligns with the drive disc.
Some models allow ring replacement without full disassembly. Always check your owner’s manual for the exact procedure.
Adjust the Traction Control Cable
Loose or Stretched Cables Prevent Engagement
The traction control cable links your drive lever to the drive plate. Pulling the handle sends tension through the cable, lifting the plate to engage the belt or disc.
Typical cable issues include:
– Stretching over time from repeated use
– Fraying or kinking
– Corrosion or internal binding
– Misadjustment after maintenance
Fine-Tune the Cable Tension
Locate the adjustment nut near the handle or drive housing. Loosen the lock nut, then turn the adjuster until the system works properly.
A correctly adjusted cable will:
– Fully engage the drive plate when you pull the lever
– Disengage completely when you release the lever
– Allow wheels to roll freely when the drive is off
After adjusting, push the machine manually. The wheels should spin without resistance.
Examine the Drive Disc for Oil or Damage
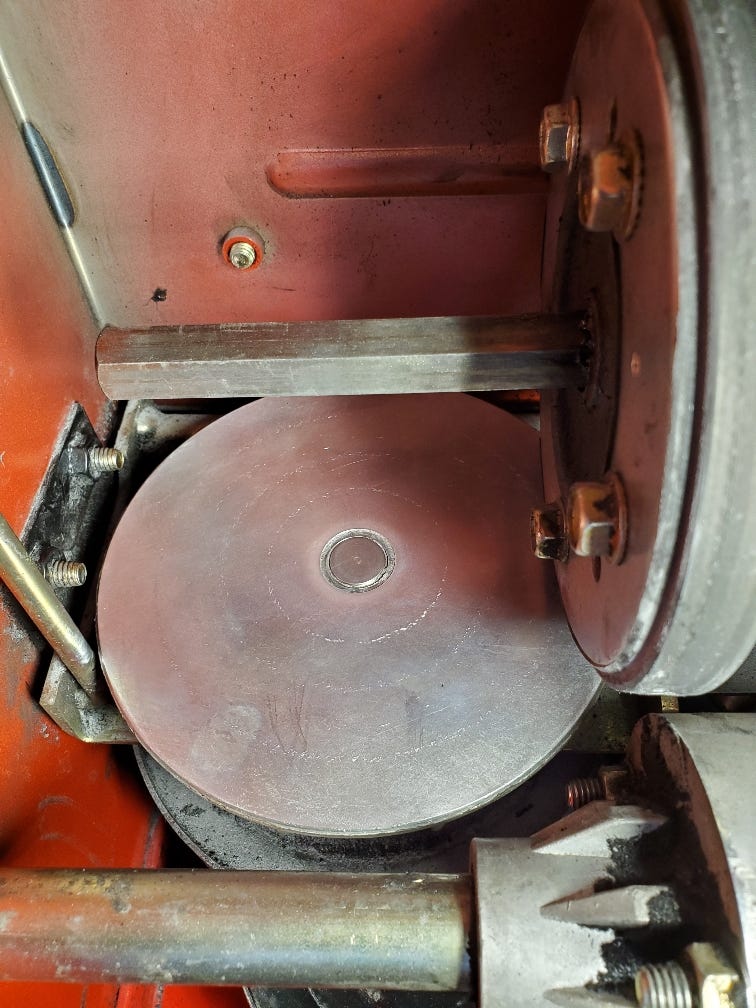
Oil Contamination Kills Grip
Check both the metal drive disc and the rubber friction disc. Oil contamination from engine or gearbox leaks can coat these surfaces and eliminate friction.
Warning signs include:
– Visible oil on either disc
– Glazed or shiny rubber surfaces
– Uneven wear patterns
– Slipping during engagement
Clean or Replace Contaminated Parts
Wipe oily surfaces with a quality degreaser and a clean cloth. If the rubber disc shows cracks, hardening, or heavy wear, replace it entirely.
Make sure the drive disc spins freely and aligns properly with the friction ring. Oil drastically reduces grip, so do not skip this step.
Diagnose the Problem Step by Step
Remove the Belly Pan Safely
Accessing the drive system requires removing the belly pan, the metal or plastic shield under the snowblower.
Tools you will need:
– Ratcheting wrench
– 3/8-inch socket set
Follow these steps:
1. Disconnect the spark plug wire
2. Tilt the snowblower forward with the fuel tank facing up
3. Cover the gas cap with a sandwich bag to prevent leaks
4. Remove the two top and two bottom 3/8-inch bolts
5. Lower the pan carefully and watch for grease buildup
Inspect the Drive Components
With the pan off, you can see the full drive system.
Check these key areas:
– Spin the wheels by hand and watch the drive sprocket
– If the sprocket spins alone without the shaft, the bolt is missing
– Examine the belt for cracks or stretching
– Look at the friction ring for wear
– Test the cable for smooth movement
– Inspect discs for oil contamination
Reassemble and Confirm the Repair
After completing the fix, reinstall the belly pan with its edges outside the frame and tighten all bolts securely. Reconnect the spark plug.
Run this final test:
1. Start the engine
2. Engage the drive lever
3. Listen for a clear chain or sprocket engagement sound
4. Confirm the wheels turn smoothly
If the machine moves forward, the repair worked.
Prevent Future Drive System Failures
Grease All Pivot Points During Maintenance
While the belly pan is off, take time to grease every moving part:
– Drive shaft
– Wheel axles
– Pivot brackets
– Cable linkages
Use a high-quality, damp grease and work it in by spinning the wheels and components. Clean away old grime first so the fresh grease bonds properly and protects against rust.
Perform Seasonal Inspections Each Fall
Before the first snow of the year, run through this quick checklist:
– Confirm the drive shaft bolt is tight
– Check belt tension and inspect for wear
– Test the traction cable for smooth operation
– Look underneath for oil leaks
– Verify all fasteners are secure
Catching small issues early prevents frustrating breakdowns during heavy storms.
Quick Troubleshooting Checklist
| Symptom | Likely Cause | Fix |
|---|---|---|
| No movement when lever is pulled | Missing drive shaft bolt | Install Grade 8 bolt with lock nut |
| Wheels slip or squeal during use | Worn or stretched belt | Replace drive belt |
| Machine moves sluggishly | Worn friction ring | Replace friction ring |
| Lever feels loose or unresponsive | Stretched or misadjusted cable | Adjust the cable tension nut |
| Oil visible on drive components | Oil leak contaminating discs | Clean or replace affected parts |
| Sprocket spins while shaft stays still | Broken shear pin or bolt | Upgrade to Grade 8 bolt |
Frequently Asked Questions About Snow Blower Self Propelled Not Working
Why does my snowblower engine run but the wheels will not turn?
The most common cause is a missing or broken drive shaft bolt connecting the sprocket to the shaft. The engine runs fine, but without that bolt, power never reaches the wheels. Other possible causes include a broken drive belt, worn friction ring, or misadjusted traction cable.
How much does it cost to fix a snowblower self-propel system?
A DIY fix using a Grade 8 bolt and nylon lock nut costs under $3 and takes about 10 to 15 minutes. Replacing a drive belt or friction ring costs more depending on your model, but most repairs stay under $30 when done at home.
Can I use a regular bolt instead of a shear pin?
Yes. Upgrading from the factory shear pin to a 1/4-inch Grade 8 bolt with a nylon lock nut is actually recommended by many experienced owners. Grade 8 steel resists vibration far better than a standard shear pin, and the nylon lock nut prevents loosening over time.
Why does my snowblower move slowly even with a new belt?
Slow movement after a belt replacement usually points to a worn friction ring or oil-contaminated drive disc. Check both components and clean or replace them as needed. A misadjusted traction cable can also cause sluggish performance.
How do I know if my friction ring is worn out?
Look for visible flat spots, cracks, or glazing on the rubber surface. Another sign is wheels that spin freely without moving the machine forward, especially on flat pavement. Replace the ring if you see any of these symptoms.
Is it safe to tack weld the sprocket to the drive shaft?
Yes, adding one or two small tack welds is a common long-term fix. It locks the sprocket in place even if the bolt loosens. To remove the weld later, use an angle grinder with a cutting disc, which cuts cleanly without damaging the shaft underneath.
Final Tips for Restoring Your Snow Blower’s Self-Propel System
Start by checking under the machine for a fallen bolt. Many owners find the missing fastener right where it dropped, which makes the fix almost instant. If the bolt failed once, it will fail again. Upgrade to a Grade 8 bolt with a nylon lock nut for permanent reliability, and consider a tack weld if you want extra peace of mind.
Spend a few minutes greasing all pivot points while the belly pan is off. This small step dramatically extends the life of your drive system. Finally, always disconnect the spark plug before working under the machine. Safety should come first, especially when working around a fuel tank.
This entire repair costs less than a fast-food meal and takes under 15 minutes. That small investment can save hundreds in repair bills and keep your snowblower running reliably for the next 15 winters or more.



