
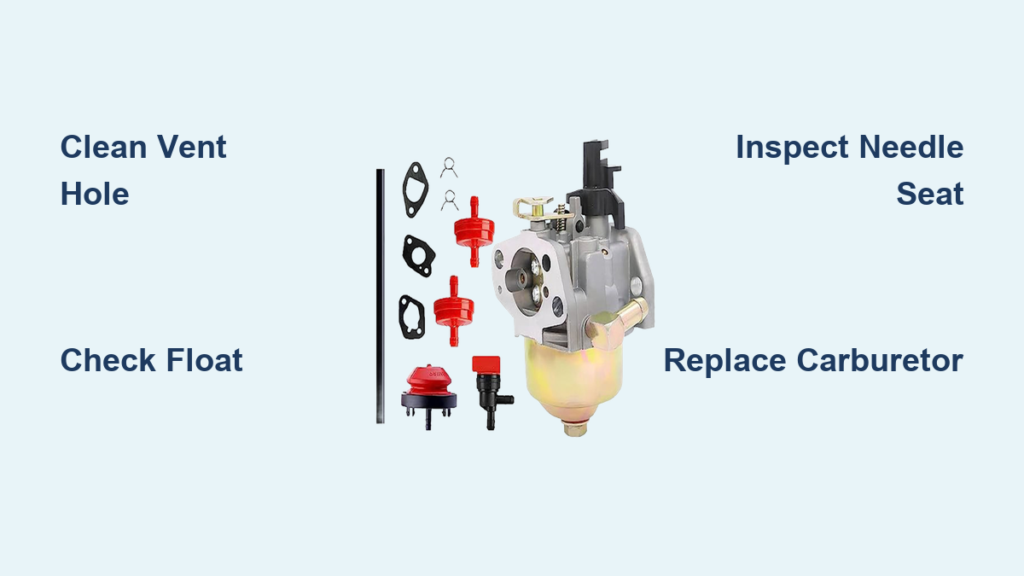
If your snow blower carburetor is leaking gas, you’re not alone. This is one of the most common small engine issues, especially after seasonal storage. Fuel dripping from the carburetor can lead to messy puddles, poor starting, or even fuel contamination in the engine oil. The good news is that most leaks stem from a few predictable causes and can be fixed without replacing the entire carburetor.
The primary culprits include a clogged vent hole, faulty float, sticking fuel inlet needle, or cracked carburetor body. Many users waste time and money replacing parts only to find the real issue was a tiny, overlooked vent hole. This guide walks you through proven diagnostic steps and repairs so you can get your snow blower running safely and reliably before the next storm hits.
Check the Hidden Vent Hole
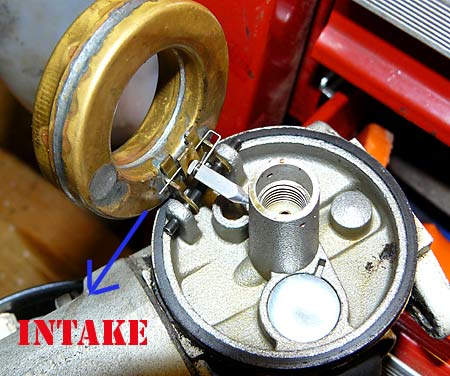
On many older Tecumseh engines (8 HP and up), a small vent hole near the top of the carburetor regulates internal pressure. When clogged, it prevents the float from closing the fuel valve, causing constant flooding and gas leaks, often from the back of the carburetor.
Locate the Vent Hole
Use a flashlight to find the tiny opening near the carburetor’s upper housing. It is easy to miss and often hidden under grime. On some models, it appears as a pin-sized hole in the casting.
Clear With Precision Tools
Use one of these tools to gently unclog the hole:
– A micro drill bit (ideal for precision)
– The inner wire from a twist tie (flexible and safe)
– A single strand from a wire brush, straightened with pliers
Insert slowly and do not force it. Push out debris without enlarging or damaging the hole.
Prevent Future Clogs
Inspect the vent hole annually before winter. Dirt, old fuel varnish, and condensation can re-clog it quickly. A quick blow with compressed air helps keep it clear.
Inspect the Carburetor Float
A damaged or fuel-filled float is a leading cause of carburetor flooding. If the float cannot rise properly, the fuel inlet stays open, overflowing gas into the engine.
Test for Internal Fuel
Remove the float and shake it gently near your ear. If you hear sloshing, the float has a pinhole and is saturated with gas. Replace it immediately.
Look for Warping or Damage
Even without fuel inside, a warped float may not seal the needle valve. Check that it lies flat and moves freely on its hinge. Compare it to a new one if unsure.
Confirm Proper Movement
After reassembly, ensure the float pivots smoothly. Any binding prevents the needle from seating, leading to leaks.
Fix Sticking Inlet Needle and Seat

The inlet needle and seat control fuel flow into the carburetor bowl. If either is stuck, worn, or dirty, gas will leak continuously.
Remove and Inspect Components
- Take off the carburetor bowl
- Remove the float and inlet needle
- Pull out the needle seat if removable
Check for:
– Corrosion on the needle tip
– Pitting or debris in the seat
– Misalignment of the needle clip
Polish the Needle Cavity
Clean buildup from the cavity where the needle seats:
– Wrap cotton around a wooden meat skewer
– Dip in metal polish
– Twist gently inside the cavity to smooth imperfections
This restores a tight seal and prevents leaks.
Replace Worn Parts
Install a new inlet needle and seat if polishing does not help. These are inexpensive and widely available for Tecumseh and similar engines.
Diagnose a Cracked Carburetor Body
Hairline cracks, especially near the float bowl, can leak fuel under pressure. These may be invisible when dry.
Perform a Visual Inspection
With the carburetor removed:
– Shine a bright light around the bowl mounting area
– Look for fine lines or discoloration
– Wipe the surface clean and recheck
Test Under Pressure
If no crack is visible, fill the bowl with fuel or solvent and watch for seepage. A crack will often only appear when wet.
Replace if Cracked
There is no reliable repair for a cracked carburetor body. Replace the entire unit to stop the leak permanently.
Decode Common Leak Symptoms

Each type of fuel leak points to a specific cause. Use this guide to narrow down the problem fast.
Gas Dripping from a Pinhole
This small hole is likely a vent or drain. Leaking here usually means:
– Plugged vent hole
– Stuck or warped float
– Debris blocking the needle valve
Clean the vent and inspect the float first.
Overflow from Top of Carburetor
Fuel spilling over the top signals carburetor flooding. Causes include:
– Leaking float
– Failed needle and seat
– Clogged vent hole
Start with the vent hole, as it is the most overlooked fix.
Fuel Squirting from Primer Bulb
This is a sign of severe flooding. Gas is backing up through the intake.
Immediate actions:
– Shut off fuel supply
– Remove and clean carburetor
– Replace float and needle/seat if needed
Note: Some engines (like certain Craftsman models) vent excess fuel through the primer instead of the crankcase.
Leak from Back of Carburetor
This almost always points to a clogged vent hole. Pressure imbalance forces fuel out the rear. Clear the vent before replacing any parts.
Follow a Smart Repair Sequence
Avoid wasting time and money. Use this step-by-step order to diagnose and fix leaks efficiently.
1. Shut Off Fuel and Drain Bowl
Turn off the fuel valve and remove the carburetor bowl. This stops fuel flow and gives access to internal parts.
2. Clean the Vent Hole First
Before touching any other component, check and clean the vent hole. It is the most common missed cause.
3. Shake and Inspect the Float
Listen for sloshing. Replace if damaged or fuel-filled.
4. Check Needle and Seat Operation
Ensure the needle moves freely and seals tightly. Polish or replace as needed.
5. Reassemble and Test
Reinstall parts in order:
– Seat (if removed)
– Inlet needle
– Needle clip (in original position)
– Float
Add a few drops of fuel to lubricate the needle before testing.
Prevent Leaks With Seasonal Care
Stop future leaks before they start with simple maintenance.
Before Winter Storage
- Drain the fuel tank or use a stabilizer
- Run the engine until the carburetor is dry
- Inspect and clean the vent hole
- Close the fuel shut-off valve
At Season Start
- Check fuel lines for cracks
- Replace old fuel filters
- Look for leaks before starting
- Verify oil is not contaminated with gas
Long-Term Tips
- Replace floats and needle/seat every 3 to 5 years on older carburetors
- Keep the fuel system clean with fresh gas
- Store the snow blower with the fuel off and bowl empty
Avoid Common Repair Mistakes
Even experienced users make these errors, so do not let them cost you time or money.
Replacing the Carburetor Too Soon
Many replace the entire carburetor without checking the vent hole. Clean it first. It could save you $50 and a trip to the parts store.
Using the Wrong Cleaning Tool
Avoid thick wires or drill bits that can enlarge or damage the vent hole. Stick to thin, flexible tools like twist tie wire.
Forgetting the Needle Clip Position
The inlet needle clip affects float height. Mark or remember its position before removal.
Ignoring Oil Contamination
If fuel leaked while running, check the engine oil. Gas in oil reduces lubrication and can damage the engine. Change the oil after fixing the carburetor.
Leaving Fuel On
Always turn off the fuel valve when the snow blower is not in use. Leaving it on invites leaks and flooding.
Tools and Parts You Will Need
Cleaning Tools
- Flashlight
- Micro drill bit or twist tie wire
- Wooden meat skewer and cotton
- Metal polish
Replacement Parts (Common)
- Float
- Inlet needle
- Needle seat
- Bowl gasket
All are low-cost and available at small engine shops or online.
When to Seek Professional Help
If you are uncomfortable disassembling the carburetor or cannot find the leak, take it to a small engine repair shop. A pro can pressure-test the carburetor and spot hidden cracks.
Also consider professional help if:
– You have tried all fixes and the leak persists
– The engine model is rare or outdated
– You lack tools for precision cleaning
Frequently Asked Questions About Snow Blower Carburetor Leaking Gas
Why is my snow blower leaking gas from the carburetor?
The most common causes are a clogged vent hole, a fuel-filled or warped float, a sticking inlet needle, or a cracked carburetor body. These issues prevent the carburetor from regulating fuel flow properly, resulting in leaks.
How do I unclog the vent hole on my Tecumseh carburetor?
Locate the tiny hole near the top of the carburetor using a flashlight. Insert a micro drill bit, twist tie wire, or a single strand from a wire brush to gently remove debris. Do not force the tool or use thick items that could damage the hole.
How do I know if my carburetor float is bad?
Remove the float and shake it near your ear. If you hear sloshing, the float has a pinhole and is filled with gas. A warped float that does not sit flat or move freely on its hinge is also compromised and should be replaced.
Can I still use my snow blower if the carburetor is leaking gas?
No. Operating a snow blower with a carburetor fuel leak is dangerous. Gas can contaminate the engine oil, create a fire hazard, and cause the engine to flood. Shut off the fuel valve and repair the leak before further use.
Do I need to change the oil if my carburetor was leaking gas?
Yes. If fuel entered the crankcase during the leak, it will dilute the oil and reduce lubrication. Always check the oil after a carburetor leak and change it if you notice a gas smell or the oil level is unusually high.
When should I replace the whole carburetor instead of repairing it?
Replace the entire carburetor if you find a cracked or damaged body that cannot be reliably repaired. Cracks near the float bowl are the most common reason a full replacement becomes necessary.
Key Takeaways for Fixing Your Snow Blower Carburetor
A snow blower carburetor leaking gas is usually fixable in under an hour with no special skills. Start with the vent hole, then check the float and needle. Most leaks come from one of these three issues. By following this guide, you will avoid unnecessary part replacements and get your machine ready for snow fast.
Regular maintenance keeps your snow blower running clean season after season. Before your next snowfall, take 10 minutes to inspect the vent hole, drain old fuel, and confirm the shut-off valve works properly. These simple habits prevent most carburetor leaks before they start.



