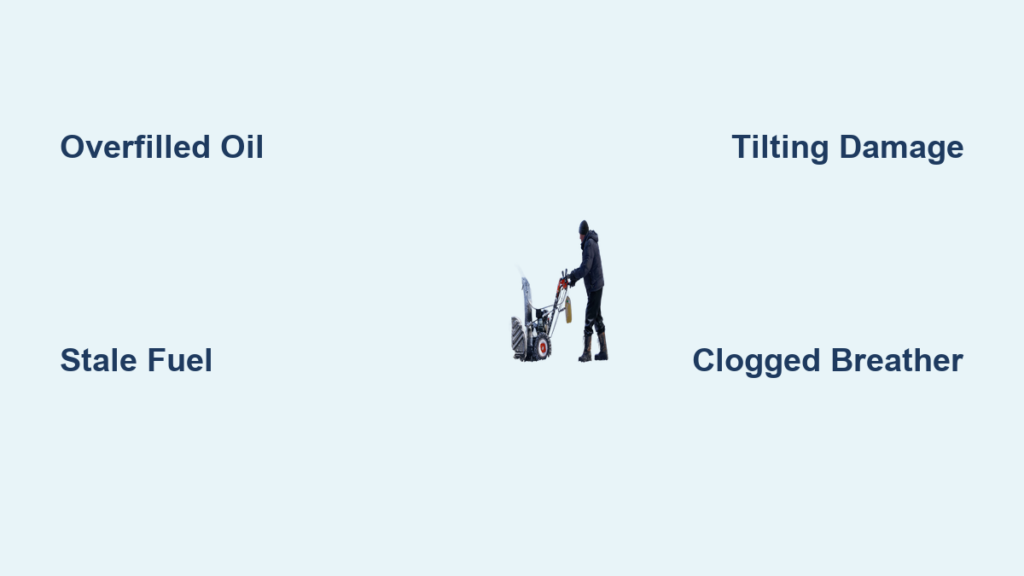
You start your snow blower on a freezing morning, expecting it to roar to life, but instead thick white smoke pours from the engine. A snow blower blowing white smoke is a common winter headache, and it almost always points to oil leaking into the combustion chamber, degraded fuel, or improper machine positioning. The good news is that most causes are simple to fix at home with basic tools and a little patience.
White smoke typically means burning oil or unburned fuel inside the engine, especially during cold starts, after long storage, or following a recent tilt. This guide walks you through every common cause, exact diagnostic steps, and proven fixes to clear the smoke for good. You will also learn how to prevent the issue from returning next season.
By the end, you will know how to identify the root cause, fix it in under an hour, and keep your machine running cleanly all winter long.
Check for Overfilled Engine Oil

The number one reason a snow blower blows white smoke is too much oil in the crankcase. When oil exceeds the recommended level, the excess gets forced past seals and into the combustion chamber, where it burns and produces thick white or bluish-white smoke with a distinct burning oil smell.
Why Overfilling Happens
• Oil was added without first checking the dipstick
• Owner assumed the level was low after months of summer storage
• Capacity was misjudged during a recent oil change
Even a small overfill can trigger smoking, especially at startup. Crankcase pressure pushes extra oil through the breather system or past worn seals directly into the cylinder.
How to Confirm the Problem
- Turn off the engine and allow it to cool completely.
- Move the snow blower to a flat, level surface.
- Pull out the oil dipstick and wipe it clean.
- Reinsert the dipstick fully, then remove it again to read the level.
- If oil sits above the “Full” mark, overfilling is almost certainly your culprit.
⚠️ Warning: Running an overfilled engine at full throttle can worsen the leak and risk hydrolock, which can bend connecting rods or cause catastrophic engine damage.
Drain Excess Oil the Right Way
If the oil level is above “Full,” draining the excess is the fastest and most effective fix. The whole process takes about 15 minutes.
Tools You Will Need
• 10mm socket wrench
• Oil drain pan
• Clean rags
• Safety gloves
• Small container for the drain plug
Step-by-Step Drain Procedure
- Tilt the snow blower slightly backward (only if safe and stable) to expose the oil drain plug on the side of the engine.
- Position the drain pan directly beneath the plug.
- Use the 10mm socket wrench to loosen and remove the plug.
- Allow all excess oil to flow out completely.
-
Watch the oil as it drains:
• Clear amber oil = simple overfill, no further action needed
• Milky or foamy oil = fuel or water contamination, requiring a full oil change -
Reinstall the drain plug and tighten it securely.
- Refill with fresh oil to exactly the “Full” mark. Do not top off.
✅ Pro Tip: After refilling, start the engine and let it idle for 2–3 minutes, then recheck the oil. Circulation gives you a far more accurate reading than checking cold.
Use the Correct Oil Type and Viscosity
Even with the right oil level, using the wrong grade can cause smoking. Thin or low-quality oil leaks past seals and burns inside the cylinder, producing white smoke even when the dipstick reads correctly.
Recommended Oil Grades
• SAE 5W-30 — Best choice for most cold-weather snow blowers, including models like the Craftsman SB410
• SAE 10W-30 — Acceptable for milder winter climates
• Always defer to your owner’s manual for model-specific recommendations
Avoid automotive multi-grade oils that are not rated for small engines. Their additive packages can damage seals and accelerate wear in snow blower engines.
Oil Change Best Practices
• Use only fresh, high-quality oil designed for small engines
• Never mix different oil brands or grades
• Follow the exact capacity listed for your engine model, since capacity varies widely
🔧 Expert Note: Some manufacturers, including Cub Cadet, recommend approved oils to preserve warranty coverage and engine performance.
Fix Smoke Caused by Tilting the Machine

Did you recently tip your snow blower onto its side to change a shear pin, clear the auger, or store it? That tilt could be the entire problem.
How Tilting Triggers White Smoke
When a snow blower is tilted more than 15 degrees, especially with the spark plug facing downward, oil seeps from the crankcase into the cylinder. The next time the engine starts, that trapped oil burns off and creates a brief cloud of white smoke.
How to Prevent Tilting Problems
• Always store and service the machine upright on a level surface
• If tilting is unavoidable, keep the spark plug pointing straight up
• Never exceed a 15-degree tilt angle
• Return the machine to level before starting the engine
Quick Fix for Recent Tilting
- Place the snow blower back on a level, upright surface.
- Wait 5–10 minutes for oil to drain back into the crankcase.
- Start the engine and let it idle for 5–10 minutes.
- Avoid high throttle until the smoke disappears completely.
In most cases, this simple procedure clears the smoke within minutes as the residual oil burns away.
Diagnose Smoke After Long Storage
White smoke on the first start of the season is one of the most common complaints. The two leading causes are old fuel and oil migration during months of inactivity.
Why Old Fuel Causes Problems
Gasoline begins to degrade in as little as 30 days, especially when it contains ethanol. Over time, stale fuel:
• Loses the volatility needed for clean combustion
• Forms varnish and gum deposits in the carburetor
• Absorbs moisture from the air, leading to water contamination
These issues cause sputtering, hard starting, stalling, and yes, white smoke.
Warning Signs of Bad Fuel
• Engine cranks but will not start, or starts and dies
• White or gray smoke with no burning oil smell
• Fuel smells sour, stale, or like old paint
Drain and Replace Old Fuel
Stale fuel must be physically removed to restore proper combustion. A simple top-off will not fix the problem.
Tools You Will Need
• Needle-nose pliers
• Small drain pan or fuel-safe container
• Clean rags
• Small funnel
Step-by-Step Fuel Flush
- Remove the front shroud to access the carburetor area.
- Use needle-nose pliers to disconnect the fuel line at the carburetor.
- Drain the old fuel into a safe container.
- Locate the carburetor bowl drain bolt on the bottom of the carburetor.
- Remove the bolt and allow remaining fuel and debris to drain out.
- Reconnect the fuel line and reinstall the shroud.
✅ Pro Tip: Hold a small funnel under the carburetor when removing the drain bolt to catch any small gaskets or washers that may fall out.
Add Fresh Fuel with Stabilizer
After draining old gas, refill with fresh, treated fuel to keep the system clean and protected.
Recommended Fuel Mix
• Fresh gasoline, ethanol-free if available
• Fuel stabilizer such as STA-BIL, mixed at 1 ounce per 2.5 gallons
Why Stabilizer Matters
• Prevents fuel breakdown during summer storage
• Cleans deposits from carburetors and fuel lines
• Extends fuel shelf life up to 12 months
Final Step After Refilling
Start the engine and let it run for 5–10 minutes to circulate the treated fuel through the carburetor, lines, and tank.
Inspect the Breather Tube for Clogs
A clogged breather tube is an easy-to-miss cause of white smoke. When the tube is blocked, pressure builds inside the crankcase and forces oil past seals into the combustion chamber.
Where to Find the Breather Tube
• Located behind the air filter housing
• A small rubber or plastic hose connecting the engine block to the intake side
How to Check and Clean
- Remove the air filter cover and filter.
- Locate the breather tube and disconnect it.
- Inspect for sludge, moisture, or visible blockages.
- Blow compressed air through the tube or spray it with carburetor cleaner.
- Reinstall the tube and air filter securely.
✅ Quick Test: If a clog was present, clearing it often stops the smoking almost immediately after the next startup.
Identify Internal Engine Damage
If white smoke continues after correcting oil levels, fuel, tilt, and breather tube issues, the problem likely lies inside the engine. These conditions require professional service.
Common Internal Failures
• Worn piston rings allow oil to seep into the combustion chamber continuously
• Damaged valve seals let oil leak past the valves into the cylinder
• Cracked cylinder or head allows coolant or oil to mix (rare but serious)
Red Flag Symptoms
• White smoke continues after 15+ minutes of running
• Oil appears milky or foamy on the dipstick
• Noticeable loss of power or compression
• Engine consumes oil between uses without visible leaks
⚠️ Do not ignore persistent smoke. Continuing to run the engine can lead to a seized motor or expensive repairs.
When to Call a Professional
Some problems go beyond the scope of DIY repair. Knowing when to stop saves you time, money, and further engine damage.
Seek Service If
• Smoke does not clear after correcting oil and fuel
• Oil is milky, foamy, or smells like gasoline
• Engine runs rough, loses power, or stalls repeatedly
• You suspect worn rings, valve seals, or cylinder damage
Recommended Next Steps
• Contact an authorized service center for your brand (Cub Cadet, Briggs & Stratton, Craftsman, etc.)
• Request a compression test to check for internal wear
• Order a model-specific repair manual from the manufacturer for advanced diagnostics
🔧 DIY Resource Tip: Briggs & Stratton sells model-specific repair manuals online that include detailed troubleshooting for small engines.
Prevent White Smoke Next Season
The best repair is the one you never have to make. A few minutes of pre-season and post-season maintenance prevents almost every white smoke scenario.
Pre-Storage Checklist
- Add fuel stabilizer to the gas tank
- Run the engine for 5–10 minutes to circulate stabilized fuel
- Turn off the fuel valve (if equipped) and let the engine run dry
- Check the oil level and top off only to the “Full” mark
- Store the machine upright on a level surface
In-Season Maintenance Tips
• Check oil level monthly
• Clean the air filter every few uses
• Inspect belts, shear pins, and auger for wear
• Never exceed the oil capacity
✅ Pro Tip: Write the purchase date on your fuel can with a marker. Anything older than 30 days without stabilizer should go in your car, not your snow blower.
Quick Reference Troubleshooting Table
| Symptom | Likely Cause | Solution |
|---|---|---|
| White smoke at startup | Overfilled oil | Drain excess, run at idle |
| Smoke after tilting | Oil in cylinder | Level machine, idle 5–10 min |
| Persistent white smoke | Worn piston rings | Professional inspection |
| Smoke plus sour fuel smell | Degraded fuel | Drain tank, refill with stabilized gas |
| Milky or foamy oil | Fuel or water contamination | Full oil change, inspect fuel system |
| Hard start, no smoke | Old fuel | Replace with fresh stabilized gasoline |
| Clogged breather tube | Crankcase pressure buildup | Clean tube behind air filter |
Frequently Asked Questions About White Snow Blower Smoke
Is white smoke from a snow blower dangerous?
White smoke is usually not dangerous in the short term, but it signals an underlying problem such as burning oil, bad fuel, or internal wear. Ignoring it can lead to engine damage over time, so address the cause as soon as possible.
Why does my snow blower smoke after sitting over summer?
After long storage, oil can migrate into the cylinder, and fuel degrades into varnish and absorbs moisture. Both conditions cause white smoke on the next start. Drain old fuel, check the oil level, and run the engine at idle for 5–10 minutes to clear residual smoke.
Can old gas cause white smoke?
Yes. Gasoline older than 30 days, especially ethanol-blended fuel, loses volatility and absorbs water. This disrupts combustion and produces white or gray smoke, often accompanied by a sour smell. Always drain old fuel and refill with fresh, stabilized gasoline.
How long should a snow blower smoke at startup?
Light white smoke for the first 1–2 minutes is normal, especially after storage or tilting. It should taper off as excess oil burns away. Smoke that continues beyond 10–15 minutes indicates a deeper problem that needs attention.
Is it safe to keep using a snow blower that smokes white?
You can run it briefly at idle to burn off excess oil, but avoid heavy use or high throttle until the cause is fixed. Prolonged operation with burning oil can damage the catalytic converter, foul the spark plug, and accelerate internal wear.
How much does it cost to fix white smoke from a snow blower?
DIY fixes typically cost $5 to $25 for fresh oil, fuel stabilizer, and basic supplies. Professional repairs for internal engine damage such as piston rings or valve seals can range from $150 to $400+ depending on the model and labor rates.
Key Takeaways for Fixing White Smoke From a Snow Blower

White smoke from your snow blower is almost always fixable without a trip to the repair shop. The most common causes are overfilled oil, stale fuel, and improper tilting, all of which you can correct at home in under an hour. A quick post-season routine using fuel stabilizer, proper oil levels, and upright storage will prevent the problem from returning.
Remember these essentials:
• Always check the dipstick before adding oil
• Drain and replace fuel older than 30 days
• Never tilt the machine beyond 15 degrees
• Let the engine idle 5–10 minutes to burn off residual oil
• Call a professional if smoke persists after these steps
Take 15 minutes this fall to run through the pre-storage checklist, and your snow blower will start clean and smoke-free all winter long.
❄️ Stay ahead of the next storm: A simple fall tune-up is the easiest way to avoid a smoky surprise on the first snowy morning.