
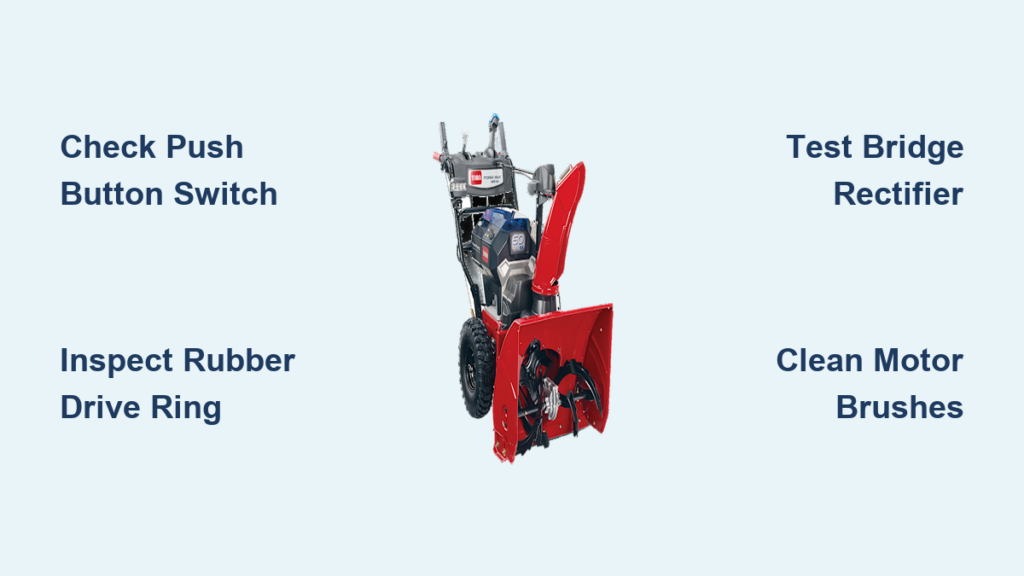
You press the start button on your Toro snow blower, expecting the engine to fire up, but nothing happens. No hum, no spin, no start. The electric start is not working. Thousands of Toro owners face this exact problem every winter across models like the S 620, S-200, and Model 381. The frustration is real, especially when snow is piling up and your machine refuses to cooperate.
The good news is that most electric start failures come from one of five common culprits: a bad push button switch, a worn rubber drive ring, dirty motor brushes, a failed bridge rectifier, or a faulty solenoid. This guide walks you through how to diagnose and fix each problem fast. By the end, you will know exactly what to check first, how to test each component, and which repairs solve the majority of no-start issues. Let us get your Toro snow blower running again.
Check the Push Button Switch First

Test for Continuity With a Multimeter
The push button switch is one of the most common failure points on Toro snow blowers. If pressing the start button produces no sound and no click, the switch is likely dead. Start your diagnosis here before moving to complex repairs.
Set a multimeter to continuity or ohms mode. Disconnect the wires from the switch terminals. Press the button and touch one probe to each terminal. If the meter shows no continuity, the switch is faulty and needs replacement.
Even when the button feels firm, internal contacts can corrode or break. One Toro owner reported going through two switches in just a few seasons. A new switch costs little and takes only 10 to 15 minutes to install.
Replace Using the Correct Part
Buy a replacement switch matched to your specific model. Check the Toro official parts site using your model number, or reference the part number printed on your unit. Reconnect the wires securely and test the start function. If the motor now spins, you have solved the problem.
Pro Tip: Always disconnect power before removing or installing the switch. For plug-in models, unplug the cord first. For battery-start units, remove the battery cable.
Diagnose Drive Clutch Slippage
Inspect the Rubber Drive Ring
If the electric motor spins but the engine does not turn over, you are dealing with drive clutch slippage. This is a common problem on Toro S 620 and S-200 models. The motor runs, but power never reaches the engine.
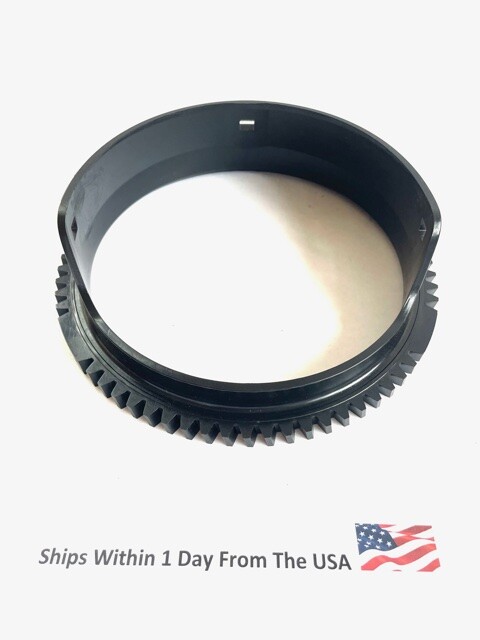
The usual culprit is a worn rubber drive ring, part number 25-30400. Over time, the rubber ring inside the plastic gear loses grip and slips on the shaft, even if it looks perfectly intact. Remove the motor housing and pull out the plastic gear. If the rubber ring moves freely on the metal pinion, replace it right away.
Replace the Plastic Gear if Teeth Are Damaged
While you have the gear out, inspect the teeth. Chipped, cracked, or missing teeth prevent proper engagement with the drive system. Replace the entire gear if you see any damage.
You can buy just the rubber ring for about $5, or a full kit with gear and ring for around $20. Both use part number 25-30400.
Upgrade to an E-Clip During Reassembly
When putting everything back together, never reuse the original ring-style retaining clip. These factory clips often fail under load and can send parts flying.
Instead, install a new E-clip, also called a split pin clip. You can find one at any hardware store for under $1. It provides much better retention and prevents future disassembly problems.
Test the Bridge Rectifier

Locate and Disconnect the Rectifier
On 120V AC electric start systems, like older S-200 models, a bridge rectifier converts AC power into pulsating DC for the starter motor. If this component fails, the motor receives no power at all.
The rectifier usually sits inside a control box near the motor. Disconnect it from both the wall plug wiring and the motor leads before testing.
Use a Multimeter to Check Each Diode
Set your multimeter to diode mode or ohms. A bridge rectifier contains four internal diodes. Test each pair of terminals by touching the probes to each one.
In one direction, you should see continuity with low resistance. In the reverse direction, you should see infinite resistance. If any diode conducts in both directions or in neither direction, the rectifier has failed.
Replacement rectifiers cost under $10 and are widely available. Solder the new one in place and reassemble the unit.
Note: Some rectifiers belong to the charging circuit rather than the start circuit. Confirm your model’s wiring before assuming the rectifier is the cause.
Fix Solenoid Issues on Battery Models
Bypass the Solenoid With a Jumper Wire
For battery-powered electric start systems, the solenoid controls power flow to the starter. When it fails, the starter will not engage.
Find the solenoid, which has two large terminals (battery and starter) and one small terminal (trigger from the switch). Use a heavy wire to jump across the two large terminals.
If the motor spins, your battery, cables, and motor are all good. The solenoid or switch is the problem. If nothing happens and you see no sparks, check the battery and cable connections.
Test the Starter Switch Circuit
Now use a second wire to connect the small terminal to the battery-side large terminal.
If the motor spins this way, the starter switch or wiring is faulty. If nothing happens, the solenoid itself is defective and needs replacement.
This two-step test isolates exactly where the problem lies: solenoid, switch, or wiring.
Clean Motor Brushes on Model 381
Access the Brush and Commutator
For the Toro 18-inch Electric Snow Blower (Model 381, 1800 Power Curve), a completely dead motor is usually not a failed motor at all. It is almost always dirty carbon brushes and commutator.
Remove the four screws on the red back plate. Then remove the three screws on the black motor cover. The motor is now fully exposed. Locate the carbon brush, which is a spring-loaded block, and the commutator, the shiny copper ring it touches.
Clean With Isopropyl Alcohol
Even when these parts look clean, oxidation or carbon dust can block electrical flow. Dip a cotton swab in isopropyl alcohol with 90% concentration or higher. Gently wipe the contact tip of the carbon brush and the entire surface of the commutator.
Let everything dry completely before reassembling.
Pro Tip: Test motor resistance with a multimeter after cleaning. A healthy motor reads approximately 2.4 ohms between terminals. A similar reading after cleaning confirms conductivity is restored.
Plug the unit back in and test. The motor should start immediately.
Verify Power and Wiring Basics
Check the Outlet and Plug Connection
Before testing any internal components, confirm the basics. Make sure the outlet works by plugging in a lamp or tester. Confirm the cord is fully inserted into both the outlet and the snow blower. Look for visible cuts or burns anywhere along the cord.
A tripped GFCI outlet or damaged extension cord can easily mimic a failed electric start system.
Inspect All Wiring for Damage
Follow the wiring from the plug all the way to the motor. Look for frayed or chewed insulation, corroded or loose connectors, and any disconnected terminals. Repair or replace any damaged wires, and tighten all connections.
For battery models, check the battery charge level and inspect cable ends for corrosion. Clean corroded terminals with a mixture of baking soda and water.
Decode Model-Specific Failures
S 620 and S-200 Gas Models
These models use electric start to crank the engine. If the motor does not turn at all, test the switch, rectifier, and wiring. If the motor spins but the engine does not, replace the rubber ring or plastic gear. If parts loosen after repair, always upgrade to an E-clip.
Quick Fix: Replacing the rubber drive ring and upgrading to an E-clip solves the majority of issues on these models.
Model 381 Fully Electric
This model has no engine, just a brushed DC motor. If you hear no sound and see no spin, clean the carbon brush and commutator. For intermittent starting problems, inspect connections for looseness or oxidation.
Warranty Note: Toro offers a 2-year limited warranty in the U.S. and Canada. Take the unit to Home Depot with proof of purchase. Be aware that some stores wrongly claim the warranty is only valid in Mexico. If your claim gets denied, cleaning the motor yourself is faster and completely free.
Prevent Future Start Failures
Clean the Motor Annually
After each winter season ends, remove the back cover and clean the brush and commutator with isopropyl alcohol. This prevents carbon buildup and ensures reliable starts next season.
Keep Spare Parts on Hand
Stock these inexpensive items so you are never stuck waiting for parts:
- Rubber drive ring (part #25-30400)
- E-clips
- Push button switch
- Bridge rectifier
Run a Test Before Snow Season Arrives
Plug in or charge your snow blower in late fall. Press the start button. If the machine hesitates or fails to start, fix the problem now rather than waiting for the first big storm.
When to Replace the Starter Motor

Confirm All Other Components Work First
Only consider replacing the starter motor after you have verified that:
- Power reaches the motor
- The switch, rectifier, solenoid, and wiring all test good
- The motor still will not spin
For Model 381, if cleaning the brushes does not help and the resistance reading is far from 2.4 ohms, the motor may have internal damage.
Install an OEM or Compatible Replacement
Buy a replacement motor for your specific model. Installation takes 30 to 60 minutes. Follow the wiring diagram carefully during installation.
Cost Note: A new motor costs more than most other repairs. Exhaust every other option first, because most no-start issues are not actually motor failures.
Frequently Asked Questions About Toro Electric Start Problems
Why does my Toro snow blower electric start click but not turn over?
A single click usually points to a solenoid issue or a low battery. Test the battery charge first. If the battery is good, use the jumper wire method to bypass the solenoid. If the starter spins when bypassed, the solenoid needs replacement.
How do I know if my Toro snow blower drive ring is worn?
The rubber drive ring wears gradually and often looks fine even when it has failed. The telltale sign is that the electric motor spins but the engine does not turn over. Pull the plastic gear and check whether the rubber ring moves freely on the metal pinion shaft.
Can a dirty brush stop my Toro electric snow blower from starting?
Yes. On Model 381 and similar fully electric Toro snow blowers, dirty or oxidized carbon brushes are the most common cause of a dead motor. Cleaning the brush and commutator with isopropyl alcohol fixes the issue in most cases.
How much does it cost to fix a Toro electric start?
Most repairs cost less than $20 in parts. A replacement rubber ring runs about $5. A new bridge rectifier costs under $10. An E-clip costs under $1. Cleaning supplies for the Model 381 motor cost just a few dollars. Only a full motor replacement carries a higher price tag.
Does Home Depot honor the Toro warranty for Model 381?
Toro officially offers a 2-year limited warranty in the U.S. and Canada for Model 381. Home Depot is an authorized warranty service center, but some locations incorrectly claim the warranty only applies in Mexico. Bring your original receipt and proof of purchase. If the claim gets denied, the motor cleaning repair takes under 10 minutes and costs almost nothing.
Final Thoughts on Fixing Toro Electric Start Problems
Most Toro snow blower electric start failures come down to five common issues: a bad push button switch, a worn rubber drive ring, dirty motor brushes, a failed bridge rectifier, or a faulty solenoid. Each one has a straightforward fix that costs little and requires no professional service.
Start with the simplest check, the push button switch, and work systematically through the system. Clean, replace, or bypass components as needed. With the right steps, you can have your Toro snow blower running again in less than an hour and ready for the next storm.



