
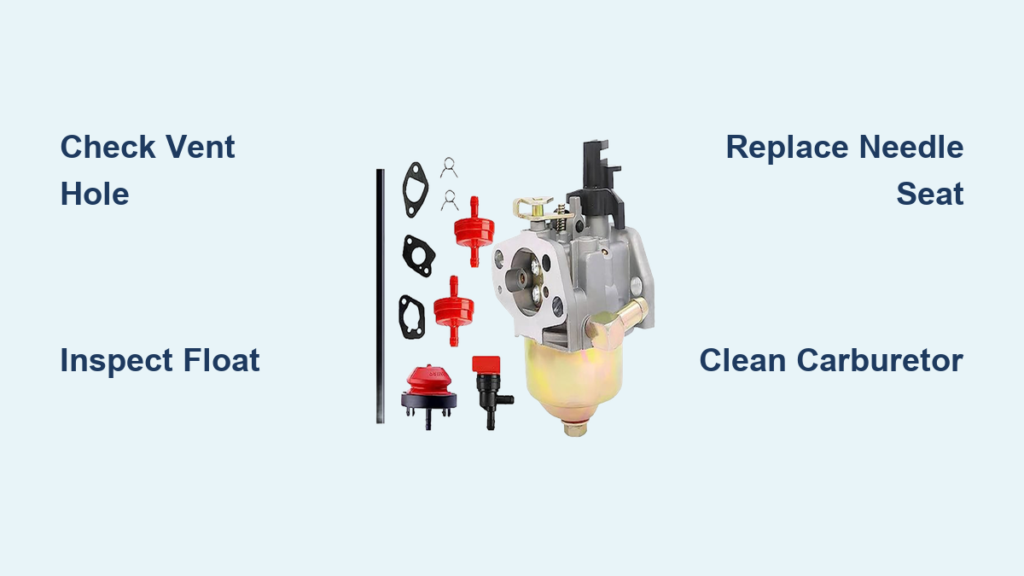
You pull your snow blower out of storage, fill the tank, and notice gasoline dripping from the carburetor. A snow blower carburetor leaking gas is a frustrating but common problem, especially in machines with Briggs & Stratton or Tecumseh engines. Left unchecked, this leak can flood the engine, contaminate the oil, and even create a serious fire hazard.
The good news? Most causes are simple to diagnose and fix with basic tools and parts costing under $10. Whether fuel is pouring from the air filter, dripping from a small vent hole, or seeping into the oil, the root issue usually traces back to a failed needle and seat, a damaged float, or a clogged vent hole. This guide walks you through every step to restore your machine safely before the next storm.
Identify Where the Fuel Is Leaking

Gas Pouring From the Air Filter
Fuel flowing from the air filter housing means the carburetor is flooding. The needle and seat assembly isn’t sealing properly. As fuel enters the float bowl, the float should rise and push the needle into the seat, shutting off the flow. When that seal fails, fuel overflows into the engine and out through the air intake. This signals internal carburetor failure, not a cracked fuel line. Shut off the machine immediately to prevent fire risk or hydrolock.
Drips From a Small Vent Hole
Many carburetors have a tiny drain or vent hole on the side or bottom. A slow drip here may seem minor, but it points to a float or needle issue. If the float stays low or the needle won’t close, fuel continuously fills the bowl and escapes through this opening. On Tecumseh engines, a blocked vent hole (not a failed float) can mimic this symptom, so always check both possibilities before buying parts.
Gas in the Engine Oil
Check the dipstick. If the oil level is higher than normal and smells strongly of gasoline, fuel has leaked past the carburetor and into the crankcase. This thins the oil, reduces lubrication, and risks engine damage. The cause is almost always a flooding carburetor from a stuck needle, cracked float, or degraded seat. Fix the carburetor first, then change the oil. Never run an engine with gas-contaminated oil.
Diagnose the Root Cause of the Leak
Test for a Plugged Vent Hole (Tecumseh Engines)
On Tecumseh flathead engines (8 HP and up), a tiny vent hole on the carburetor body regulates pressure. When clogged with varnish or debris, fuel can’t stop flowing, even with a perfect float and needle. Many users replace the entire carburetor only to see the same leak return. To clear it, use a micro drill bit, inner wire from a twist tie, or a single strand from a wire brush. Blow through the hole afterward. Air should pass freely. This five-minute fix often solves “mystery leaks” after rebuilds.
Inspect the Float for Damage
Remove the float and shake it near your ear. A sloshing sound means fuel has entered the float, either through a crack (in plastic floats) or absorption (in older brass floats). Cracked plastic floats are common in aging units. Brass floats, once thought durable, can absorb fuel over time and become too heavy to rise. Either way, the float won’t lift the needle, and fuel keeps flowing. Replace it with a plastic float. These are lightweight, fuel-resistant, and never leak.
Check Float Level and Movement
With the carburetor upright, the float should sit level with the carburetor body. If it tilts or hangs low, it won’t shut off fuel. On models with a metal tab, bend it slightly to adjust the height. Ensure the float moves freely on the pin with no binding or corrosion. A sticking float can mimic a failed needle. Clean the pivot pin and housing if needed. Restricted movement prevents proper sealing.
Replace the Needle and Seat Assembly
Remove the Old Seat Safely
After removing the float pin and needle, you’ll see the rubber seat in the fuel inlet. To remove it:
– Place a rag over the inlet to catch debris
– Use an air compressor; a quick blast will pop the seat out with an audible “pop”
– If stuck, gently pry with the non-sharp end of a drill bit or chainsaw file
Avoid metal tools that could scratch the housing. Even small scratches can cause leaks after a new seat is installed.
Install the New Seat Correctly
The replacement seat has a groove on one side that must face up. Insert it using the same tool, pushing until it seats fully. You’ll often feel a slight “pop” when it locks in. Never install it upside down. The groove ensures a proper seal. This part costs under $5 and is available for both Briggs & Stratton and Tecumseh models. A fresh seat stops most leaks caused by ethanol-swollen rubber.
Verify the Needle and Seat Seal
Reattach the needle to the float and reinstall the assembly. Hold the carburetor upright and connect the fuel line. As fuel flows in, lift the float by hand. The flow should stop immediately. Release it, and fuel should resume. When the float is level, flow stops. This confirms the new needle and seat are working. If fuel still flows, the seat may not be fully seated or the cavity is corroded.
Clean the Needle Cavity for Smooth Movement

Polish the Bore
A sticking needle won’t seal, even with a new seat. Corrosion or varnish in the needle cavity is usually the culprit. To fix this:
– Remove the seat and float
– Wrap a wooden meat skewer with cotton
– Dip it in metal polish
– Insert into the cavity and twist back and forth
This polishes the bore, ensuring the needle slides freely. Reinstall the seat and test movement with your finger. The float should rise and fall without resistance.
Prevent Future Sticking
Ethanol in modern fuel leaves behind gummy residue that binds the needle. Always use fresh fuel and add a fuel stabilizer at the end of the season. Running old gas is the top cause of sticky components. If storing for more than 30 days, drain the carburetor or run the engine dry.
Rebuild and Reassemble the Carburetor

Clean All Passages Thoroughly
After repairs, spray carburetor cleaner through every passage:
– Fuel inlet
– Idle and main jets
– Float bowl
– Vent holes
Use compressed air to blow out debris. A clean carburetor prevents future clogs and ensures proper fuel metering. Wipe the bowl with a lint-free cloth. Never use wire to clear jets. This can enlarge them and ruin calibration.
Reassemble Without Losing Small Parts
The float pin is tiny and easy to lose, so place a rag under your work area. Reinsert the pin after attaching the needle to the float. Ensure the inlet needle clip (if present) goes back in the exact same position. Misplacement can restrict movement. Double-check that the float swings freely and the needle lifts smoothly.
Perform Post-Repair Checks
Change Contaminated Oil
If gas entered the crankcase, change the oil immediately after fixing the carburetor. Run the engine for a minute to circulate fresh oil, then change it again for full protection. Use the manufacturer-recommended oil type. Skipping this step risks bearing wear and premature engine failure.
Test for Leaks Before Full Use
Reconnect the fuel line and let the engine sit for 10 minutes. Check for drips. Start the machine and let it run for 5 to 10 minutes. Watch for leaks at the carburetor, primer, and air filter. If everything stays dry, the repair succeeded. If not, recheck the seat installation and vent hole.
Prevent Future Carburetor Leaks
Upgrade to a Plastic Float
Replace old brass floats with plastic floats, even if they still seem to float. Brass units can absorb fuel over time and fail unexpectedly. Plastic floats are immune to this problem and cost very little. This simple swap prevents future flooding and is a smart upgrade during any carburetor service.
Use Fuel Stabilizer Year-Round
Ethanol degrades rubber seats and varnishes internal parts. Add a fuel stabilizer to every tank, especially at season’s end. Run the engine for 5 minutes to circulate treated fuel. This keeps the carburetor clean and components supple. When possible, opt for ethanol-free gas for small engines.
Inspect Annually Before Winter
Before first use each season:
– Check oil for fuel smell
– Inspect the carburetor for leaks
– Clean the vent hole
– Test float movement
A 10-minute inspection can prevent a mid-storm breakdown. Keep a needle and seat kit on hand. It costs less than a tow or professional repair.
Frequently Asked Questions About Snow Blower Carburetor Leaks
Why is gas leaking from the air filter on my snow blower?
Fuel coming from the air filter side means the carburetor is flooding. The needle and seat assembly is not sealing, allowing gas to overflow into the engine and out through the intake. Replace the needle and seat kit to stop the leak.
Can a plugged vent hole cause my carburetor to leak gas?
Yes, especially on Tecumseh flathead engines (8 HP and up). A clogged vent hole disrupts pressure balance, causing fuel to back up and overflow even when the float and needle are working perfectly. Clear the hole with a micro drill bit or twist tie wire before replacing any parts.
How do I know if my snow blower float is bad?
Remove the float and shake it near your ear. A sloshing sound means fuel has entered the float, either through a crack or absorption. Also look for visible cracks, especially on plastic floats. A faulty float won’t rise properly, leaving the needle open and the carburetor flooding.
Is it safe to run a snow blower with gas in the oil?
No. Gasoline in the crankcase thins the oil and reduces lubrication, which can damage bearings and other internal components. Fix the carburetor first, then change the oil immediately before running the machine again.
How much does it cost to fix a leaking snow blower carburetor?
Most repairs cost under $10 in parts. A needle and seat kit typically runs less than $5, and a replacement plastic float is similarly affordable. With basic tools, you can complete the repair in under an hour.
Do I need to replace the whole carburetor if it’s leaking gas?
Usually not. Most leaks are caused by a failed needle and seat, damaged float, or clogged vent hole. These components are inexpensive and easy to replace. Even a full carburetor rebuild rarely requires a new assembly.
Key Takeaways for Fixing a Snow Blower Carburetor Leak
A snow blower carburetor leaking gas almost always comes down to three causes: a failed needle and seat, a damaged float, or a clogged vent hole. Start by identifying where the fuel is escaping, then work through the diagnosis systematically. On Tecumseh engines, always check the vent hole first, since a blocked vent can mimic other failures and persist even after a full rebuild.
With basic tools and parts under $10, you can complete the repair yourself in under an hour. After fixing the carburetor, always change the oil if gas reached the crankcase. Finally, add fuel stabilizer at the end of each season and inspect the carburetor annually to prevent future leaks. Your next step: gather your tools, order a needle and seat kit, and tackle the repair before the next snowfall arrives.



