
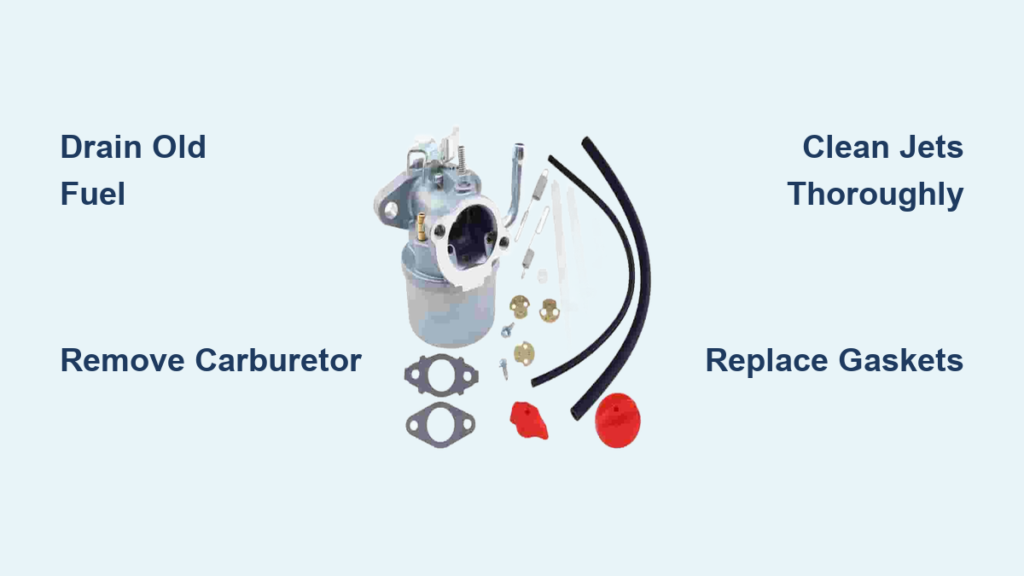
A clogged carburetor is the number one reason a Craftsman snow blower refuses to start after sitting in storage all summer. Stale fuel leaves behind sticky varnish that blocks the tiny passages inside the carburetor, starving the engine of fuel at the exact moment you need it most. If your machine cranks endlessly, sputters under load, or stalls after a few seconds, the carburetor is the prime suspect.
This guide covers the full Craftsman snow blower carburetor cleaning process, from identifying symptoms to reassembly. You will learn how to drain old fuel safely, remove the carburetor without losing springs, clean every passage properly, and get your engine firing on the first pull.
Symptoms of a Dirty Carburetor on a Craftsman Snow Blower
Engine Cranks But Will Not Start
Old fuel is the most common cause of a no-start condition after months of storage. Ethanol-blended gasoline begins breaking down in as little as 30 days, leaving gummy deposits that clog the main jet and float bowl. You may crank the engine repeatedly with no result, even with fresh oil and a clean spark plug installed.
Sputtering, Surging, or Stalling Under Load
A partially blocked carburetor lets some fuel through but not enough for steady operation. The engine might start briefly, then surge, misfire, or die when you engage the auger. This points to a restricted idle circuit or partially plugged main jet.
Engine Only Runs on Full Choke
A brief choke pull during cold starts is normal. If your snow blower only runs with the choke held fully closed, the carburetor is delivering too little fuel. Restricted jets or a stuck choke plate can cause this lean running condition.
Safety Steps Before Starting Carburetor Work
Disconnect the Spark Plug Wire
Pull the rubber boot off the spark plug before touching any fuel components. This single step prevents accidental ignition while your hands are near the carburetor and fuel line.
Work in a Ventilated Area
Gasoline vapors and carburetor cleaner fumes are both flammable and harmful to breathe. Always work outdoors or in a garage with the door wide open. Keep a fire extinguisher nearby as a precaution.
Wear Protective Gear
Safety glasses shield your eyes from splash-back when spraying carb cleaner. Nitrile gloves protect your skin from solvents and fuel residue during disassembly.
Tools and Supplies for Carburetor Cleaning
Gather everything before you start, so you are not searching mid-repair. You will need:
– Socket set with 10mm and 13mm sockets
– Flathead and Phillips screwdrivers
– Carburetor cleaner spray with precision straw
– Compressed air canister or air compressor
– Small magnetic parts tray
– Carburetor rebuild kit with gaskets and needle valve
– Clean rags and a fuel-safe drain pan
Avoid using wire brushes, drill bits, or metal picks inside the carburetor. These tools can scratch the soft brass jets and enlarge the calibrated orifices, which ruins them permanently.
How to Remove the Carburetor from a Craftsman Snow Blower
Locate the Carburetor
On most Craftsman snow blowers, the carburetor sits on the side of the engine, just behind or beside the air filter housing. You will see a rubber fuel line entering one side and a metal throttle rod connecting to the governor arm.
Drain the Fuel Tank
Place a drain pan under the fuel tank. Squeeze the spring clamp on the fuel line with pliers and slide the line off the carburetor inlet. Let any residual fuel flow out completely. Dispose of old gas properly and never reuse fuel older than 60 days.
Disconnect the Throttle Linkage
Detach the throttle rod and spring from the carburetor lever. Before removing anything, take a photo with your phone so you can see exactly how the linkage routes for reassembly. These small parts have a habit of springing into the grass and disappearing.
Unbolt the Carburetor
Remove the two mounting bolts that hold the carburetor to the intake manifold. Most models use 10mm or 13mm bolts with rubber vibration grommets. Lift the carburetor straight off and set it on your workbench.
Disassembling the Carburetor for Cleaning

Remove the Float Bowl
Flip the carburetor upside down and remove the bowl screw or nut. Lift off the float bowl carefully and set the small gasket aside for replacement. The float arm will drop down gently once the bowl is off.
Remove the Float Pin and Needle Valve
Slide the float pin out with needle-nose pliers or a small punch. Lift off the float and the needle valve attached to it. Inspect the needle tip for grooves, pitting, or debris. A worn needle must be replaced.
Remove the Main Jet and Idle Mixture Screw
Unscrew the main jet from the carburetor body using a small flathead screwdriver. For the idle mixture screw, turn it clockwise until it lightly seats while counting the turns. Most Craftsman carburetors use a setting between 1 and 1.5 turns out. Write this number down for reassembly.
Cleaning the Carburetor Parts Thoroughly
Spray All Passages with Carburetor Cleaner
Lay the carburetor body on a rag and spray carb cleaner into every opening. Target the main jet bore, idle circuit, fuel inlet, venturi throat, and throttle bore. Keep spraying each passage until the liquid running out the other side is completely clear. Use the red precision straw to reach the tiny holes that fingers cannot access.
Blow Out Passages with Compressed Air
Compressed air is essential for clearing passages that cleaner alone cannot reach. Focus on the small idle port near the throttle plate, since this is the most common clog point. Never probe jets with wire, since this permanently enlarges the hole.
Soak Stubborn Deposits in Carb Dip
For heavy varnish buildup, soak the carburetor body in a commercial carburetor dipping solution for 15 to 30 minutes. Wear gloves and follow the product label. Rinse thoroughly with fresh carb cleaner and blow dry with compressed air when finished.
Reassembling the Carburetor with New Parts

Install Fresh Gaskets and Seals
A carburetor rebuild kit costs around $10 to $15 and includes new gaskets, a needle valve, and seat. Always install fresh gaskets from the kit. Reusing old gaskets is the leading cause of fuel leaks after reassembly.
Reinstall the Float and Needle
Slide the float pin back into position and make sure the float swings freely. Lift the float by hand and confirm the needle seats squarely in its housing. A stuck float will flood the engine or cause fuel to leak into the crankcase.
Reset the Idle Mixture Screw
Screw the idle mixture screw in until it lightly seats, then back it out to the original turn count you recorded during disassembly. This restores the factory fuel-air ratio and prevents a too-rich or too-lean condition.
Reinstalling the Carburetor and Testing the Engine
Mount the Carburetor to the Engine
Align the carburetor flange with the intake manifold and insert the mounting bolts with their rubber grommets. Tighten the bolts evenly in a crisscross pattern to avoid cracking the housing. Snug is enough; do not over-tighten.
Reconnect the Fuel Line and Linkage
Push the fuel line firmly onto the carburetor inlet until it clicks into place over the barbed fitting. Reattach the throttle rod and spring using the photo you took earlier as a reference. Move the throttle lever by hand to confirm smooth operation.
Prime and Start the Engine
Reconnect the spark plug wire. Press the primer bulb 3 to 5 times and set the choke to full. Pull the starter cord with a firm, steady motion. Once the engine fires, gradually push the choke lever to the off position as it warms up.
Fine-Tune the Idle Speed
If the engine races or stalls at idle, locate the idle speed screw on the throttle linkage. Turn it clockwise to raise RPM or counterclockwise to lower it. The goal is steady idle with no stalling when the auger lever is released.
Preventing Carburetor Problems in the Future
Add Fuel Stabilizer to Every Tank
Pour fuel stabilizer into every fill-up, but especially the last tank before storage. Stabilizer prevents ethanol from separating and forming the varnish that clogs carburetors. Run the engine for 5 minutes after adding stabilizer so the treated fuel reaches the carburetor.
Replace the Fuel Filter Annually
A clogged in-line fuel filter restricts fuel flow and forces the carburetor to compensate. Swap the filter once a year or at the start of each winter season. This $5 part prevents hundreds of dollars in carburetor damage.
Use Ethanol-Free Gasoline When Possible
Ethanol attracts moisture and corrodes rubber and plastic components inside the fuel system. Pure gas with no ethanol lasts much longer and keeps the carburetor internals clean. Many gas stations sell E0 fuel labeled for small engines and marine use.
Frequently Asked Questions About Craftsman Snow Blower Carburetor Cleaning
How often should I clean the carburetor on my Craftsman snow blower?
Clean the carburetor every 2 to 3 years under normal use. In humid climates or when using ethanol-blended fuel, an annual cleaning is safer. Cleaning once a year also makes sense if the machine sits with fuel in the tank for long off-seasons.
Can I clean the carburetor without removing it from the snow blower?
You can spray carb cleaner into the air intake with the engine running, but this only addresses light surface deposits. For sticky varnish, gum, or a no-start condition, full removal and disassembly is the only reliable method.
What happens if I bend the float arm during cleaning?
A bent float arm causes the carburetor to flood or run too rich. You can carefully bend it back to level using needle-nose pliers, but check the float level against the service manual specification before reinstalling. Severely bent floats should be replaced.
Should I replace the carburetor instead of cleaning it?
Replacement makes sense if the carburetor body is cracked, the throttle shaft is worn, or cleaning does not restore proper operation. A new aftermarket carburetor for most Craftsman models costs between $30 and $60 and includes mounting gaskets.
Why does my snow blower only run with the choke on after a carb cleaning?
If the engine still requires full choke after cleaning, the idle mixture screw is likely set too lean. Turn the screw out a quarter turn at a time until the engine runs smoothly with the choke off. A vacuum leak at the intake manifold gasket can also cause this symptom.
Final Thoughts on Craftsman Snow Blower Carburetor Cleaning
A clean carburetor is the difference between a snow blower that fires on the first pull and one that leaves you stranded in a blizzard. Most Craftsman carburetor problems trace back to old fuel, so the best defense is draining the tank or adding stabilizer before storage. When cleaning is needed, work methodically, label every part, and use a rebuild kit to replace the gaskets and needle valve.
For most owners, a full carburetor cleaning takes 60 to 90 minutes using basic tools and a $15 rebuild kit. If the engine still will not start or run properly after reassembly, swap the spark plug, check for a blocked fuel line, or test the ignition coil before replacing the entire carburetor.



