
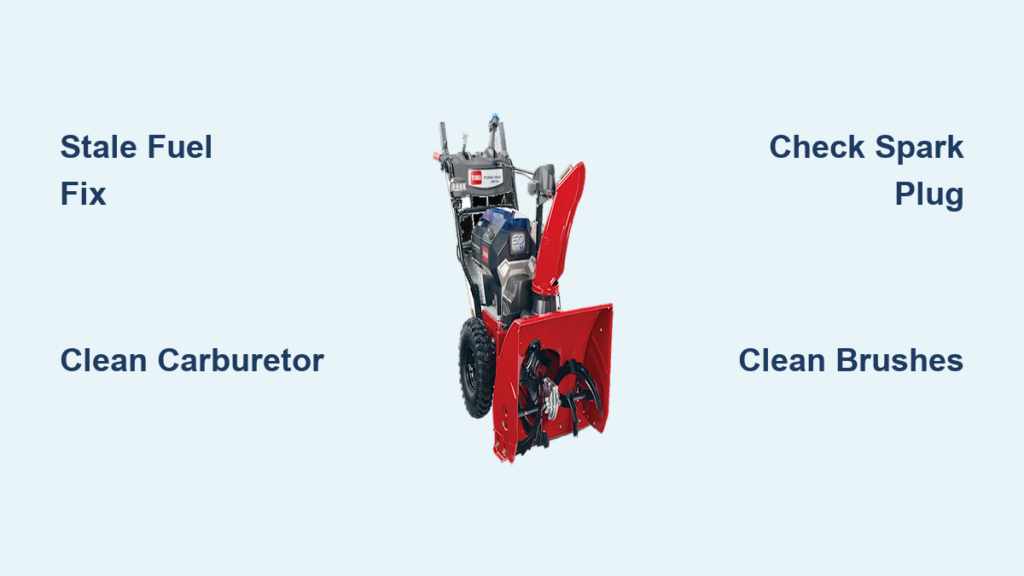
Your Toro snow blower worked perfectly last winter, but now it won’t start, sputters, or makes strange noises. You’re not alone. Thousands of Toro owners face the same frustrating situation every fall when pulling their machines out of storage. The good news? Most Toro snow blower problems trace back to a handful of preventable issues you can fix yourself with basic tools and a few hours of work.
This guide covers every major failure point in Toro’s gas and electric snow blower lines. You’ll learn how to diagnose problems accurately, perform step-by-step repairs, and implement a maintenance routine that prevents 90% of future breakdowns. From clogged carburetors to dead electric motors, we’ll show you exactly what to check, what to replace, and when to call it quits.
Fuel System Failures: Why Your Toro Won’t Start After Storage
Stale Gasoline Destroys Carburetors in 30 Days
Bad fuel is the number one cause of Toro snow blower problems across every gas-powered model. Ethanol-blended gasoline begins breaking down within 30 days, forming varnish and gum that coat every internal surface. By spring, your carburetor’s precision passages are sealed with sticky residue. The fuel smells sour or chemical-like, appears darker than fresh gas, and may contain visible particles.
Even if you drained the tank before storage, residual fuel in the carburetor hardens into a varnish coating. This affects all gas-powered Toro models, but the Power Max and Power Clear series suffer most. The fix starts with prevention: add fuel stabilizer before storage and run the engine for 5 minutes to circulate it through the system. If you already missed that step, a thorough carburetor cleaning will restore function.
Clean the Carburetor with Full Disassembly
In-place cleaning doesn’t work on clogged carburetors. You need complete access to the main jet, idle jet, and emulsion tube. Start by turning off the fuel valve, then remove the primer bulb, fuel line, and kill switch wiring carefully without pulling on the connector. Remove the two 10mm bolts holding the carburetor and note the spring and hook system for correct reinstallation.
Inspect the internal components for sticky residue. The most effective cleaning method uses an ultrasonic cleaner, soak the entire carburetor for 30 minutes to dissolve stubborn varnish. After soaking, use a 1/32″ drill bit or needle to clear the emulsion tube’s side ports. Reinstall the float in its single correct orientation and test the needle by blowing into the fuel inlet. No air should pass when the carburetor is upright. During reassembly, tighten the emulsion tube until snug only. Brass threads in aluminum strip easily under excessive force.
Unclog the Emulsion Tube’s Side Ports
The emulsion tube is a precision metering device that mixes air and fuel for combustion. Its tiny side ports clog frequently and must be completely clear for proper engine operation. Unlike simple tubes, this component requires removal and individual inspection. After removal, examine each port under magnification and clear blockages with a fine wire or compressed air.
This fix is critical for Power Max 11 models where the emulsion tube is especially vulnerable. If the tube shows damage or stripped threads, replace it entirely. Never force installation. A snug fit prevents leaks without risking thread damage.
Prevent Fuel Degradation Before Storage
Prevention costs less than repair. Use non-ethanol fuel when available, or always add a quality stabilizer. At season’s end, either drain the tank completely or fill it with stabilized fuel and run the engine for 5 minutes. This coats internal components and prevents oxidation. Store the blower in a dry, temperature-stable area away from concrete floors.
Before first use each season, check fuel condition by smell and color. Sour or discolored fuel needs immediate draining. A $10 bottle of stabilizer prevents a $100 carburetor replacement, making this the smartest investment any Toro owner can make.
Electrical Problems: Restore Power to Electric and Gas Models
Diagnose No-Start Conditions in Electric Snow Blowers
If your Toro 18″ electric snow blower plugs in but makes no sound, the culprit is almost always carbon brush contamination. These small rectangular blocks press against the commutator, the rotating contact surface, to deliver power. Over time, carbon dust, grime, and oxidation build up and break the circuit. The motor appears completely dead, but the fix takes 30 minutes and costs nothing.
Unplug the unit and remove the four screws on the red back cover. Lift off the black motor housing by removing three more screws. You’ll see the carbon brushes and commutator immediately. If they appear blackened or dusty, cleaning will likely restore full function.
Clean Motor Contacts with Isopropyl Alcohol
Use 90% or higher isopropyl alcohol and a lint-free cloth or cotton swab to wipe down both the brushes and commutator surface. Remove all carbon buildup without touching components with bare fingers. Skin oils worsen contact issues. Let everything dry completely before reassembly.
Test continuity with a multimeter after cleaning. A reading of 2.4 ohms between the motor’s positive and negative terminals confirms proper connection. Reattach the covers, plug in, and test. Most units fire up immediately. This zero-cost fix works on many corded electric models and saves you from buying a replacement motor.
Replace Worn Carbon Brushes When Cleaning Fails
If cleaning doesn’t restore function, the brushes may be worn beyond service life. Measure their length and replace any brushes under 1/4 inch. Order OEM or compatible replacements online. Installation reverses the removal process, but ensure the brushes slide freely in their holders. Misaligned brushes cause sparking or complete failure.
After replacement, test resistance again. If you still have no continuity, the motor windings may be damaged. At that point, replacement becomes more practical than repair. However, 90% of “dead” electric motors simply need a thorough cleaning.
Test Safety Switches on Gas-Powered Models
Gas-powered Toros include safety interlocks that prevent starting under unsafe conditions. The kill switch, stop switch, and safety key must all function properly. Check that the safety key is fully inserted and the stop switch is in the run position. Inspect wiring for damage, especially near the handle where repeated use causes wear.
A loose or corroded connection mimics fuel problems and leaves you chasing the wrong cause. Use a multimeter to test continuity through each switch. Repair or replace any faulty components. Never bypass safety systems. They protect against accidental starts that could cause serious injury.
Engine Won’t Start? Test These Components First

Verify Spark Plug Function Before Replacing Parts
A faulty spark plug creates symptoms identical to fuel system failures. Remove the plug and inspect it carefully. A wet, fuel-soaked plug suggests flooding from a stuck float or over-priming. A dry, white, or cracked plug indicates no fuel reaching the cylinder or ignition system failure.
Use a spark tester or ground the plug against the engine block while pulling the cord. Look for a strong blue spark jumping the gap. No spark points to ignition coil or wiring problems. Weak or inconsistent spark means replacement. Always use the correct plug type specified in your manual. For Power Max 11 models, a fresh plug often improves starting performance after carburetor service.
Test Compression Only When Simpler Causes Are Ruled Out
Low compression is uncommon but indicates serious internal engine damage. Worn piston rings, damaged valves, or cylinder issues cause this condition. Use a compression tester to check. Most small engines need 80 to 120 PSI to start reliably. Readings below 60 PSI mean the engine likely won’t fire regardless of other repairs.
If compression is low, professional repair or replacement becomes necessary. However, most no-start cases stem from fuel or spark issues. Test compression only after verifying fuel delivery and ignition function.
Prime the Engine Correctly for Cold Starts
The primer bulb draws fuel into the carburetor and must hold pressure to work. Squeeze it 3 to 5 times until firm. If the bulb stays soft or won’t hold pressure, check for cracks or loose connections. Replace damaged bulbs immediately. A working primer is essential for cold starts, especially after carburetor service.
After any carburetor work, verify the fuel valve is on and all lines are reconnected. Set the choke to fully closed position before pulling the starter cord. This combination ensures proper fuel delivery for reliable starting.
Auger and Drive System Repairs

Fix Auger Motor Failure in Electric Models
When the auger motor stops working in electric Toro snow blowers, the problem usually traces back to dirty or worn brushes. Follow the cleaning procedure outlined earlier. If the motor spins after cleaning but the auger still won’t turn, inspect the drive belt and gear case for damage.
For gas models with working engines but non-engaging augers, check the auger drive cable. It may be loose, broken, or misadjusted. Lubricate all moving parts annually and replace any frayed cables immediately. A functioning auger is essential for actual snow removal, so don’t overlook this system.
Resolve Drive System Engagement Problems
The Power Max 11 features six forward and two reverse speeds. When gears won’t engage properly, check the transmission fluid level and condition. Low or dirty fluid causes slipping and poor performance. Use SAE 80W-90 gear oil for refills.
Inspect drive belts for visible wear, cracking, or glazing. Adjust the drive control cable if the blower creeps forward on its own or refuses to move. Keep wheels clean and free of ice buildup that interferes with traction. Store the machine with the drive disengaged to reduce spring tension and extend component life.
Fast Repairs: Skip the Full Disassembly
Use GumBuster for 15-Minute Carburetor Cleaning
Instead of spending two hours disassembling the carburetor, try the GumBuster chemical cleaning system. This kit includes a permanent purge valve that replaces the bowl drain screw. Remove the single drain screw beneath the choke lever, install the purge valve, and attach the solvent can using the included hose.
Inject 2 to 3 sprays of solvent directly into the carburetor. Dripping after the second or third shot indicates sufficient coverage. Wait 5 to 10 minutes for the solvent to dissolve gum in the jets, passages, and emulsion tube. Add fresh fuel, prime the engine, turn the ignition on, and attempt to start. Most units fire up within seconds.
The purge valve stays installed permanently, providing easy access for future maintenance. This 15-minute fix avoids 2 hours of labor and saves $50 to $100 on replacement parts. GumBuster works on all four-stroke Toro snow blowers, both single-stage and dual-stage models.
Know When to Replace Instead of Clean
Replace the carburetor only when it’s cracked, stripped, or has a worn throttle shaft. Otherwise, thorough cleaning restores function effectively. New carburetors cost $50 to $100+ and require removing the shroud, emission system, and starter. The labor alone takes 1.5 to 2 hours.
For Power Clear models, GumBuster delivers excellent results without any disassembly. For older machines with heavy varnish buildup, full teardown and ultrasonic cleaning works best. Match your repair method to the contamination level for optimal results.
Prevent Future Toro Snow Blower Problems
Follow This Simple Maintenance Schedule
Prevent 90% of issues with basic seasonal care. At season’s end, complete these steps:
- Add fuel stabilizer and run the engine for 5 minutes
- Drain the fuel tank completely or store it full with stabilizer
- Clean the carburetor if the unit sat with old fuel
- Check the spark plug and air filter condition
- Clean motor brushes on electric models
Before first use each winter, work through this checklist:
- Check fuel quality by smell and color
- Inspect belts and cables for wear
- Test the starting system
- Lubricate auger and drive components
Store Your Snow Blower Properly
Storage location matters as much as storage preparation. Choose a dry, covered area away from damp garages or sheds where condensation forms. Cover the unit to prevent dust buildup on critical components. Elevate it off concrete floors to avoid moisture wicking.
For electric models, coil the cord neatly and store indoors to prevent insulation damage. Never leave any snow blower outside year-round. Proper storage prevents varnish, rust, and electrical issues that shorten equipment life.
Frequently Asked Questions About Toro Snow Blower Problems
Why won’t my Toro snow blower start after sitting all summer?
Stale fuel is the most likely cause. Ethanol-blended gasoline breaks down in as little as 30 days, forming varnish and gum that clog carburetor passages. Drain the old fuel, clean the carburetor thoroughly, and refill with fresh gasoline mixed with stabilizer. Most post-storage starting problems trace directly to this issue.
How do I clean a Toro carburetor without removing it?
Use the GumBuster chemical cleaning system. Remove the bowl drain screw, install the purge valve, and inject 2 to 3 sprays of solvent. Wait 5 to 10 minutes for the chemicals to dissolve gum and varnish. This method works well for moderately clogged carburetors. Heavily contaminated units still need full disassembly and ultrasonic cleaning.
What causes a Toro electric snow blower to suddenly stop working?
Carbon brush contamination is the primary cause. Carbon dust, grime, and oxidation build up on the brushes and commutator, breaking the electrical circuit. Cleaning with 90% isopropyl alcohol usually restores function. If cleaning fails, the brushes may be worn and need replacement.
How often should I use fuel stabilizer in my Toro snow blower?
Add stabilizer to every fuel fill-up if you use ethanol-blended gasoline. At minimum, always add stabilizer before storage. Running the engine for 5 minutes after adding stabilizer circulates it through the entire fuel system, protecting the carburetor and fuel lines from varnish formation.
Can I use GumBuster on any Toro snow blower model?
GumBuster works on all four-stroke Toro snow blowers, including both single-stage and dual-stage models. It’s compatible with Power Clear, Power Max, and similar gas-powered units. The kit is not designed for two-stroke engines or electric models.
Why does my Toro snow blower run poorly then die?
Partial carburetor clogging restricts fuel flow, causing the engine to run lean and stall under load. A partially blocked main jet or emulsion tube creates this symptom. Cleaning the carburetor thoroughly or using GumBuster typically resolves running and stalling issues.
Key Takeaways for Solving Toro Snow Blower Problems
Fuel system failures cause most Toro snow blower problems, especially after seasonal storage. Stale gasoline creates varnish that clogs carburetors within weeks. Always use fuel stabilizer and either drain the tank or run stabilized fuel through the system before storage.
Electric models with no-start symptoms usually need simple brush and commutator cleaning with isopropyl alcohol. This free fix resolves 90% of electric motor failures and takes under 30 minutes.
For fast carburetor repairs, GumBuster eliminates disassembly and gets most units running in 15 minutes. Reserve full teardown and ultrasonic cleaning for heavily contaminated carburetors. Regular maintenance prevents the conditions that cause failures in the first place.



