Winter storms can turn your driveway into a workout, but a Toro snow blower changes the game. Whether you own a single-stage, two-stage gas, or battery-powered model, learning how to use a Toro snow blower correctly makes snow removal faster, safer, and far less exhausting. This guide breaks down everything from first-time setup to seasonal storage, so you can tackle any snowfall with confidence.
You will learn how to assemble your machine, start it in cold weather, adjust settings for different snow conditions, clear your driveway efficiently, and keep your Toro running strong for years to come.
Assemble Your Toro Snow Blower Before First Use

Most Toro snow blowers ship partially assembled, but you still need to complete a few steps before the first snowfall. Proper setup prevents breakdowns and ensures safe operation from day one.
Attach the Discharge Chute and Handle
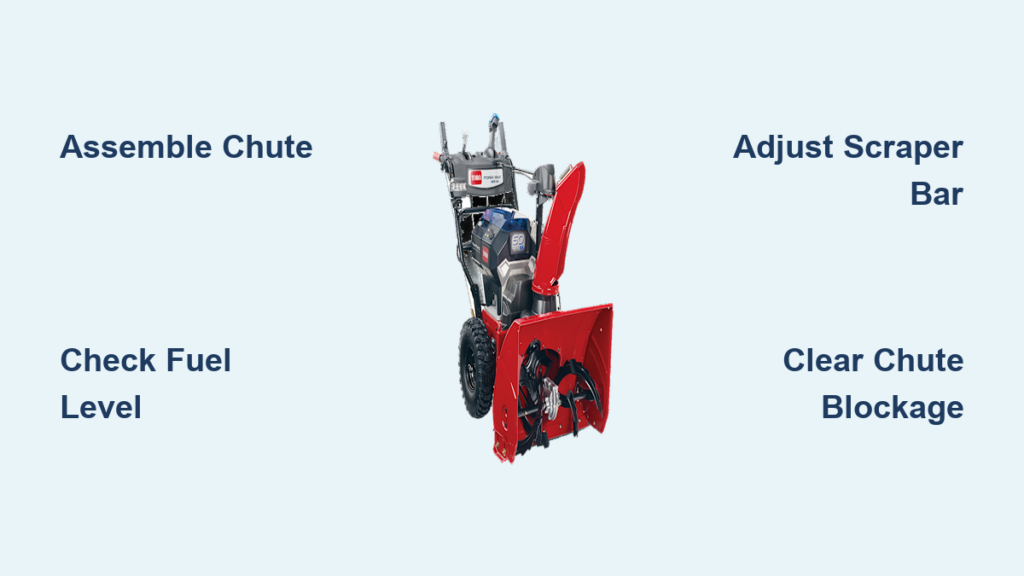
For single-stage and two-stage gas models, secure the discharge chute and fold up the handle according to your model’s manual. Use the included tools to tighten all bolts firmly. Test the chute by rotating it left and right to confirm it locks at multiple angles.
Connect the Battery on Electric Models
If you own a Toro battery two-stage snow blower, slide the battery pack into its compartment until it clicks. Press the charge indicator button to confirm a full charge before your first use. Always use genuine Toro batteries, since aftermarket packs may not communicate properly with the machine.
Add Fuel and Oil to Gas Models
Gas snow blowers need fresh fuel and oil before starting. Use unleaded gasoline with no more than 10% ethanol. Fill the oil reservoir to the “Full” mark on the dipstick using SAE 5W-30 or a similar cold-weather formula.
Follow Essential Safety Steps Before Operating
Snow blowers involve fast-moving parts and sharp augers, so safety always comes first. Spending two minutes on preparation can prevent serious injuries.
Review Built-In Safety Features
Toro snow blowers include several safety systems that protect you during use:
– Operator Presence Control (OPC): The engine only runs while you hold this lever against the handle.
– Discharge chute safety: The engine shuts down automatically if the chute is removed or tampered with.
– Key switch on select models: Prevents unauthorized starting by children or bystanders.
Never disable or bypass these features.
Dress for the Job
Wear insulated, water-resistant boots with good traction. Add gloves, safety glasses, and high-visibility outerwear if you are clearing snow near roads. Avoid loose scarves, hoodies, or jackets that can get pulled into the auger.
Start Your Toro Snow Blower the Right Way
Cold engines can be stubborn, but the right starting technique prevents flooding and wear. Follow the steps that match your model type.
Prime and Choke a Gas Engine
Press the primer bulb three to five times to draw fuel into the carburetor. Move the choke lever to the “Full” position and set the throttle to “Fast” or “Start.” Once the engine runs, gradually reduce the choke over the first minute.
Pull the Recoil Starter Smoothly
Hold the OPC lever down with your left hand. Pull the starter rope with a quick, steady motion using your right hand. Let the rope retract fully before pulling again. If the engine does not start after five pulls, wait 30 seconds to let excess fuel clear.
Start Battery and Electric Models
For battery-powered and electric-start units, insert the safety key and hold the OPC lever. Press the electric start button or pull the assisted start cord. No priming or choking is required.
Adjust Your Snow Blower for Different Snow Conditions

No two snowfalls are alike. Adjusting your Toro for depth, density, and surface type improves performance and reduces strain on the machine.
Set the Scraper Bar Height (Single-Stage)
Adjust the scraper bar bolts so the auger just clears paved surfaces. On gravel driveways, raise the scraper slightly higher to avoid picking up rocks.
Aim the Discharge Chute Safely
Rotate the chute handle to control the throw direction. Use the chute crank on two-stage models to adjust the distance. Always aim away from people, cars, windows, and delicate landscaping.
Match Speed to Snow Density
Use the gear selector on two-stage models to control forward speed. Move slowly in deep or wet snow, and increase speed on lighter powder. This prevents auger stall and keeps the engine running smoothly.
Clear Snow with Pro-Level Technique
How you move across your driveway matters as much as the machine you use. A few smart habits will cut your clearing time in half.
Start with a Test Pass
Begin in an open area to check handling, chute direction, and discharge distance. Make small adjustments before committing to a full pass down your driveway.
Use Overlapping Passes
Overlap each pass by 6 to 12 inches to avoid leaving thin strips of snow. Work from the center of large areas outward, or push snow consistently to one side of the driveway.
Clear Heavy Snow in Layers
When snow exceeds 8 inches deep, remove it in two passes. Take off the top layer first, then go back for the base. This reduces strain on the auger and prevents engine flooding.
Stop Before the Auger Overloads
If the machine slows down or the engine bogs, you are pushing too much snow. Reduce your forward speed or take narrower passes until the auger catches up.
Handle Blockages and Obstructions Safely
Even careful operators encounter clogs, especially in wet or icy conditions. Always shut down the machine before clearing anything.
Shut Off the Engine Completely
Release the OPC lever, turn the key to “Off,” and remove it. Wait for all moving parts to stop before approaching the chute.
Clear the Chute with a Wooden Tool
Use a plastic shovel handle or a broomstick to push compacted snow out of the discharge chute. Never use your hands, and never use metal tools that can damage the chute or spark near fuel vapors.
Check for Ice and Debris
Inspect the auger housing for ice buildup or foreign objects. Remove debris carefully with a wooden stick. On two-stage models, remember that Toro snow blowers do not use shear pins. The commercial-grade gear case shuts off the engine automatically when the auger overloads, so simply clear the obstruction and restart.
Maintain Peak Performance During Use
A little attention during the job keeps your Toro snow blower working at its best.
Prevent Snow from Sticking
Spray the auger, chute, and housing with silicone or non-stick cooking spray before each use. This helps wet snow slide through instead of clumping.
Let the Engine Cool on Long Jobs
After 30 minutes of continuous use, shut down for 5 to 10 minutes. This prevents overheating and extends engine life, especially in heavy, wet snow.
Refuel Only When the Engine is Cool
Never add gasoline while the engine is running or hot. Wipe up spills immediately, and store fuel in an approved container away from the machine.
Shut Down and Store Your Snow Blower Properly
Good shutdown habits protect your machine during storage and make next season’s startup easier.
Turn Off and Disconnect Power
Release the OPC lever, turn the key off, and remove it. On battery models, eject the battery and bring it indoors to a climate-controlled space.
Remove Snow and Debris
Brush off the auger, chute, and undercarriage after every use. Use a plastic scraper for packed snow, but avoid metal tools that can scratch or dent components.
Store in a Dry, Covered Location
Keep your Toro in a clean garage or shed. Cover it with a fitted tarp or snow blower cover to keep out dust and moisture.
Complete Seasonal Maintenance Before Storage

End-of-season care is the single biggest factor in how long your snow blower lasts. Follow these steps once the snow stops falling for the year.
Drain or Stabilize the Fuel System
Add fuel stabilizer to the tank, run the engine for five minutes, then shut it off. Alternatively, drain the tank and carburetor if you prefer long-term empty storage.
Change the Engine Oil
Drain the old oil while the engine is still warm, then refill with fresh SAE 5W-30. Check the dipstick to confirm the correct level.
Inspect the Spark Plug, Air Filter, and Belts
Replace the spark plug once per year. Clean or swap the air filter, and check the drive belt for cracks or fraying. Replace any worn parts before storage so your machine is ready to go in fall.
Sharpen or Replace the Rotor Blades
Inspect the rubber paddles on single-stage models or the metal augers on two-stage models. Replace any that are worn, cracked, or missing chunks.
Troubleshoot Common Toro Snow Blower Problems
Even well-maintained machines can act up. Here is how to diagnose the most frequent issues.
Engine Will Not Start
- Confirm fresh fuel is in the tank.
- Check the spark plug for fouling or incorrect gap.
- Make sure the oil level is at the full mark, since low oil triggers safety shutdowns.
Auger Will Not Turn
- On single-stage models, inspect the drive belt for slippage or damage.
- On two-stage models, confirm the auger control cable is fully engaged and properly adjusted.
Snow Is Not Throwing Far Enough
- Clear any chute blockages.
- Lubricate the chute rotator with light oil.
- Increase engine speed to throw snow farther.
Extend the Life of Your Toro Snow Blower
A few extra habits can push your machine past the 10-year mark with reliable performance every winter.
Run a Pre-Season Winter Checklist
Before the first snow, change the oil, replace the spark plug and air filter, and inspect belts, cables, and the scraper bar. A 15-minute check saves hours of frustration later.
Use Only Genuine Toro Replacement Parts
Belts, blades, batteries, and shear-pin alternatives are designed to fit your exact model. Aftermarket parts often wear out faster or fail to fit properly.
Schedule Annual Professional Service
For deep tune-ups, carburetor cleaning, or transmission issues, visit a certified Toro dealer. Annual service catches small problems before they become expensive repairs.
Frequently Asked Questions About Using a Toro Snow Blower
What type of gasoline should I use in my Toro snow blower?
Use fresh unleaded gasoline with no more than 10% ethanol. Avoid E85 or higher ethanol blends, since they can damage the engine and fuel system.
How do I start a Toro snow blower in extremely cold weather?
Press the primer bulb three to five times, set the choke to full, and pull the starter rope with a quick motion. Once the engine fires, gradually reduce the choke over the first minute.
Do Toro two-stage snow blowers have shear pins?
No. Toro two-stage models use a commercial-grade gear case that shuts off the engine when the auger hits an obstruction or overloads. Simply clear the debris and restart the machine.
How often should I change the oil in my Toro snow blower?
Change the engine oil at the end of every snow season, or after every 50 hours of use, whichever comes first. Use SAE 5W-30 oil for best cold-weather performance.
Can I leave my Toro snow blower outside during winter?
It is better to store it in a garage or shed, but if outdoor storage is your only option, use a heavy-duty fitted cover to protect it from moisture and debris.
Why is my snow blower not throwing snow as far as it used to?
The most common causes are a clogged chute, a worn drive belt, or low engine speed. Clear blockages first, then check the belt condition and throttle setting.
Key Takeaways for Mastering Your Toro Snow Blower
Learning how to use a Toro snow blower comes down to three essentials: prepare your machine, operate it with intention, and maintain it consistently. Start by assembling the chute, handle, and fuel system correctly, then follow safety protocols every time you start the engine. Adjust the scraper bar, chute direction, and speed to match each storm, and clear in overlapping passes to save time.
When you finish the season, take 30 minutes to change the oil, stabilize the fuel, and inspect belts and spark plugs. That small investment pays off with fast startups, reliable performance, and a snow blower that lasts a decade or longer.
Your next step is simple: pull out your owner’s manual, confirm your model number, and stock up on fresh fuel and oil before the first flake falls.