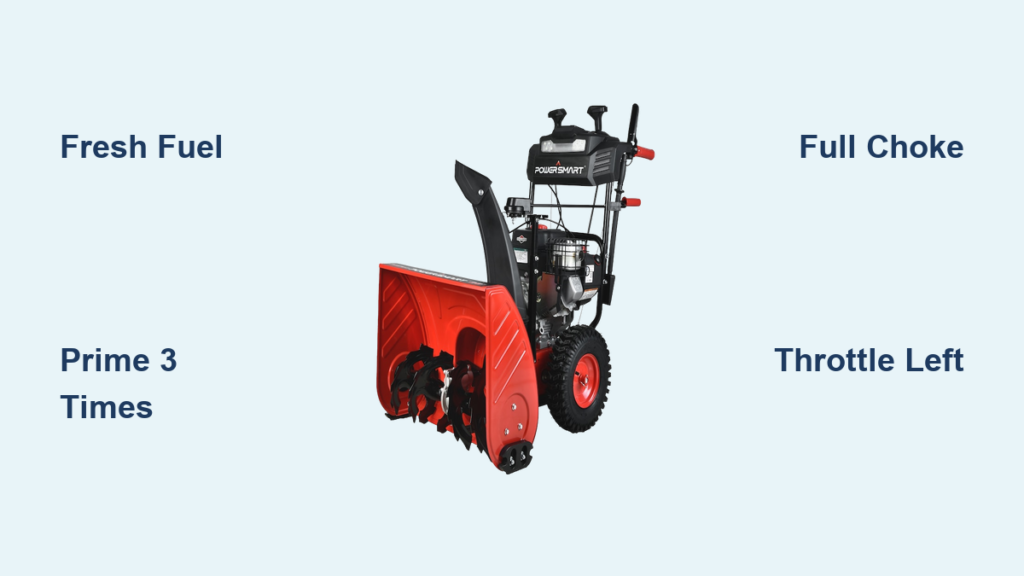
Fumbling with a stubborn snow blower while snow piles up is one of winter’s most frustrating experiences. If you’re trying to start a PowerSmart snow blower and the engine just won’t catch, you’re not alone—cold-weather starting issues are the number one complaint among owners. The PowerSmart 26-inch model (PSSHD26T) with its 212cc engine is a popular residential choice, but its gas-powered design demands specific preparation before each use. This guide walks you through both the electric start and pull start methods, plus the troubleshooting steps that solve 90% of no-start problems. You’ll learn exactly what to press, pull, and check—and what to fix when nothing seems to work.
Pre-Start Checks Before You Crank the Engine

Most failed starts trace back to skipped preparation. Running through these checks takes two minutes and prevents the headaches that follow.
Verify Fresh Fuel and Proper Oil
Old gasoline is the leading cause of hard starts. Fuel left sitting for 30 to 60 days breaks down, gums up the carburetor, and prevents ignition. If you didn’t run the tank dry at the end of last season, assume the fuel is bad. Drain it, refill with fresh gasoline, and add a fuel stabilizer if you’re storing the unit for more than a month.
Check the oil level with the dipstick. Low or degraded oil can prevent cold starts and damage internal components. Top off with SAE 5W-30 or an equivalent if the level sits below the fill mark. Never run the engine with insufficient oil.
Insert the Ignition Key and Set the Throttle
The ignition key must be fully inserted and turned to the “ON” position. A loose or partially turned key stops the electric starter from engaging, and it’s a surprisingly common oversight.
Push the throttle lever all the way to the left. This high-speed position increases engine responsiveness during cold cranking. Units left in a low or neutral setting often fail to catch, even with perfect priming.
Inspect the Spark Plug and Lubricate the Chute
Pull the spark plug and check for fouling, corrosion, or an incorrect gap. The gap should measure between 0.028 and 0.031 inches. A dirty or damaged plug is a top cause of no-start conditions, so clean or replace it as needed. Reinstall securely and reconnect the wire.
Apply silicone lubricant to the chute mechanism. This step doesn’t affect ignition, but it prevents the frustration of a stuck chute right after the engine finally fires.
Electric Start Method: Step-by-Step
When you have access to an outlet, the electric start is the easiest way to get your PowerSmart running. Follow this exact sequence for best results.
Prime the Engine and Connect the Cord
Press the primer bulb three times. The bulb sits on the side of the engine and draws fuel into the carburetor. Three pumps is the official manual recommendation—enough fuel for ignition without flooding the chamber. If the engine stalled on a previous attempt, increase to four or five pumps to enrich the mixture.
Connect a 12-gauge, 10 to 15-foot extension cord with a standard 120V male plug to the snow blower’s female inlet. Never modify the plug or use an adapter. Incompatible cords cause voltage drop, which leads to weak cranking or no response. Test the outlet with another device first to confirm power is flowing.
Press the Starter Button Briefly
With the choke fully closed and throttle set, press the red starter button for two to three seconds only. Do not hold it longer. Prolonged activation overheats the starter motor and can cause permanent damage. A healthy engine fires within this window. If nothing happens, wait 10 seconds before trying again.
Adjust the Choke After the Engine Fires
Once the engine starts, immediately move the choke lever to the halfway position. Leaving it fully closed causes a rich fuel mixture that leads to stalling. In temperatures between 25 and 30°F, the engine stabilizes quickly with half choke. After one to two minutes of warm-up, slide the choke fully open for normal operation.
Pull Start Method for Cold Weather Backup
No power source nearby? The recoil pull start works reliably on well-maintained units and requires no electricity.
Prime, Choke, and Set Throttle
Press the primer bulb three to four times. Then move the choke lever fully to the right, which is the closed position. This restricts airflow and enriches the fuel mixture for cold ignition. Skipping this step is a frequent reason pull starts fail.
Confirm the throttle lever is pushed fully to the left. With the throttle in the correct position, the engine responds immediately to a firm pull.
Pull with a Smooth, Steady Motion
Grasp the starter handle firmly and pull with a smooth, steady motion. Avoid jerking or short yanks—these can damage the recoil mechanism. A firm, full pull engages the engine properly. Most documented cases show the 212cc engine fires on the first or second pull when maintenance is current.
If the engine catches but stalls, re-prime four to five times, keep the choke closed, and pull again. A second attempt usually succeeds. Once running, adjust the choke to halfway to stabilize the idle.
Choke Management for Stable Operation

Correct choke use is critical from the moment you pull the cord until the engine is fully warmed up.
Use Full Choke for Cold Starts
Always begin with the choke fully closed, all the way to the right. This creates the rich fuel-air mix necessary for cold ignition. Attempting to start with the choke open often results in no response at all.
Transition to Half Choke After Ignition
After the engine starts, move the choke to the midway position. This setting balances fuel and air, preventing stalling while allowing the engine to warm up. In temperatures between 25 and 30°F, this position maintains a stable idle without flooding.
Open the Choke When Warm
Once the engine runs smoothly for one to two minutes, slide the choke fully to the left. This returns the engine to normal operating mode. Leaving the choke closed too long wastes fuel and increases carbon buildup inside the engine.
Priming Best Practices and Common Mistakes
Priming ensures the carburetor has enough fuel to ignite. Too little and the engine won’t start; too much and it floods.
Follow the Three-Pump Rule
The manual specifies three priming pumps for optimal cold starts. This amount delivers sufficient fuel without risk of flooding. Many users report success on their first attempt with this exact number.
Increase Priming After a Stall
If the engine stalls after initial ignition, four to five pumps are often needed. The combustion chamber cools quickly, requiring a richer mix for restart. This adjustment resolves most second-attempt failures.
Avoid Over-Priming
Excessive priming, meaning six or more pumps, floods the engine and soaks the spark plug with fuel, preventing ignition. If you suspect flooding, wait five to 10 minutes for the fuel to evaporate, then try again with no priming and the throttle fully open.
Troubleshooting Common Starting Problems

Even with proper steps, issues can arise. Here’s how to diagnose and fix them quickly.
Engine Stalls Immediately After Starting
This is common in cold weather. The fuel mixture becomes too lean once the initial burst burns off. Re-prime four to five times, restart with full choke, then adjust to halfway. If the choke lever feels stiff, that points to a mechanical issue that needs servicing.
No Response from the Electric Starter
If the button does nothing, work through this checklist:
- Check the extension cord connection at both ends
- Verify the ignition key is fully turned to “ON”
- Test the outlet with another device
- Ensure the starter button isn’t stuck or corroded
A faulty cord or loose key are the most frequent culprits.
Engine Won’t Catch at All
No ignition suggests deeper issues. Stale fuel is a common cause, so drain and refill with fresh gas. A dirty carburetor can also prevent starting; one documented unit required a complete carburetor replacement. A faulty spark plug is another likely suspect, so clean or replace it. Finally, double-check that the choke is fully closed. If all else fails, a small amount of starting fluid can help diagnose whether fuel delivery is the problem.
Using Starting Fluid Safely
Starting fluid can jump-start a stubborn engine, but use it as a diagnostic tool rather than a regular solution.
Apply Only When Needed
Spray a one-second burst into the carburetor intake, with the air filter removed, when the engine fails to catch after multiple attempts. This typically indicates fuel delivery issues from stale gas or a clogged carburetor.
Don’t Rely on It Long-Term
Starting fluid is a temporary fix. Repeated use without addressing the root cause leads to recurring problems. Once the engine is running, drain the old fuel and clean the system to prevent future failures.
Maintenance for Reliable Cold Starts
Prevention beats repair every time. Regular upkeep ensures your snow blower starts when you need it most.
Clean the Carburetor Annually
A clogged carburetor is the top cause of hard starting. Remove and clean it with carburetor cleaner, or replace it if damaged. One restored unit performed reliably for five seasons after a carburetor replacement.
Check the Spark Plug Before Each Season
Remove, inspect, and clean the spark plug. Replace it if worn or fouled. A fresh plug ensures strong ignition, especially in cold weather.
Use Fuel Stabilizer or Run Dry
At season’s end, either run the engine dry or add fuel stabilizer and run the engine for five minutes to circulate it. This prevents varnish buildup and ensures smooth starts next winter.
Operating Within the Machine’s Limits
Knowing your snow blower’s limits maximizes performance and extends its lifespan.
Limit Snow Depth to 4 Inches
For best results and engine longevity, clear no more than 4 inches per pass. Deeper snow strains the auger and engine, increasing stall risk. Make multiple passes for heavy snowfalls.
Operate in Temperatures Above 25°F
The PowerSmart 26-inch has been tested successfully between 25 and 30°F. Below this range, starting becomes harder and fuel vaporization drops. Pre-warming the engine in a garage helps in extreme cold.
Stick to Paved Surfaces
This blower is designed for residential use on driveways and sidewalks. Avoid gravel or uneven terrain that could damage the auger or housing.
Frequently Asked Questions About PowerSmart Snow Blowers
Why won’t my PowerSmart snow blower start in cold weather?
Cold weather thickens oil and slows fuel vaporization, making ignition harder. The most common causes are stale fuel, insufficient priming, or a choke that isn’t fully closed. Fresh fuel, three priming pumps, and full choke solve most cold-start problems. If the engine still won’t catch, inspect the spark plug and carburetor.
How many times should I prime my PowerSmart snow blower?
The official manual recommends three priming pumps for a standard cold start. If the engine stalls on the first attempt, increase to four or five pumps for the second try. Avoid more than five pumps, as over-priming floods the engine and prevents ignition.
Can I use any extension cord for the electric start?
No. Use a 12-gauge, 10 to 15-foot extension cord rated for standard 120V household current. The cord must have a male plug that fits the snow blower’s female inlet. Never modify the plug or use an adapter—voltage drop from an incompatible cord leads to weak cranking or no response.
How do I know if my snow blower has stale fuel?
If the engine cranks but won’t catch, and you didn’t run the tank dry at the end of last season, stale fuel is likely the culprit. Gasoline degrades in 30 to 60 days. Drain the old fuel, refill with fresh gasoline, and add a fuel stabilizer before storage to prevent future issues.
When should I use starting fluid on my snow blower?
Use starting fluid only as a diagnostic tool when the engine fails to catch after multiple normal starting attempts. Spray a one-second burst into the carburetor intake and try again. If the engine starts, fuel delivery is the problem—usually stale gas or a clogged carburetor. Address the root cause rather than relying on starting fluid regularly.
What maintenance prevents starting problems?
Three tasks prevent most starting issues. First, use fresh fuel or add stabilizer before storage. Second, clean or replace the spark plug annually. Third, clean the carburetor every season or replace it if damaged. Running the engine dry at season’s end also prevents stale fuel problems.
Key Takeaways for Starting Your PowerSmart Snow Blower
Reliable starting comes down to three things: fresh fuel, correct priming, and proper choke management. Always begin with three primer pumps, full choke, and throttle fully to the left. Use the electric start when power is available, but don’t hesitate to use the pull start on well-maintained units—it fires on the first or second pull in most cases.
Before winter arrives, drain old fuel, clean the carburetor, and inspect the spark plug. These 10 minutes of preparation save hours of frustration when the first snowfall hits. With proper care, your PowerSmart can deliver five seasons or more of dependable service, just like documented units that have cleared 50+ driveways in a single season without issue.