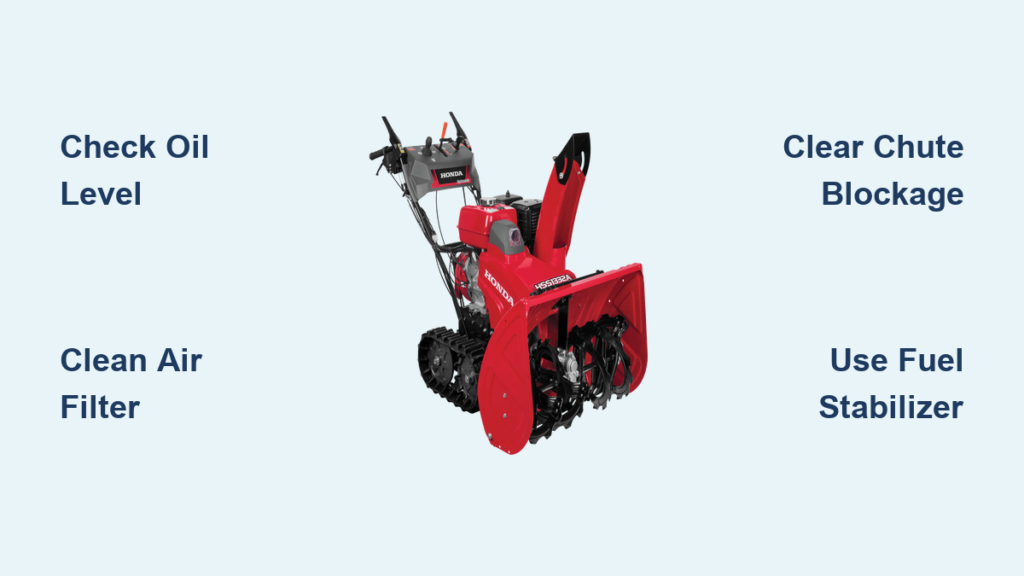
If your Honda snow blower isn’t starting smoothly, losing power, or making strange noises, the issue likely stems from skipped maintenance rather than mechanical failure. Regular upkeep keeps your machine reliable in harsh winter conditions and extends its lifespan for years. With proper Honda snow blower maintenance, you’ll avoid frustrating breakdowns mid-storm and reduce long-term repair costs.
This guide covers every essential step, from pre-season prep to post-season storage. You’ll learn how to inspect critical components, prevent common issues, and keep your unit running at peak performance. Whether you own a single-stage or two-stage model, these actionable tips will save you time, money, and stress when snow hits.
Pre-Season Inspection Steps

Before the first snowfall, a thorough check ensures your Honda snow blower starts on command and performs efficiently. Skipping this step risks poor performance or engine damage from stale fuel, worn parts, or debris buildup.
Check Engine Oil Level
Locate the dipstick near the engine cylinder and remove it to inspect oil level and condition. The oil should be clear amber; dark or milky oil signals contamination or age. Top off with 10W-30 four-stroke motor oil if low. Never operate with insufficient oil, as it causes rapid engine wear.
Pro Tip: Change the oil annually, even if it looks clean. Old oil loses lubricity and accumulates moisture over time.
Inspect Spark Plug Condition
Remove the spark plug using a socket wrench and examine the electrode. Look for carbon buildup, corrosion, or a wide gap. A healthy plug has a light tan or gray tip. Replace the spark plug if you notice cracks, oiliness, or excessive wear.
- Gap setting: 0.028–0.031 inches (0.7–0.8 mm)
- Recommended plug: NGK BPR6ES or equivalent
Reinstall the plug snugly and reconnect the wire.
Fuel System Readiness
Old gasoline degrades within 30 days, forming varnish that clogs the carburetor. For optimal performance:
- Drain old fuel from the tank and run the engine until it stalls.
- Refill with fresh, unleaded gasoline (87 octane or higher).
- Use fuel stabilizer if storing for more than 30 days.
Warning: Never use ethanol-blended fuels over E10. Higher ethanol attracts moisture and damages rubber and plastic parts.
Clear Snow Discharge Path
A blocked chute or auger housing reduces throwing distance and strains the engine. Always disconnect the spark plug before cleaning.
Unclog Chute and Housing
Use a plastic scraper or gloved hand to remove packed snow and ice from:
- Discharge chute
- Auger housing
- Impeller fins
Never use metal tools, since they can damage plastic components or create sparks.
Inspect Auger and Paddles
On single-stage models, check rubber paddles for wear. If paddle height is less than 1 inch, replace in pairs. For two-stage blowers, ensure auger blades spin freely and show no cracks or bends.
Visual Cue: Uneven wear may indicate misalignment or bearing issues.
Engine Starting Troubleshooting
When the engine won’t start or runs poorly, follow this diagnostic path to identify the root cause.
No Start: Check Fuel and Spark
- Confirm fresh fuel in the tank with stabilizer.
- Prime the engine (if equipped) with 3–5 bulb presses.
- Pull starter cord with choke engaged.
If no ignition occurs:
- Test for spark by grounding the plug and pulling the cord.
- If there’s no spark, replace the plug or check the ignition coil.
Rough Running or Stalling
Common causes include:
- Clogged carburetor jets
- Dirty air filter
- Partial fuel blockage from kinks or debris
Fix: Remove and clean the carburetor bowl if the engine sputters or idles unevenly.
Replace Air Filter Regularly

A clogged air filter restricts airflow, causing hard starting and reduced power.
Remove and Inspect Filter
Locate the filter housing on the side of the engine. Open the cover and pull out the foam or paper element.
- Foam filters: Wash in warm, soapy water, dry, then lightly oil before reinstalling.
- Paper filters: Replace if dirty; do not clean or oil them.
Frequency: Check every 25 hours of use and replace or clean at least once per season.
Adjust Drive and Auger Cables

Proper cable tension ensures smooth operation of the auger and drive system.
Test Auger Engagement
With engine off and spark plug disconnected, engage the auger lever. The auger should lock firmly with minimal slack.
If engagement feels delayed:
- Locate the adjustment nut near the control lever.
- Tighten clockwise to increase tension.
- Test until engagement is immediate but not overly stiff.
Calibrate Drive System
On two-stage models, uneven drive cable tension causes veering or sluggish movement.
- Loosen the cable anchor bolt.
- Adjust so both wheels turn simultaneously when engaged.
- Retighten and test in a cleared area.
Tip: Lubricate cable housings annually with silicone spray for smooth action.
Sharpen or Replace Blades
Dull blades reduce efficiency and increase strain on the engine.
Remove Auger for Sharpening
- Tip the machine forward onto a soft surface.
- Secure the auger and remove retaining bolts.
- Pull out the auger assembly carefully.
Use a file or grinder to restore edge bevel at a typical 25° angle. Maintain balanced weight by removing equal material from both ends.
When to Replace: Install a new auger if you spot cracks, warping, or excessive thinning.
Winter Storage Preparation

Proper off-season care prevents corrosion, fuel system damage, and starting issues next year.
Drain or Stabilize Fuel
Choose one method:
- Drain completely: Run engine until the fuel line is dry.
- Stabilize: Add fuel stabilizer to a full tank and run for 5 minutes to circulate.
Best Practice: Stabilized fuel lasts up to 12 months; draining eliminates varnish risk.
Clean Machine Thoroughly
Remove all snow, ice, and salt residue from:
- Chute and housing
- Undercarriage
- Wheels and scraper bar
Dry completely to prevent rust.
Store in Dry, Covered Area
Keep the snow blower in a garage or shed away from moisture and temperature swings. Cover with a breathable tarp and avoid plastic, which traps condensation.
Maintenance Schedule by Usage
Follow this timeline to stay ahead of wear and avoid unexpected failures.
After Every 5 Hours of Use
- Check oil level
- Clear discharge chute
- Inspect for loose bolts or damage
End of Season (Annual)
- Change engine oil
- Replace spark plug
- Clean or replace air filter
- Inspect belts (two-stage models)
- Lubricate control cables and auger bearings
Every 2 Years
- Replace fuel lines
- Inspect ignition coil output
- Check impeller wear (two-stage)
Frequently Asked Questions About Honda Snow Blower Maintenance
How often should I change the oil in my Honda snow blower?
Change the oil at least once per season, even if it appears clean. Old oil loses lubricity and can accumulate moisture that damages engine components. Always use 10W-30 four-stroke motor oil for best results.
What type of spark plug does a Honda snow blower use?
Most Honda snow blowers use an NGK BPR6ES spark plug or equivalent. Check your owner’s manual for the exact specification. Set the gap to 0.028–0.031 inches (0.7–0.8 mm) for reliable ignition.
Can I leave fuel in my snow blower over the summer?
You can leave fuel if you add a quality fuel stabilizer and run the engine briefly to circulate it. Stabilized fuel lasts up to 12 months. Alternatively, drain the tank completely and run the engine until it stalls to prevent varnish buildup.
How do I know when to replace the auger paddles?
Replace rubber paddles when the height measures less than 1 inch. Always replace them in pairs to maintain balanced performance. Worn paddles significantly reduce throwing efficiency.
What happens if I use ethanol fuel higher than E10?
Ethanol blends above E10 attract moisture and damage rubber seals and plastic components inside the fuel system. Stick to unleaded gasoline with no more than 10% ethanol to protect your machine.
Where can I download the official Honda snow blower owner’s manual?
Visit the official Honda Power Equipment website and navigate to the Owner’s Manuals section. Select your specific series (single-stage or two-stage) and model to download the manual.
Key Takeaways for Honda Snow Blower Maintenance
Consistent Honda snow blower maintenance keeps your machine starting reliably, performing strongly, and lasting for many winters. Focus on the three areas that prevent most breakdowns: fresh fuel with proper stabilizer, clean oil changed annually, and a clear discharge path free of packed debris.
Schedule maintenance like clockwork and keep basic tools on hand so you’re never caught off guard. Always refer to your specific model’s owner’s manual for torque specs and part numbers. When the next blizzard hits, your preparation will pay off with a snow blower that starts on the first pull and clears your driveway without complaint.