
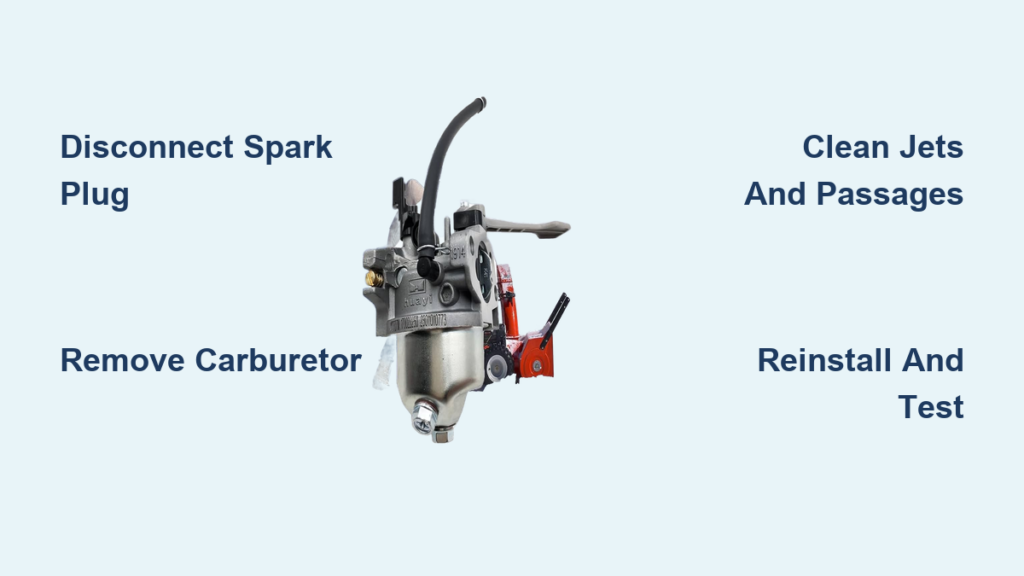
A clogged or dirty carburetor is one of the most common reasons your Toro snow blower won’t start or runs roughly after long storage. Old fuel breaks down and leaves sticky varnish that blocks jets and passages, disrupting the air-fuel mixture your engine needs. If you’re dealing with hard starts, stalling, or rough idling, a thorough carburetor cleaning can often restore performance without costly repairs.
This guide shows you how to clean a Toro snow blower carburetor step by step. You’ll learn how to remove, disassemble, clean, and reinstall the carburetor using basic tools. The process takes about 30 to 60 minutes and works for most Toro models, including Power Clear, SnowMaster, and Track Drive snow blowers.
Prepare Your Work Area and Safety Gear
Before touching any engine parts, set up a clean, well-lit workspace. A garage workbench or flat driveway works well. Make sure the snow blower is off and the engine is completely cool.
Disconnect the Spark Plug First
Always disconnect the spark plug wire before starting any carburetor work. This prevents accidental starts and keeps you safe around fuel components. Pull the rubber boot off the plug and tuck it to the side.
Gather Tools and Supplies
Have everything ready before you begin. You will need:
– Socket wrench or screwdrivers sized for your model
– Small container for holding small parts
– Carburetor cleaner spray with a precision straw
– Nylon brush or soft toothbrush
– Compressed air (optional but helpful)
– Replacement carburetor kit if jets or gaskets are damaged
– Safety glasses and chemical-resistant gloves
Avoid wire brushes or metal picks, as they can scratch or enlarge delicate jet openings.
Locate and Remove the Carburetor
The carburetor sits on the side of the engine, usually near the air filter housing. It connects to the fuel line, throttle linkage, and sometimes a choke cable.
Identify the Mounting Style
Toro carburetors typically mount in one of two ways:
– Two bolts with a fuel bowl underneath
– A single bolt with a flange-style base
Check your model before loosening hardware.
Disconnect the Fuel Line Safely
Pinch the fuel line with needle-nose pliers and slide it off the carburetor inlet. Place a rag under the area to catch any spilled fuel. If the line feels brittle or cracked, replace it to prevent air leaks later.
Detach Throttle and Choke Linkages
Use a small wrench to unhook the throttle rod and choke lever. Snap a photo of their positions first, so you can reinstall them correctly later.
Remove the Mounting Bolts
Loosen and remove the carburetor mounting bolts. Gently wiggle the unit free from the engine. Watch for small washers, gaskets, or spacers that may fall out.
Disassemble the Carburetor Carefully

Lay all parts on a clean towel in the order you remove them. Working methodically prevents lost screws and springs.
Remove the Fuel Bowl and Float
Turn the carburetor upside down. Unscrew the bowl nut or screws and lift off the bowl. Look for dark sludge or water droplets inside.
Slide out the float pin and remove the float and needle valve. Inspect the needle tip closely. If it is worn, grooved, or cracked, replace it.
Take Out the Jets
Unscrew the main jet and idle jet using a small wrench. These are usually small brass tubes threaded into the carburetor body. Place them in a labeled container so they don’t get lost.
Some models include an emulsion tube or pilot jet. Handle these gently to avoid bending or scoring.
Clean All Parts Thoroughly
This step removes the varnish, gum, and debris that block fuel passages.
Spray Carburetor Cleaner Into All Passages
Apply carburetor cleaner with the extension straw directly into:
– Main jet hole
– Idle jet passage
– Fuel bowl cavity
– Venturi throat where air flows through
– Choke and throttle bores
Let the cleaner soak for a few minutes on heavy deposits.
Brush and Flush Visible Areas
Scrub exterior surfaces with a nylon brush or soft toothbrush. For tight internal passages, rely on cleaner solvent and compressed air rather than poking with tools. Never use wire to clear jets, since this can enlarge or damage the orifices.
Soak Stubborn Components in Cleaner
If buildup is heavy, soak the metal carburetor body in a carburetor dip for 15 to 30 minutes. Remove all rubber and plastic parts, such as the float, before soaking. Rinse thoroughly with clean solvent and let everything dry fully.
Reassemble the Carburetor
Reinstall parts in the reverse order of disassembly.
Reinstall the Jets and Float
Screw the main and idle jets back in gently. Overtightening can strip the soft brass threads. Reattach the float and needle valve, then secure the fuel bowl with a fresh gasket if the old one is cracked or hardened.
Check the Float Level If Applicable
Some models require a float level adjustment to prevent flooding. Hold the carburetor level and measure the float gap with a ruler. Refer to your engine manual for the exact specification, usually around 0.5 to 0.7 inches.
Reinstall the Carburetor on the Engine

Now return the cleaned carburetor to the engine.
Reconnect the Fuel Line
Push the fuel line firmly back onto the carburetor inlet. It should fit snugly without clamps on most Toro models. Replace the line if it feels loose or stiff.
Reattach Throttle and Choke Linkages
Reconnect the throttle rod and choke lever in their original positions. Move them by hand to confirm smooth pivot action.
Tighten the Mounting Bolts
Secure the carburetor mounting bolts evenly. Be careful not to over-tighten, especially on aluminum flanges, which can crack easily.
Test Engine Operation
Reconnect the spark plug wire and prepare to start the engine.
First Start Tips
- Prime the engine two to three times if it has a primer bulb
- Set the choke to the full closed position
- Pull the starter cord slowly until you feel resistance, then pull quickly
If the engine does not start within 5 to 10 pulls, wait 30 seconds and try again. Flooding can occur from excessive priming.
Observe Running Behavior
Once running, let the engine warm up with the choke open. Listen for smooth idle and watch for fuel leaks around the carburetor base. If the engine sputters or stalls, recheck jet installation and fuel flow.
Prevent Future Carburetor Problems
A few simple habits can keep your carburetor clean for years.
Use Fuel Stabilizer in Every Tank
Add fuel stabilizer such as Sta-Bil before storing the snow blower. Run the engine for about 5 minutes to circulate treated fuel through the carburetor and fuel lines.
Drain Fuel for Long-Term Storage
If you will store the unit longer than 30 days, drain the fuel tank. Run the engine until it stops on its own to empty the carburetor bowl.
Avoid Old or Ethanol-Heavy Gasoline
Never use gasoline older than 30 days. Ethanol blends absorb moisture and leave varnish quickly. Fresh fuel with stabilizer is the best defense.
Know When to Replace Instead of Clean
Sometimes cleaning will not solve the problem.
Warning Signs of a Bad Carburetor
- Persistent flooding or fuel leaking from the bowl
- Engine will not idle even after a thorough cleaning
- Cracked carburetor body or stripped mounting threads
- No improvement after multiple cleaning attempts
Replacement carburetors and rebuild kits are available for most Toro engines, including Tecumseh and OHV models.
Frequently Asked Questions About Toro Snow Blower Carburetors
How do I know if my Toro snow blower carburetor is clogged?
Common signs include hard starting, rough idle, stalling, reduced power, and visible varnish or gum in the fuel bowl. If the engine runs better with the choke partially closed, the main jet is likely restricted.
Can I clean a carburetor without removing it from the engine?
You can spray carburetor cleaner into the air intake with the engine off, but this only addresses minor buildup. A full clean requires removal and disassembly to reach internal jets and passages.
What is the best cleaner for a Toro snow blower carburetor?
A spray carburetor cleaner like CRC or Berryman B-12 works well for routine jobs. For heavy varnish, soak the metal body in Berryman Chem-Dip for 15 to 30 minutes.
How often should I clean the carburetor on my Toro snow blower?
If you use fuel stabilizer and fresh gas, a full cleaning may only be needed every few years. Clean the carburetor whenever you notice starting or running problems after storage.
Is it cheaper to clean or replace a Toro snow blower carburetor?
Cleaning is almost always cheaper. A can of carburetor cleaner costs a few dollars, while a replacement carburetor runs $25 to $60 plus installation time. Cleaning also preserves the original factory settings.
Key Takeaways for Cleaning Your Toro Snow Blower Carburetor
A clean carburetor is the foundation of reliable winter starts. Disconnect the spark plug first, work methodically, and use proper carburetor cleaner rather than metal tools. Reassemble carefully and always use fresh fuel with stabilizer to prevent future buildup. If problems persist after a thorough cleaning, replacing the carburetor is a straightforward next step.



