Installing lawn edging is one of the most effective ways to elevate your landscape’s appearance while reducing long-term maintenance. Whether you’re separating grass from flower beds, containing gravel, or defining a walkway, the right edging creates clean lines and stops invasive grass roots in their tracks. But simply placing a strip of plastic around a bed will not cut it. How to install lawn edging correctly determines whether it lasts years or fails in months. This guide walks you through every critical step, from planning and trenching to staking and finishing, so your edging stays secure and effective for decades.
You will learn which materials work best for curves or straight runs, how deep to dig, and why staking matters more than the material itself. Whether you are using plastic, metal, rubber, or stone, proper installation is the key to durability. Let us build a boundary that holds its line, no matter what the lawn throws at it.
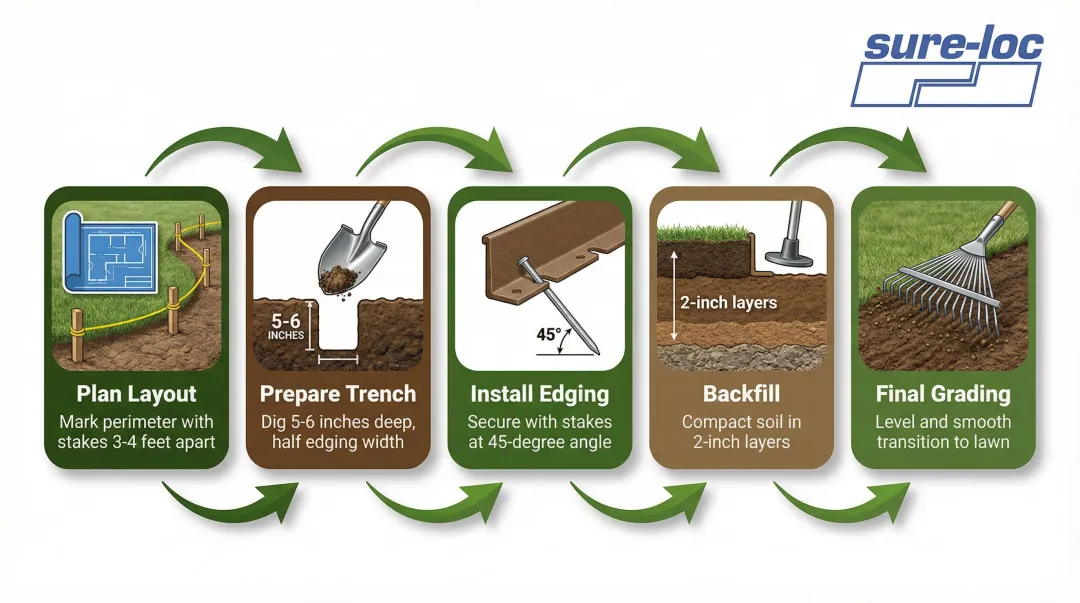
Plan the Edging Layout Before Digging
Before any tools hit the ground, map out where edging will go. Poor placement leads to awkward lines, mowing hazards, or wasted effort. The goal is function and flow.
Mark Curves with a Garden Hose
For smooth, natural-looking curves, lay a garden hose along the path you want. Adjust bends until the shape feels balanced with your landscape. Once satisfied, spray paint along the hose or sprinkle flour to transfer the line. This method prevents jerky or forced curves that look unnatural.
Use String for Straight Lines
For driveways, patios, or formal beds, stretch twine between stakes. Keep the string taut and eye-level to ensure a straight, consistent line. Check alignment every few feet. For long runs, use a line level to avoid unintended slopes.
Measure Total Length Accurately
Cut twine along curved lines and measure it to calculate edging needed. Add ten percent extra for adjustments, overlaps, or unexpected curves. Running short mid-project leads to mismatched joints or weak seams.
Pro Tip: Wait a season after installation before planting. This gives time to pull weeds manually, improving soil health and reducing future maintenance.
Choose the Right Edging Material

Not all edging is equal. Your choice affects durability, appearance, and ease of installation. Match the material to your soil, climate, and design goals.
Plastic Edging: Affordable and Flexible
PVC or polyethylene edging is budget-friendly and works well in most soils. Look for six-inch height to block grass rhizomes. Avoid thin, crease-prone types. Invest in UV-stabilized brands for twenty-plus year life.
- Best for: Gentle curves, DIYers, budget projects
- Limitations: Can warp if unstaked, low aesthetic appeal
Metal Edging: Sleek and Durable
Steel or aluminum edging offers a clean, modern look. It resists weather and holds sharp curves when warmed in sunlight. Rustic steel develops a patina that blends into natural landscapes.
- Best for: High-traffic areas, modern designs
- Caution: Can chip if struck by mowers. Keep top one-half inch above grade.
Recycled Rubber: Eco-Friendly and Bendable
Made from recycled tires, rubber edging is flexible and crack-resistant. It conforms easily to tight curves and will not degrade in UV light.
- Best for: Winding beds, eco-conscious projects
- Drawback: Limited color options, may fade over time
Stone or Paver Edging: Longest-Lasting
Brick, concrete, or natural stone edging delivers unmatched durability and curb appeal. It resists frost heave and mowing damage but requires more labor and base prep.
- Best for: Permanent installations, high-end landscapes
- Installation: Needs compacted base and concrete bed
Expert Insight: Stone or paver edging is more durable and has a nice look, according to landscape architect Maureen Smith.
Dig the Trench to the Correct Depth
The trench is the foundation of lasting edging. A poorly dug trench leads to shifting, sinking, or grass invasion.
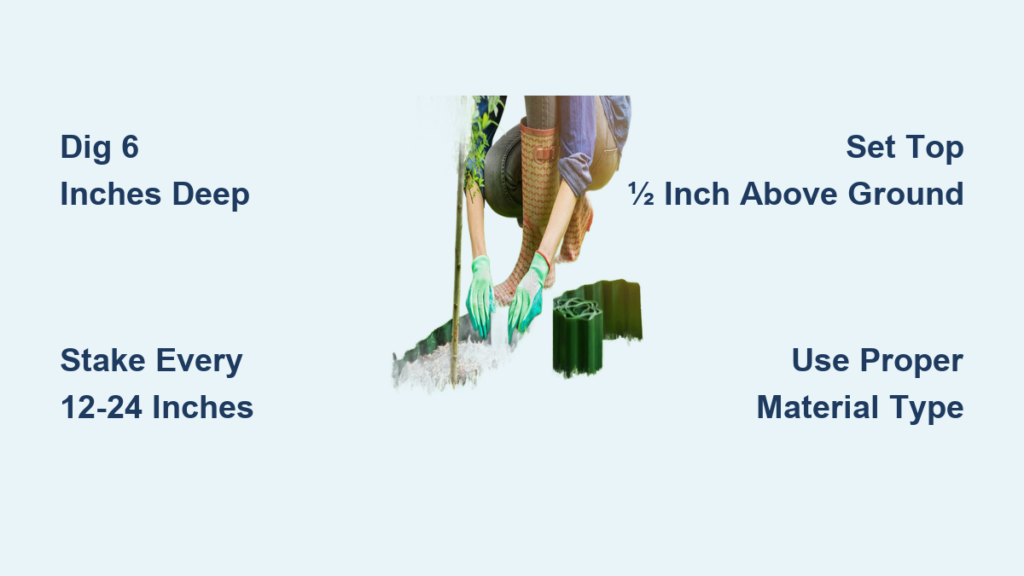
Dig Six Inches Deep for Maximum Protection
Trench depth should be two to three inches deeper than the edging height. For six-inch edging, dig six inches deep, especially in clay-heavy or cold climates. Shallow trenches of three to four inches allow grass roots to tunnel underneath.
Regional Note: In Michigan and similar areas with clay-heavy soil, reach the clay layer to block aggressive weeds like quackgrass.
Shape Trench for Stability
Create a vertical wall on the lawn side and a forty-five degree slope on the bed side. This shape locks the edging in place and prevents lateral movement.
- Alternative: Leave trench one to two inches behind the final line to adjust alignment during backfilling.
Width Guidelines
- Roll-type (plastic, metal, rubber): Just wide enough for edging plus backfill
- Stone or paver edging: Six inches wider than the stone to allow for base and compaction
Install Roll-Type Edging Step by Step
Plastic, metal, and rubber edging follow the same core process. Success lies in preparation, alignment, and staking.
Warm the Edging in Sunlight
Unroll plastic or rubber edging in direct sun for thirty to sixty minutes. This softens the material, reducing curl and making it easier to conform to curves.
Visual Cue: Edging should lie flat without springing back.
Cut and Position the Edging
Lay edging along the trench, anchoring one end with a rock. Use heavy-duty snips or hacksaw to cut to length. For obstacles like roots, cut the edging and bend it over the obstacle.
Set Edging at Correct Height
Press edging into the trench against the vertical wall. The top should sit one-half inch above grade, high enough to block grass, low enough to avoid mower strikes.
Stake Every Twelve to Twenty-Four Inches
Use six-inch steel stakes or nails driven horizontally or at forty-five degrees through the edging into the trench wall.
- Straight runs: Stake every two to three feet
- Curves, joints, cold climates: Stake every twelve to eighteen inches
Pro Tip: Six-inch nails are cheaper and just as effective as commercial stakes.
Join Sections Securely
For seamless joints, follow these steps:
- Cut off four-inch top bead from one section
- Overlap ends and use H-clip or connector
- Drive a stake through both layers
For PVC, apply PVC cement to both sides before joining. Work quickly because glue sets fast.
Lay Stone or Paver Edging Properly
Stone edging requires more prep but offers unmatched durability and appearance.
Prepare a Solid Base
Excavate four to five inches deep and six inches wider than the stone. Slope the base point seventy-five percent away from the house for drainage.
Add and Compact Road Crush
Fill with three to four inch layers of road crush (crushed rock with fines). Tamp each layer with a vibrating tamper. Lightly mist with water to enhance compaction.
Optional: Pour Concrete Bed
For maximum stability, pour two or more inches of wet concrete over the base. Use a four-to-one mix of road crush to Portland cement for strength and cost savings.
Set and Level the Stones
Place stones on the wet bed. Use a two-by-four board across the top and tap with a mallet to align and level.
- Ensure even spacing
- Keep tops flush for a clean look
Fill Joints with Polymeric Sand
After curing, sweep polymeric sand into gaps. Do not wet immediately. Wait until all joints are filled. Water activates the polymer, hardening the sand.
- Drying time: At least twenty-four hours
Stake for Frost Resistance
Use nine-and-a-quarter-inch non-bending steel stakes every two feet. Drive at forty-five degrees toward the pavers or through the horizontal tab to prevent heave.
Note: Final pavers can be placed on top of the edging horizontal leg for full support.
Backfill and Finish Smoothly
Backfilling locks the edging in place and restores the surface.
For Roll-Type Edging
- Backfill both sides with excavated soil
- Pack soil more firmly on the side needing support
- Adjust edging height as you go
- Tamp gently to remove air pockets
- Smooth with a rake
Replace mulch, gravel, or decorative rock.
For Stone Edging
Backfill only after concrete has cured (twenty-four to forty-eight hours). Pull soil and mulch up to cover the base of the stones. Avoid walking on stones during this period.
Avoid landscaping fabric if the base is compacted. It tears easily and can trap moisture.
Handle Curves and Obstacles Smartly
Even the best plan meets challenges. Know how to adapt.
Dry-Fit Before Final Install
Lay edging loosely along curves to test flow. Let it relax into shape. Do not force bends. Adjust stakes as needed for smooth alignment.
Manage Roots and Rocks
- Thick roots: If stable and not in the way, leave in place
- Rocks: Remove if possible, otherwise cut and bend edging over
Install in Cold Climates with Care
Frost heave is the enemy of unstaked edging.
Stake Aggressively
In freezing zones, stake every twelve inches, especially at joints and curves. Unstaked edging will shift and fail.
Install Below Frost Line If Possible
Deeper installation (six-plus inches) reduces heave risk. Compact soil thoroughly and avoid air pockets.
Maintain Edging for Long Life
Even the best installation needs light upkeep.
Inspect Annually
Check for shifting, especially after winter. Re-stake loose sections immediately.
Keep Top Clear
Avoid piling mulch over the edging top. This hides the barrier and lets grass creep over.
Mow Smart
Do not ride mowers over edging. Keep a safe distance to prevent chipping or bending.
Replace Low-Grade Materials
Generic plastic creases and cracks. Invest in quality brands with UV protection and better shape retention.
Expert Consensus: Proper installation is more important than material choice. Even cheap plastic lasts decades when staked and buried correctly.
Compare Edging Types at a Glance
| Feature | Plastic | Metal | Stone | Rubber |
|---|---|---|---|---|
| Cost | Low | High | High | Medium |
| Install Ease | Moderate | Moderate | Hard | Easy |
| Durability | 20+ years | 25+ years | 30+ years | 15-20 years |
| Curve Flexibility | Good | Good | Poor | Excellent |
| Rhizome Block | 5-6 inch needed | Excellent | Excellent | Good |
| Mower Safety | Safe | Risk of chipping | Safe | Safe |
| Aesthetic | Minimal | Modern/rustic | High | Natural |
Key Takeaways for Installing Lawn Edging
- Invest in quality edging that pays off in longevity
- Use a level when unrolling to avoid slopes
- Cut sod with a half-moon edger for clean removal
- Backfill with topsoil, then add two to three inches of mulch
- Stay hydrated because this is physically demanding work
The best edging is nearly invisible, just a clean line that keeps chaos at bay. With the right depth, staking, and material, your lawn edges will stay sharp for decades.
Frequently Asked Questions About Installing Lawn Edging
How deep should I dig the trench for lawn edging?
Dig the trench six inches deep for standard edging. This depth ensures the edging sits deep enough to block grass rhizomes from tunneling underneath. In clay-heavy soils or areas with aggressive weeds like quackgrass, dig down to the clay layer for maximum protection.
What is the best type of edging for DIY installation?
Plastic and rubber edging are easiest for DIY installation. Plastic is affordable and flexible, while rubber offers excellent curve conformance. Both materials are lightweight and require basic tools. Stone and paver edging require more labor and experience.
How often should I stake the edging?
Stake roll-type edging every twelve to twenty-four inches. Use tighter spacing (twelve inches) on curves, at joints, and in cold climates where frost heave is a concern. Straight runs can use wider spacing up to three feet.
Should the edging sit above or below the ground level?
The top of the edging should sit one-half inch above grade. This height blocks grass rhizomes from crossing while staying low enough to avoid mower damage and tripping hazards. Any higher and it becomes a mowing obstacle.
Can I install edging in rocky soil?
Yes, but it requires more effort. Remove rocks when possible. If rocks are immovable, cut the edging and bend it over the obstacle. Avoid hammer-in edging types in rocky soil because they are difficult to drive and may bend or break.
How long does properly installed lawn edging last?
Quality plastic edging lasts twenty or more years when properly installed with correct staking and depth. Metal edging lasts twenty-five years or longer. Stone and paver edging can last thirty years or more with minimal maintenance.
Final Thoughts on Installing Lawn Edging
Installing lawn edging is a straightforward project that delivers lasting results when done correctly. The most critical factors are digging to the proper depth (six inches), staking frequently enough to prevent shifting, and choosing quality materials. Proper installation matters more than expensive materials. Even budget plastic edging lasts decades when buried deep and secured with adequate stakes.
Take time to plan your layout, choose materials suited to your climate and soil, and do not rush the staking process. The small investment in preparation pays off in edges that stay straight and effective for years to come. Your landscape will look polished, and you will save hours on maintenance.