Winter storms bring beauty, but they also bring the chore of clearing snow-covered driveways and walkways. If you own an electric snow blower, you already have a quieter and more eco-friendly alternative to gas-powered models. But when the snow starts falling, knowing how to start an electric snow blower quickly and safely makes all the difference.
Whether you use a corded or cordless (battery-powered) model, this guide walks you through every step without confusion. You will learn essential prep steps, common startup mistakes to avoid, and simple troubleshooting if your blower does not turn on.
Prepare Your Work Area Before Starting
Setting up your work area correctly helps you start safely and avoid interruptions mid-clearing.
Clear Debris and Obstacles From the Path
Pick up sticks, rocks, or garden tools from your driveway or walkway. These objects can jam the auger or damage internal components if pulled into the impeller.
Assess Snow Depth and Type
Electric snow blowers perform best on fresh, light snow up to 8 inches deep. Wet, heavy snow or icy layers can overload the motor. If the snow exceeds your model’s capacity, break it into smaller passes or remove some by shovel first.
Dress for Cold-Weather Safety
Wear insulated, waterproof boots, gloves, and high-visibility clothing. Avoid loose sleeves, scarves, or drawstrings that could catch in moving parts.
Corded vs. Cordless: Identify Your Snow Blower Type

Knowing your power source ensures you follow the correct startup procedure for your specific model.
Determine Your Power Source
- Corded models plug directly into an outdoor-rated electrical outlet.
- Cordless models run on rechargeable lithium-ion batteries (typically 24V, 40V, or 80V).
Each type has unique startup steps and power limitations.
Match the Extension Cord to the Blower (Corded Models)
For corded blowers, plug into a ground fault circuit interrupter (GFCI) outlet to prevent shock in wet conditions. Choose your extension cord gauge based on distance:
- 14-gauge wire for runs up to 50 feet.
- 12-gauge wire for runs of 50 to 100 feet.
- Never exceed 100 feet total.
A mismatched cord causes voltage drop, which leads to weak performance or motor burnout.
Pre-Startup Safety Checks Every Time
Skipping safety checks risks injury or equipment damage. Spend two minutes inspecting key components before each use.
Inspect the Power Cord for Damage
Look for cuts, frays, or exposed wires along the entire length. Never operate a snow blower with a damaged cord; replace it immediately. Coil the cord loosely to prevent tripping or accidental pulling.
Charge the Battery Fully (Cordless Models)
Confirm the battery is fully charged before heading outside. Most batteries need 2 to 4 hours to charge completely. Store batteries at room temperature before use, since cold batteries lose power faster.
Check the battery indicator light. If it blinks red or fails to hold a charge, the battery may need replacement.
Examine the Auger and Discharge Chute
With the power disconnected, rotate the auger by hand to confirm it spins freely. If it feels frozen or stuck, clear snow or ice with a plastic tool. Never use your hands.
Confirm the discharge chute is clear and rotates smoothly without resistance.
How to Start a Corded Electric Snow Blower
Follow this sequence for a reliable, safe startup every time.
Connect the Extension Cord Safely
Plug the extension cord into the GFCI outlet first, then connect the snow blower to the cord. This order reduces electrical sparking at the outlet.
Keep the connection point elevated off the snow using a plastic tray or bucket to keep moisture away from the plug.
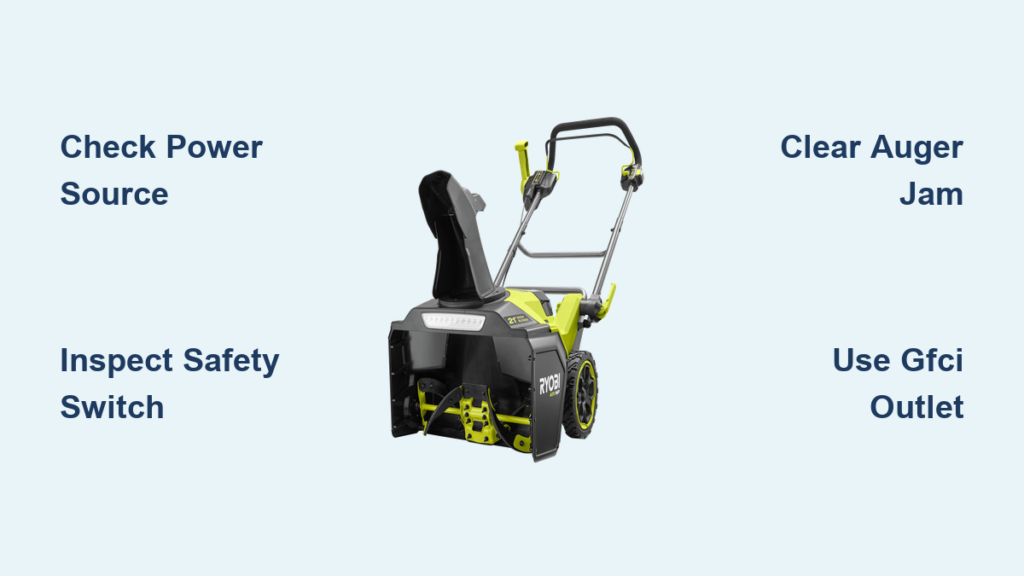
Engage the Two-Stage Safety Switch
Most electric snow blowers use a two-stage trigger system to prevent accidental starts:
- Press and hold the safety lock (usually a red button or lever).
- Squeeze the main operating lever while holding the safety.
Release the safety lock once the motor runs.
Power On the Motor
The motor should start instantly once both controls are engaged. Unlike gas blowers, there is no pull cord and no priming required.
If the motor does not start, troubleshoot with these steps:
- Test the outlet with another device.
- Confirm the extension cord is fully seated.
- Reset the GFCI outlet if it has tripped.
How to Start a Cordless Electric Snow Blower
Battery-powered models offer freedom from cords. Follow these steps for consistent startup.
Insert the Battery Until It Clicks
Slide the battery into its compartment until you hear a click. A loose or partially seated battery prevents startup.
Wipe the battery contacts with a dry cloth if you notice dirt or corrosion.
Activate the Safety Lock
Press the safety lock button (usually near the handle) before squeezing the operating lever. This prevents accidental startup when you pick up or set down the machine.
Squeeze the Start Trigger
Pull the operating lever to engage the auger. The motor should power on immediately with no priming or pulling required.
If nothing happens, try these quick fixes:
- Remove and reinsert the battery.
- Look for a reset button on the blower or battery.
- Test with a second battery if you have one available.
Clearing Snow Effectively After Startup
Starting the blower is just the first step. Use these techniques to clear snow efficiently.
Adjust the Chute Direction First
Use the chute control knob or lever to aim snow to the side or rear. Never point the chute toward people, vehicles, or windows.
Walk at a Steady, Controlled Pace
Electric models clear snow efficiently but work best at a measured pace. Walk slowly and let the auger pull the machine forward at its own speed.
Overlap Each Pass
Overlap your clearing path by 6 to 12 inches on each pass. This prevents ridges of uncut snow and ensures complete coverage.
Troubleshooting an Electric Snow Blower That Won’t Start

Most startup problems have simple solutions you can handle in minutes.
No Power at the Outlet
Check the outlet first. Plug in a lamp or phone charger to confirm power. If the outlet is dead, reset the GFCI or check your home’s breaker panel.
For corded models: Inspect the entire extension cord for damage and replace if necessary.
For cordless models: Test with a different battery or charger. If a battery no longer accepts a charge, it has likely reached end-of-life (typically after 3 to 5 years).
Auger Spins Slowly or Stalls
- Corded models: You may be using an undersized extension cord. Switch to a shorter cord with a thicker gauge.
- Cordless models: The battery may be cold or low on charge. Bring it indoors to warm up before use.
- Both types: Clear any snow jam in the auger housing. Power off the machine, wait 30 seconds, then clear debris with a broom handle.
GFCI Outlet Keeps Tripping
This is common in wet conditions. Reset the outlet and elevate the plug connection off the ground. Use a weatherproof outlet cover for extra protection.
Post-Use Care and Proper Storage
Shutting down and storing your blower correctly keeps it ready for the next storm.
Power Off and Disconnect First
Release the operating lever, then unplug the cord (or remove the battery). Always disconnect power before clearing any jam or debris.
Wipe Down and Dry All Surfaces
Remove snow buildup from the auger, chute, and housing. Wipe metal parts with a dry cloth to prevent rust.
Store Indoors in a Dry Location
Keep your snow blower in a dry garage or shed. Never leave it outside in freezing, wet conditions.
- Corded models: Wrap the cord loosely to avoid kinks.
- Cordless models: Store batteries at 50% charge in a cool, dry place.
Extend Your Snow Blower’s Lifespan With Simple Maintenance
A few minutes of care after each use adds years to your machine.
Clean After Every Use Without Water
Hosing down a snow blower risks moisture damage to electrical parts. Use a dry brush or compressed air to remove debris instead.
Lubricate Moving Parts Seasonally
Apply silicone spray to the auger bearings and chute mechanism once per season. Avoid oil-based lubricants, which attract dirt and debris.
Inspect Wear Parts Annually
Check the scraper bar, skid shoes, and belts (if equipped). Replace worn parts before the next winter season begins.
Critical Safety Reminders
Electric does not mean risk-free. Follow these rules every time you operate your blower.
- Never use the blower in standing water due to electrocution risk.
- Keep children and pets well away during operation.
- Do not force the blower forward; let it move at its own pace.
- Never insert your hands into the chute or auger housing, even with power off.
Frequently Asked Questions About Starting an Electric Snow Blower
Do Electric Snow Blowers Need Oil or Fuel?
No. Electric snow blowers run on electricity from a cord or battery. You never need to add oil, gasoline, or other fuel. This makes them easier to maintain than gas models.
Can I Use an Indoor Extension Cord Outside?
No. Only use extension cords rated for outdoor use. Indoor cords lack the insulation needed to handle moisture and cold temperatures safely.
Why Does My Snow Blower Keep Tripping the GFCI Outlet?
Moisture in the cord connection or a damaged cord usually causes this. Elevate the plug off wet ground, inspect the cord for damage, and reset the outlet. If tripping continues, stop using the blower and consult a technician.
How Long Does a Cordless Snow Blower Battery Last?
Most cordless snow blowers clear 20 to 45 minutes of snow per charge, depending on battery voltage and snow conditions. Higher-voltage batteries (60V or 80V) last longer than lower-voltage options.
Can I Start an Electric Snow Blower in the Snow?
Yes, but keep the electrical connection dry. Plug into a GFCI outlet and elevate the connection off the ground. Do not operate the blower in standing water or during heavy rain.
What Should I Do if the Auger Freezes?
Turn off the power and disconnect the cord or battery. Move the machine to a warm area to thaw, or clear ice with a plastic tool. Never chip at ice with metal tools or your hands.
Final Thoughts on Starting Your Electric Snow Blower
Knowing how to start an electric snow blower correctly saves time, prevents equipment damage, and keeps you safe during winter storms. The process follows a simple pattern: prepare the area, confirm your power source, complete safety checks, and engage the two-stage trigger system. With proper technique and post-use care, your electric snow blower will deliver reliable, quiet, and emission-free performance for many winters to come.
Stay prepared before the snow falls, and you will clear every storm efficiently and safely.