Nothing ruins a snowy morning faster than a snow blower that refuses to start. If you’re standing in your garage, cord in hand, wondering why your Snapper won’t fire up on the first freezing morning of the season, you’re definitely not alone. Whether you’re dealing with a stubborn engine after months of summer storage or battling a sudden mid-winter storm, knowing how to start a Snapper snow blower properly is essential for reliable winter performance.
The good news? Starting your Snapper is straightforward when you follow the correct sequence. From checking oil and fuel to using the choke and primer correctly, every step matters in getting that engine roaring to life. This guide walks you through pre-start checks, ignition setup, all three starting methods (pull cord, electric, and Easy Start), and post-start adjustments. You’ll also get model-specific tips for popular units like the SS822E and 8245, plus troubleshooting solutions for common issues like flooded engines and hard starts.
Pre-Start Safety and Mechanical Checks

Before you touch the starter cord or press any buttons, make sure the machine is safe and ready to run.
Verify the Oil Level
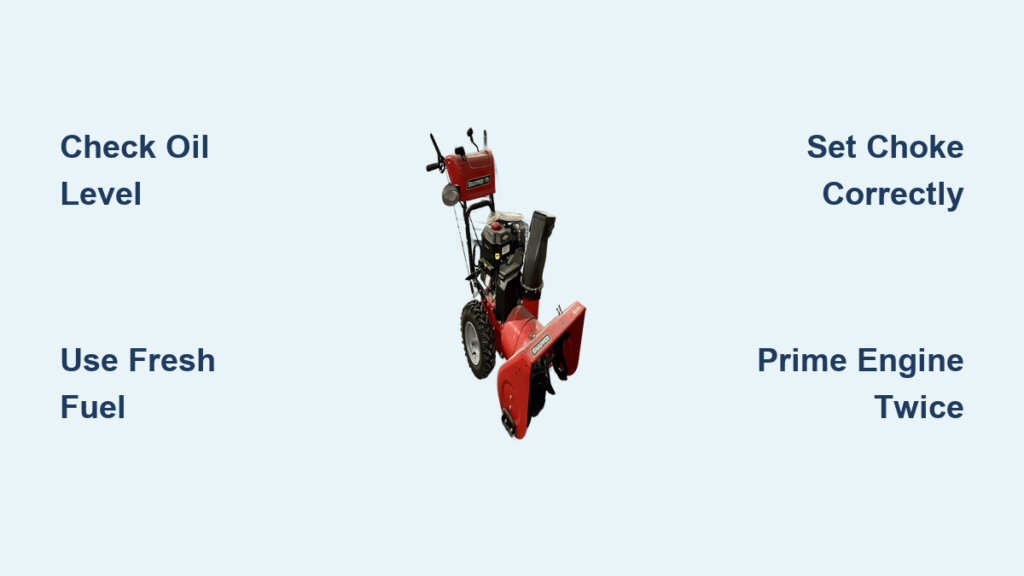
Check the oil before anything else. Remove the oil fill cap and dipstick, then inspect the level. On the Snapper SS822E with its Briggs & Stratton engine, look for the ribbed area on the dipstick, which marks the correct fill range. If oil is low, top it off to that mark, but never overfill, since excess oil can damage the engine. Also, check for fuel in the oil. A milky appearance or gasoline smell signals fuel contamination from a possible carburetor issue or over-priming. Fix this before attempting to start.
Confirm Fuel Type and Level
Use fresh gasoline with at least 87 octane, though 89 is recommended, especially for first starts after storage. Higher octane reduces knocking and improves cold-weather ignition. Avoid fuel containing more than 10% ethanol, which can degrade rubber and plastic components over time. Fill the tank nearly full. If the machine has been stored all summer, confirm the fuel was stabilized; old, gummy gasoline is a leading cause of hard starts.
Disengage the Drive and Auger
Set all controls to neutral before starting. The drive system and auger must be disengaged to prevent sudden movement and reduce engine load during ignition. Starting in neutral is standard practice across all Snapper models and makes the process safer and easier.
Review Safety Guidelines
Read your Snapper Operator’s Manual before the first use of the season. It contains model-specific warnings and procedures you need to know. Never bypass safety features like the safety key or kill switch. Keep hands and feet clear of moving parts at all times. If you’re using electric start, inspect the cord for damage and confirm it’s properly grounded.
Activate the Ignition and Fuel Supply
Once prep is complete, power up the system and enable fuel flow.
Turn the Ignition Switch On
Turn the key or engine switch clockwise until it stops in the ON position. On some models, a plastic safety key must be inserted first. Many owners keep the key in the ignition during the off-season to avoid fumbling in the cold and to ensure it never gets lost.
Open the Fuel Valve
Locate the red fuel shut-off valve near the base of the unit. Turn it counterclockwise until the indicator line aligns parallel with the fuel line. This opens the valve and allows fuel to reach the carburetor. If the valve stays closed, the engine simply won’t start. Keep the valve open during operation and close it only for long-term storage.
Set the Throttle to FAST
Move the throttle control lever to the FAST position. This increases engine speed and slightly enriches the fuel mixture, making ignition easier. Always run the engine at FAST during operation, since leaving it in SLOW can cause stalling and poor performance.
Use the Choke Correctly for Cold Starts

The choke restricts air intake, which is critical for igniting a cold engine.
Engage the Choke Fully for a Cold Engine
For a cold start, turn the choke knob fully clockwise to the CHOKE position. This restricts airflow and enriches the fuel mixture for easier ignition. On models with a safety key, press the key before adjusting the choke.
Adjust the Choke Midway (SS822E Tip)
On the Snapper SS822E, full choke isn’t always ideal. Instead, set the choke midway between fully open and fully closed. This prevents flooding while still providing enough fuel for ignition. Over-choking is a common cause of failed starts, particularly on older or temperamental engines.
Skip the Choke on a Warm Engine
Never use the choke if the engine is warm or has been running recently. Doing so floods the engine. For warm starts, leave the choke in the RUN position and start the engine using your preferred method.
Prime the Engine When Needed
Priming delivers fuel directly to the carburetor, which is essential after storage or in cold conditions.
Press the Primer Bulb Two or Three Times
Locate the primer button or bulb on the engine. Press it two to three times slowly and firmly. This pushes fuel into the carburetor and makes ignition much easier. For the SS822E, two presses are usually enough. Over-priming can flood the engine, especially in warmer conditions.
Don’t Prime a Warm Engine
Just like with the choke, priming is only for cold starts. If the engine is warm, skip this step entirely. Repeated priming without starting leads to flooding and a strong fuel smell.
Start the Engine Using Pull, Electric, or Easy Start
Pick the right starting method based on your model and current conditions.
Pull Cord Start: Step-by-Step
- Hold the starter handle firmly with a secure grip.
- Pull slowly until you feel resistance, which engages the starter mechanism.
- Pull rapidly and fully in one smooth motion.
- If it doesn’t start, wait 10 seconds and repeat, up to three attempts.
Pro Tip: Use the pull cord whenever possible, especially on newer models. It’s reliable and preserves the electric starter for emergencies when you truly need it.
Electric Start: Safe Operation
If your model has electric start, like the Snapper 8245, follow these steps:
- Plug a three-wire extension cord into a grounded wall outlet.
- Connect the other end to the snow blower’s power port.
- Press and hold the start button for no more than five seconds.
- If it doesn’t start, wait one full minute before trying again.
After the engine fires, disconnect the extension cord from the wall outlet first, then from the snow blower. This prevents accidental restarts and reduces electrical risk.
Easy Start (SS822E and Modern Models)
The SS822E includes Easy Start capability, which eliminates the need for pulling a cord:
- Plug the unit into a power source.
- Turn the ignition to ON.
- Set the choke to the midway position (not fully closed).
- Prime the engine twice.
- Press the Easy Start button.
This system is ideal for users with limited strength or mobility. It reduces physical strain and increases reliability, especially in freezing temperatures.
Warm Up and Adjust the Choke
Once the engine fires up, resist the urge to start clearing snow immediately.
Let the Engine Warm Up
Allow the engine to run for two to three minutes before engaging the auger. On older models, run on choke position one for 30 to 60 seconds, then move to position two. This gradual warm-up prevents stalling and ensures smooth operation once you begin working.
Gradually Move the Choke to RUN
After warm-up, turn the choke knob two clicks counterclockwise to reduce fuel enrichment. Then slowly move it to the RUN position as the engine stabilizes. If the engine sputters, open the choke slightly. If it floods, return to RUN and crank without the choke engaged.
Engage the Auger and Start Clearing

Now you’re ready to tackle the snow.
Activate the Auger Control
Once the engine runs smoothly, engage the auger control lever. This spins the auger and begins pulling snow into the machine. On non-self-propelled models like the SS822E, push the unit forward manually.
Watch Out for Forward Pull from New Augers
New auger flights create strong suction and can pull the unit forward on their own. Keep a firm grip on the handlebars and guide the machine carefully, especially on flat or icy surfaces where control is harder to maintain.
Adjust the Chute Direction
Use the chute handle to direct snow left, right, or upward. Make sure the chute is clear of obstructions before rotating it.
Troubleshoot Common Starting Issues

Even with perfect preparation, problems can still occur. Here’s how to handle the most common ones.
Clear a Flooded Engine Fast
Symptoms: Engine won’t catch, strong fuel smell, smoke from the exhaust.
Fix: Set the choke to RUN, throttle to FAST, and pull the cord (or press the start button) without priming. This clears excess fuel from the cylinder. It may take several pulls, but the engine should start once the mixture normalizes.
Diagnose a Hard Start
- Old fuel: Drain the tank and refill with fresh, stabilized gasoline.
- Clogged carburetor: Clean the carburetor or use a fuel additive like Seafoam.
- Choke position: Too much choke floods the engine; too little prevents ignition.
- Priming: Try two or three presses if the engine is cold.
Fix Engine Sputtering or Stalling
- Slightly open the choke to balance the fuel-air mixture.
- Confirm the throttle is set to FAST.
- Check that the fuel valve is fully open and not restricted.
Address a Pull Cord That Won’t Retract
- Inspect the cord for tangles or debris.
- If the cord is broken, the rewind mechanism may need replacement, especially on 8245 models.
- Lubricate the spring mechanism if it feels stiff.
Model-Specific Starting Tips
Different Snapper models have unique quirks worth knowing.
Snapper SS822E: Easy Start Mastery
- Use 89 octane fuel for best results.
- Prime twice and no more.
- Set the choke to midway, not fully closed.
- Always connect power before pressing the Easy Start button.
- Let the engine warm up before engaging the auger.
Snapper 8245: Dual-Start Reliability
- Has both pull start and electric start, so use pull start for longevity.
- Always starts in neutral, which is standard and safe.
- Benefits from adding Seafoam at every refuel to prevent carburetor clogs.
- Electric start requires short 5-second bursts with a 1-minute cooldown between attempts.
Prevent Future Starting Problems
Keep your Snapper ready all season with these smart habits.
Add Seafoam at Every Refill
Pour Seafoam into the fuel tank each time you refill. It cleans injectors, prevents varnish buildup, and keeps the carburetor flowing smoothly. Many owners report never needing a carburetor replacement with regular use.
Store with Full, Stabilized Fuel
At the end of the season, fill the tank completely and add fuel stabilizer. Run the engine for about 5 minutes to circulate the treated fuel through the system. This prevents moisture buildup and gum deposits during long-term storage.
Run the Engine Monthly in the Off-Season
Start the snow blower for 5 to 10 minutes every 4 to 6 weeks, even during summer. This keeps seals lubricated, fuel fresh, and the engine ready when winter weather arrives.
Check Oil and Fuel Before the First Snow
Before winter begins, verify the following:
– Oil level and overall condition
– Fuel freshness and quality
– Choke and primer function
– Electric start cord condition (if equipped)
A quick test run confirms reliability before you actually need it.
Frequently Asked Questions About Starting a Snapper Snow Blower
Why won’t my Snapper snow blower start after sitting all summer?
Old, gummy fuel is the most common culprit. Drain the tank, refill with fresh 89 octane gasoline, and add Seafoam. Check the oil for fuel contamination, confirm the fuel valve is turned on, and prime the engine two or three times before pulling the cord.
How many times should I press the primer button?
For most models, press the primer two to three times slowly and firmly. On the SS822E, two presses are typically enough. Never prime a warm engine, since this can flood the cylinder.
Should I use the choke every time I start?
Use the choke only for cold starts. For a warm engine that’s been running recently, leave the choke in the RUN position and start normally. Over-choking a warm engine floods it and makes starting harder.
What octane fuel should I use in my Snapper?
Use a minimum of 87 octane, but 89 octane is recommended, especially after storage. Higher octane reduces knocking and improves cold-weather starts. Avoid fuel with more than 10% ethanol when possible.
How do I clear a flooded Snapper engine?
Set the choke to RUN, throttle to FAST, and crank the engine without priming. It may take several pulls, but the engine should start once excess fuel clears from the cylinder.
Is electric start bad for my snow blower?
Electric start isn’t bad when used properly, but it can wear out over time. Use the pull cord whenever possible and reserve electric start for emergencies. Limit electric start attempts to 5 seconds with a 1-minute cooldown between tries.
Key Takeaways for Starting Your Snapper Snow Blower with Confidence
Starting a Snapper snow blower comes down to following the right sequence every time. Always verify oil and fuel quality first, then engage the choke and primer based on engine temperature. Choose the starting method that matches your model, whether that’s pull cord, electric start, or Easy Start technology.
Warm up the engine for two to three minutes before clearing snow, and adjust the choke gradually as the engine stabilizes. For long-term reliability, add Seafoam at every refuel, store with stabilized fuel, and run the engine monthly during the off-season.
If problems arise, diagnose methodically: flooded engines need the choke set to RUN, hard starts often trace back to old fuel or incorrect choke position, and a non-retracting pull cord usually signals a worn rewind mechanism. With proper technique and consistent maintenance, your Snapper will start reliably for many winters to come.
Always consult your specific Operator’s Manual for model-specific details, and prioritize safety with every use. When you’re ready to tackle the snow, your Snapper will be ready too.