Imagine stepping outside after a heavy snowstorm, extension cord in hand, only to press the start button and hear nothing. Many Cub Cadet owners face this exact frustration, often because the electric start system requires more than just plugging in and pushing a button. The truth is, even reliable machines need the right preparation to fire up in freezing temperatures.
This guide shows you exactly how to electric start your Cub Cadet snow blower the right way. You will learn the full pre-start checklist, the correct starting sequence for both 2X and 3X models, and how to troubleshoot common issues. By the end, you will be able to start your machine confidently in any winter condition.
Pre-Start Safety and Setup

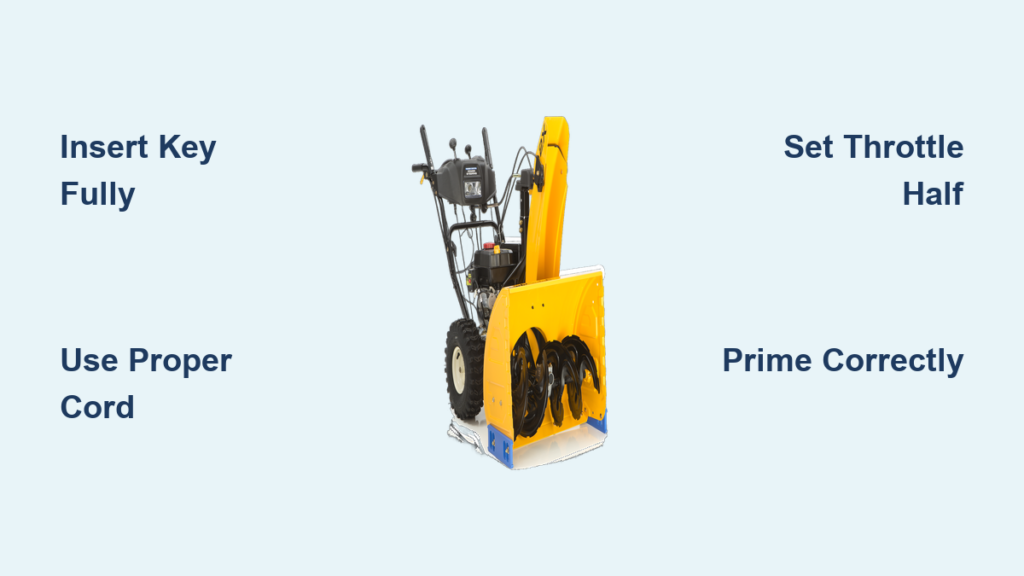
Insert the Ignition Key Fully
The ignition key acts as a safety interlock on all Cub Cadet models. Push the key all the way into the ignition slot before doing anything else. The engine will not crank unless the key is fully seated. A small pro tip: drill a tiny hole in the key and attach a short loop of twine so it does not get lost in the snow.
Check Fuel and Oil Levels
Open the fuel cap and confirm a full tank. Use straight unleaded gasoline for regular operation, but switch to non-ethanol fuel or Aspen 4 (92 octane, ethanol-free) for the best long-term results. Ethanol-blended gas degrades quickly and can clog the carburetor.
Next, check the oil using the dipstick. On 2X models, the dipstick sits on the right side of the engine and unlocks with a quarter turn. On 3X models, pull the dipstick out, wipe it clean, reinsert it, and read the level. Oil should sit between the low and high marks, ideally near the top of the “H” dot. Always check on level ground.
Inspect Shear Pins Before Every Use
Shear pins protect the auger system from costly damage. On both 2X and 3X 26-inch models, you will find four shear pins: one on each side of the front auger and one on the rear (3X) or each auger (2X). If any pin is missing or broken, replace it before starting. Operating without a pin can destroy the gearbox.
Fuel and Oil Best Practices

Use Ethanol-Free Fuel When Possible
Ethanol-free fuel prevents carburetor varnish and gumming, especially during seasonal storage. If you cannot find non-ethanol gas, Aspen 4 is a premium alternative designed for four-stroke engines. It burns clean, resists degradation, and improves cold-weather starting. Always use fresh fuel, since gas older than 30 days often causes hard starts.
Apply Silicone Spray Before Every Use
Snow sticking inside the auger housing or chute creates clogs and extra strain. Spray heavy-duty silicone spray on all internal surfaces, including the augers, chute, intake area, and housing. On 2X models, also spray inside the auger barrel. Shake the can well before use, and reapply before each snow event. This step alone saves significant cleanup time later.
Electric Start System Setup

Use the Right Extension Cord
The electric start needs proper voltage to work. Use a 12- or 14-gauge heavy-duty extension cord plugged into a grounded three-prong outlet. For 3X models, keep the cord 15 feet or shorter. For 2X models, stay under 20 feet. Longer cords cause voltage drop, which weakens cranking. Test the outlet with another device before plugging in to confirm power.
Connect and Test the Starter
Locate the power inlet on the snow blower and plug in the extension cord. Press the red push-to-start button near the inlet. The starter motor should crank the engine smoothly. If nothing happens, check the key, cord connections, outlet, and cord specifications. Never crank for more than 5 to 10 seconds at a time, and wait 30 seconds between attempts to avoid overheating the starter.
Starting Sequence: Step by Step
Set the Throttle Correctly
Position the throttle lever at halfway for 2X models. For 3X models, set it to three-quarter or half throttle. Never start at full throttle when the engine is cold, since this can cause stalling or fuel washdown in the cylinders. You can increase speed after the engine warms up.
Engage the Choke
Move the choke lever to the “choke” or “start” position. On 3X models, the arrow on the choke knob should point to the side. This closes the air intake and enriches the fuel mixture. Once the engine fires, turn the choke off immediately to prevent flooding.
Prime the Engine Based on Temperature
Press the primer bulb the correct number of times for your conditions:
- Above 55°F: 1 press (2X) or 1–2 presses (3X)
- Below 55°F: 2–4 pumps (2X) or 1–2 presses (3X)
Over-priming floods the engine, especially in cold weather. If the snow blower will not start after a few tries, wait several minutes to let excess fuel evaporate before retrying.
Crank and Start the Engine

Press the Starter Button
With the throttle set, choke on, and engine primed, press and hold the electric start button for 5 to 10 seconds. The engine should fire within a few seconds. If it does not, release the button, wait 30 seconds, and try again. Repeated cranking without pause can damage the starter or drain the system.
Return to the Control Panel After Cranking
On some 3X models, the electric starter only cranks the engine without completing the full start cycle. After the first crank, return to the control panel and confirm that the choke is still on, the throttle is at half, the key is pushed in, and the primer was used. Then press the starter button again. This second attempt often succeeds once the fuel system is primed.
Post-Start Actions
Turn Off the Choke Immediately
As soon as the engine starts, move the choke lever to the “run” position. Leaving the choke on too long floods the engine and produces black smoke. In very cold weather, you can keep it on for a few extra seconds until the engine runs smoothly, but do not delay the switch.
Remove the Extension Cord
Once the engine is running, unplug the extension cord from the snow blower. Leaving it connected creates tripping hazards and risks cord damage during operation. Store the cord in a dry place for next use.
Warm Up for 30 to 60 Seconds
Let the engine idle for 30 to 60 seconds before engaging the auger or drive. This allows oil to circulate and components to reach operating temperature. In sub-zero conditions, extend the warm-up time. Never engage the snow blower immediately after a cold start.
Troubleshooting Common Issues
Engine Cranks But Will Not Start
If the starter turns the engine but it will not fire, check these items:
- Choke position: Is it fully on?
- Throttle setting: Is it at half?
- Primer use: Did you prime 1–3 times?
- Fuel level and quality: Is the gas fresh and ethanol-free?
- Key insertion: Is the key fully pushed in?
A clogged or flooded carburetor is the most common cause. If the engine smells like gas, it is likely flooded. Wait 10 minutes and try again with no priming and the choke slightly open.
No Cranking Sound
If pressing the start button produces nothing, verify the extension cord is 12- or 14-gauge and under the maximum length, test the outlet with another device, ensure the key is fully inserted, and check for damaged cords or loose connections. If all else fails, the starter motor or solenoid may need service.
Hard Starting in Cold Weather
Freezing temperatures demand extra attention. Increase primer pumps to 3–4 on 2X models, keep the choke on slightly longer, use the electric start instead of the pull cord for consistent cranking speed, and avoid over-cranking by waiting 30 seconds between attempts. Using Aspen 4 or non-ethanol fuel improves cold starts significantly.
Model-Specific Tips

Cub Cadet 3X 26: Three-Stage Starting
The 3X model features a three-stage system with a front auger, middle auger, and impeller for heavy snow. Starting tips include:
- Use a 15-foot maximum cord (12- or 14-gauge)
- Set throttle to three-quarter
- Prime 1–2 times only in cold weather
- Turn choke off immediately after start
- Use power steering levers to unlock wheels for turning in deep snow
The middle auger connects to the front via a shear pin, so check it if the middle is not spinning.
Cub Cadet 2X 26: Dual Auger Efficiency
The 2X model uses a dual auger system for balanced snow pickup. Key points include:
- Dipstick has two nubs on one side and one on the other; align correctly
- Prime 1–3 times depending on temperature
- Keep cord under 20 feet
- Use trigger levers on handles to release one wheel for easier turning
Four shear pins (one per auger) must be intact for full operation.
Shutdown and Storage
Proper Shutdown Steps
Follow these steps to shut down safely:
- Release both handles to disengage the auger (left) and drive (right)
- Pull the throttle to the far right (stop position) to shut off the engine
- Remove the ignition key to prevent unauthorized use
- Reinsert the key into the ignition when storing to prevent loss and ensure readiness
Never leave the machine running unattended.
Prevent Future Starting Issues
- Drain fuel or use a stabilizer before long-term storage
- Run the engine dry or store with fresh, ethanol-free gas
- Clean or rebuild the carburetor annually if used heavily
- Replace spark plugs every season for reliable ignition
- Inspect belts for cracks or wear
Regular maintenance ensures your electric start works when you need it most.
Frequently Asked Questions About Electric Starting a Cub Cadet Snow Blower
Why is my Cub Cadet electric start not working?
The most common causes are an ignition key that is not fully inserted, a damaged or incorrect gauge extension cord, a dead outlet, or a loose cord connection. Verify the key is pushed all the way in, use a 12- or 14-gauge cord under the maximum length for your model, and test the outlet with another device. If the starter still does not crank, the starter motor or solenoid may need service.
How long can I crank the electric starter?
Limit cranking to 5 to 10 seconds per attempt. After each attempt, wait 30 seconds before trying again. Continuous cranking without pauses can overheat and damage the starter motor or drain the system. If the engine does not start after several proper attempts, review your choke, throttle, and primer settings before continuing.
How many times should I prime my Cub Cadet snow blower?
Priming depends on temperature and model. For 2X models, press the primer bulb 1 time in 55°F weather and 2 to 4 times in colder conditions. For 3X models, press it 1 to 2 times only in cold weather or if the engine is hard to start. Over-priming floods the engine, so always start with fewer presses and add more if needed.
Do I need a special extension cord for the electric start?
Yes. Use a 12- or 14-gauge heavy-duty extension cord plugged into a grounded three-prong outlet. For 3X models, keep the cord 15 feet or shorter. For 2X models, stay under 20 feet. Lightweight indoor cords or longer cords cause voltage drop, which results in weak cranking or failure to start.
Should I leave the choke on after the engine starts?
No. Turn the choke off immediately after the engine fires. Leaving the choke on floods the engine and produces black smoke. In very cold weather, you can keep it on for a few extra seconds until the engine runs smoothly, but switch it to the run position as soon as possible.
Key Takeaways for Electric Starting Your Cub Cadet Snow Blower
Starting your Cub Cadet snow blower with the electric system is fast and reliable when done correctly. Follow this proven sequence every time: insert the key fully, set the throttle to half, engage the choke, prime based on temperature, plug in a proper extension cord, and press the starter button for no more than 10 seconds.
Address issues early by using fresh ethanol-free fuel, checking oil and shear pins before each use, and applying silicone spray to prevent snow buildup. With the right preparation, your snow blower will fire up in seconds, even in the coldest weather. Keep this guide handy for every storm season, and you will never struggle with a stubborn start again.