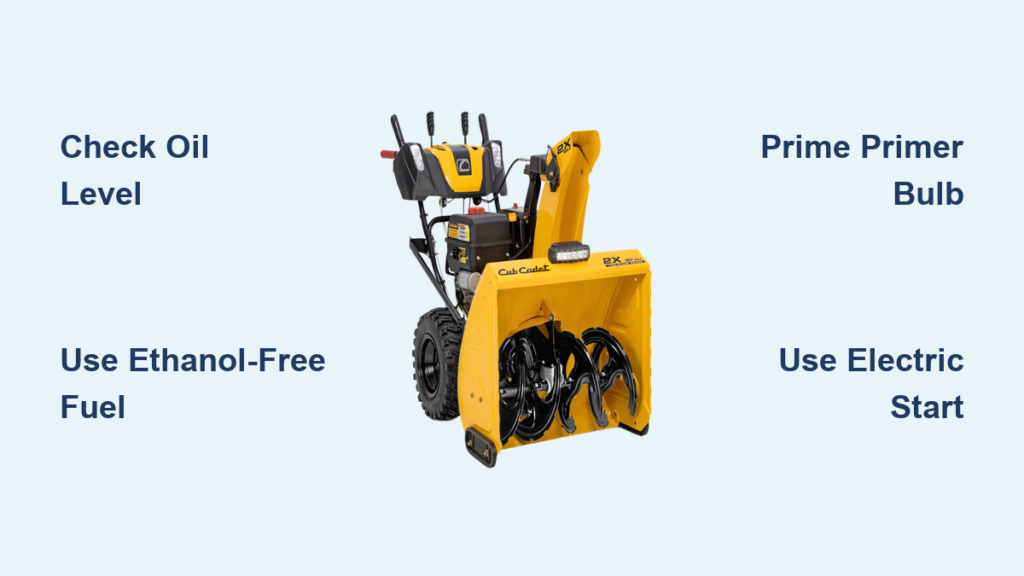
Nothing is more frustrating than a snow blower that won’t start when you need it most. Whether you’re dealing with a fresh snowfall or a stubborn engine in freezing temps, knowing how to start a Cub Cadet snow blower 2X correctly saves time and headaches. The Cub Cadet 2X series (including the 2X 24 and 2X 28) offers both electric and pull-cord ignition, making it versatile for any cold-weather scenario. This guide covers pre-start checks, fuel tips, and proven starting methods so you can fire up your machine with confidence.
Let’s get your Cub Cadet 2X running smoothly, no matter how low the temperature drops.
Check Engine Oil Before Every Start

Read the Dipstick Correctly
Before you even think about ignition, verify the engine oil level using the dipstick on the engine, not the side cap. Pull the dipstick out, wipe it clean, reinsert it fully, then pull it again to get an accurate reading. The oil must sit between the two marked dots on the dipstick’s bar graph. If it falls below the lower mark, add oil until it reaches the top dot.
Pro Tip: The dipstick has one “W” on one side and two “W”s on the other. Insert it correctly or it can get stuck in the tube.
Choose the Right Oil Weight
Use 5W-30 or SAE 30 engine oil depending on your climate and temperature. Running with low oil can cause severe engine damage, so never skip this step. A quick two-minute check protects your investment for years of reliable snow removal.
Use Ethanol-Free or Stabilized Fuel
Avoid Ethanol Blends
Fill your tank with straight unleaded gasoline, but steer clear of ethanol-blended fuels. Ethanol attracts moisture, degrades quickly, and clogs carburetors, especially after storage or in cold weather. For best results, use Aspen Fuel (ethanol-free) or TruFuel (pre-mixed and stabilized). These shelf-stable options prevent hard starts and extend engine life significantly.
Keep Fuel Fresh
If you must use regular gas, add a fuel stabilizer and run the engine for a few minutes to circulate it through the system before storage. For immediate use, ensure fuel is less than 30 days old. Older fuel is a leading cause of hard starting and rough running.
Electric Start Method: Fast and Reliable
Connect the Right Extension Cord
The electric start is the recommended method, especially in temperatures below 20°F. First, fully insert the ignition key into the switch and press until it snaps into place. Turn the key to the “on” position. Then, plug in a 16-gauge or 14-gauge extension cord (marked 16/3) no longer than 10 feet, with 15 feet being the absolute maximum.
Key Requirements:
– Use a grounded household outlet
– Avoid power strips
– Skip outdoor outlets without GFCI protection
A thin or overly long cord reduces power delivery and can prevent successful ignition.
Set Throttle, Choke, and Start the Engine
Set the throttle lever to mid-range (halfway between turtle and rabbit). Push the choke fully down to the “Start” position. Press and hold the electric starter button for 2 to 3 seconds only, and never exceed 5 seconds to prevent starter motor damage.
If the engine doesn’t start, release the button and wait 10 seconds before trying again. Most 2X models fire within 1 to 2 attempts. Once running, disconnect the extension cord immediately and let the engine warm up for 1 to 2 minutes before engaging the auger.
Manual Pull Start: Cold Weather Backup
Prime and Set Controls Properly
When electric start isn’t available, the pull cord works well with the right technique. First, ensure the key is inserted and turned to “on.” Set the throttle to mid-range. Press the primer bulb 2 to 3 times under normal conditions, or 4 to 5 times when temperatures drop below 30°F. Then move the choke to the “choke” or “Start” position (fully closed) to enrich the fuel mixture.
Pull with a Firm, Steady Motion
Grasp the starter handle and pull the cord firmly and steadily. Don’t yank it. Most engines start within 2 to 3 pulls when primed correctly. If it doesn’t fire, wait 10 seconds to clear excess fuel, then retry. Avoid rapid, repeated pulls, which can flood the engine.
Once started, let it run for 15 to 30 seconds before slowly releasing the choke to the “run” position. Remember, electric start is more reliable in freezing temps, so use it whenever possible.
Master the Handlebar Controls

Auger and Drive Lever Functions
All controls are conveniently located on the handlebar. The left lever engages the auger, and you should always activate it before moving forward or reversing. Keep it engaged until all snow is cleared to prevent clogs and freezing.
The right lever controls drive speed. The 2X 28 features 6 forward and 2 reverse gears. Stop completely before shifting, as shifting while moving causes grinding due to high friction in the transmission’s rubber disc.
Power Steering and Chute Adjustments
Pull the left power steering trigger to turn left, and the right trigger to turn right. This unlocks one wheel for tight turns in deep snow or confined spaces. Use the chute rotation trigger to aim snow: pull, rotate, then release to lock the position. Push the tilt button to adjust discharge height. The throttle (turtle to rabbit) controls engine speed, so use mid-range for starting and full power for heavy, wet snow.
Cold Weather Starting Tips Below 20°F
Boost Your Success Rate
In freezing temps, electric start is strongly recommended because it spins the engine faster than pulling, increasing ignition success. Use 4 to 5 primer presses if relying on the pull start. Ensure fuel is fresh or ethanol-free, since cold weather amplifies ethanol-related starting issues.
Let the engine idle for 1 to 2 minutes to warm up before heavy use. Avoid old fuel, clogged primer bulbs, or weak extension cords, all of which cause frustrating delays.
Prevent Flooding and Starter Damage
Cold fuel vaporizes poorly, making proper priming and choke use critical. If the engine sputters but won’t start, it may be flooded. Wait 10 to 15 minutes before retrying with the choke off and throttle open. Use a heavy-duty 16-gauge cord to ensure full power delivery, and never hold the starter button longer than 5 seconds. Overheating can permanently damage the motor.
Proper Shutdown and Key Safety
Shut Down the Engine Correctly
When you’ve finished clearing snow, reduce the throttle to the “turtle” or stop position and let the engine idle for 15 seconds. Then pull the key out to shut it off completely. Always remove the key to prevent accidental starts and deter theft.
Make sure the auger has cleared all snow before stopping. Leftover snow can freeze and jam the system overnight.
Prevent Losing Your Key in the Snow
Keys are small and easy to lose in whiteout conditions. Attach a lanyard by drilling a small hole in the key and threading a string through it. Hang it on the handlebar or wear it around your wrist to keep it secure and ready for the next use.
Troubleshoot Common Starting Failures

No Start? Check These First
If the engine refuses to start, run through this quick checklist:
- Key fully inserted and turned to “on”
- Fuel is fresh and ethanol-free
- Choke in the “start” position
- Primer bulb pressed 2 to 5 times
- Extension cord meets gauge and length specs
Wait 10 seconds between start attempts to prevent starter overload. If electric start produces no response, check the outlet and cord connections. A blown fuse or tripped GFCI can cut power without warning.
Fix Headlight and Discharge Issues
The headlight turns on automatically when the engine runs. If it doesn’t light, check the bulb and wiring connections, as loose wires are a common culprit.
For poor snow discharge, inspect the shear pins. There are four total (two per auger shaft). If an auger spins freely by hand, the shear pin is broken. Replace it immediately; spares are stored in the onboard compartment. Apply silicone spray inside the chute and auger housing to prevent snow buildup and clogs.
Preventative Maintenance for Reliable Starts

Apply Silicone Spray Regularly
Spray heavy-duty silicone inside the chute, around the auger housing, and at the discharge opening. This creates a non-stick surface that reduces snow packing and clogs while making post-use cleanup faster. It also prevents rust and corrosion. Reapply every few uses or after heavy snowfall.
Replace Shear Pins Proactively
Shear pins protect the auger gearbox from damage when hitting obstacles like rocks or ice. They’re cheap and easy to replace, so don’t wait for them to break. Swap them out before the season starts or after clearing icy driveways. Keep spares in the onboard storage compartment and test each auger weekly. Free spinning means the pin is gone.
Maintain Fuel and Oil Systems
Check oil before every use and top off if low. Change it annually or after 50 hours of operation. Use non-ethanol fuel or stabilized gas to prevent carburetor clogs. For long-term storage, either drain the fuel completely or run the engine dry. Never leave ethanol-blended fuel sitting over the summer months.
Frequently Asked Questions About Starting a Cub Cadet 2X
Why won’t my Cub Cadet 2X start with the electric starter?
The most common causes are a loose or disconnected extension cord, a tripped GFCI outlet, or holding the starter button too long. Check that your cord is 16-gauge or 14-gauge and no longer than 15 feet. Never hold the button more than 5 seconds, and wait 10 seconds between attempts to let the starter motor cool.
How many times should I press the primer bulb before starting?
Press the primer bulb 2 to 3 times under normal conditions. In temperatures below 30°F, increase to 4 to 5 presses for better fuel delivery. Over-priming can flood the engine, so don’t exceed these ranges.
Can I use regular gasoline with ethanol in my Cub Cadet 2X?
It’s not recommended. Ethanol attracts moisture, degrades quickly, and clogs carburetors, especially during storage and cold weather. Use Aspen Fuel, TruFuel, or add a fuel stabilizer to regular gas and run the engine for a few minutes to circulate it.
What type of extension cord do I need for electric start?
Use a 16-gauge or 14-gauge extension cord (marked 16/3) that matches the thickness of the cord supplied with your machine. Keep it 10 feet or shorter, with 15 feet as the maximum. Always plug directly into a grounded household outlet and avoid power strips.
How do I know if a shear pin is broken?
Test each auger by hand. If it spins freely without resistance, the shear pin is broken and needs replacement. The 2X 28 has four shear pins total (two per auger shaft). Spare pins are stored in the onboard compartment for quick swaps.
Should I use electric start or pull start in cold weather?
Electric start is strongly recommended in temperatures below 20°F. It spins the engine faster than a pull cord, dramatically improving ignition success. Save the pull start for warmer conditions or when electricity isn’t available.
Key Takeaways for Starting Your Cub Cadet Snow Blower 2X
Starting your Cub Cadet 2X comes down to three essentials: proper preparation, correct starting technique, and regular maintenance. Always check oil and fuel quality before ignition, use ethanol-free or stabilized gasoline, and choose electric start whenever temperatures drop below 20°F. Match the choke and throttle to conditions, prime correctly, and never exceed 5 seconds on the starter button.
Your next step is simple: run through this checklist before your next snowfall. Check the oil, fill up with fresh ethanol-free fuel, inspect your extension cord, and confirm your shear pins are intact. With these habits, your Cub Cadet 2X will start reliably every winter for years to come.