
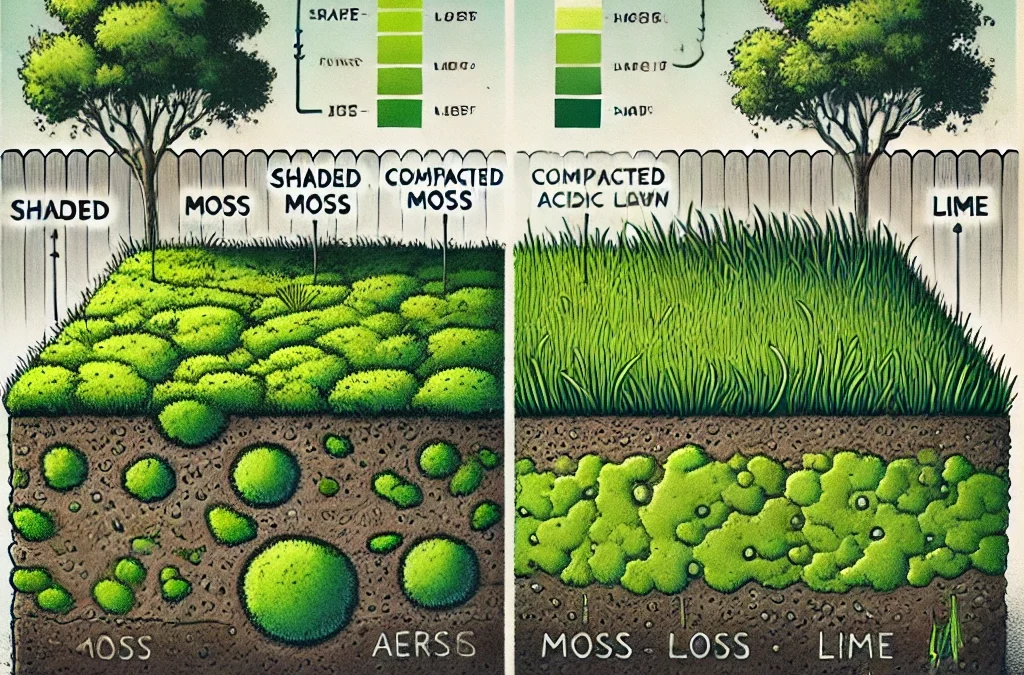
Imagine stepping barefoot onto a velvety green carpet that stays lush year-round, no mowing or watering required. A moss lawn offers exactly that: a quiet, sustainable alternative to traditional grass that thrives where turf fails. Perfect for shady, compacted, or acidic soils, moss grows naturally in conditions most gardeners fight to fix. Once established, it asks for almost nothing.
This guide walks you through every step to grow a moss lawn, from selecting the right species and preparing your site, to planting, maintaining, and designing with moss. Whether you’re starting small between stepping stones or converting an entire yard, you’ll learn how to build a resilient, low-maintenance landscape that harmonizes with nature.
Choose the Right Moss Species for Your Lawn
Picking the best moss for your lawn depends on light, moisture, and foot traffic. Not all mosses behave the same. Some spread fast while others form cushions, and some tolerate light sun while many demand deep shade.
Carpet Moss for Walkable Ground Cover
Hypnum imponens, commonly called carpet or sheet moss, is the top choice for walkable moss lawns. It forms a dense, even mat that spreads quickly under trees or along north-facing slopes. Its low profile and flexibility make it ideal for large shaded areas where a uniform look is desired.
Feather and Fern Moss for Visual Interest
Rhytidiadelphus triquetrus, or feather moss, has arched stems and a soft, flowing appearance perfect between rocks or as a transition layer. Thuidium delicatulum, or fern moss, adds fine, lacy detail that mimics tiny ferns, enhancing visual interest in shaded garden beds.
Mood and Cushion Moss for Focal Points
Dicranum spp., or mood moss, grows in bold, cushiony mounds, making it excellent for borders or texture contrast. Leucobryum glaucum, known as cushion moss, forms bright green domes on soil and rock, ideal for pathways or rocky terrain.
Haircap and Peat Moss for Special Zones
Polytrichum spp., or haircap moss, stands upright and tolerates slightly more sun, great for low-traffic zones. Sphagnum, or peat moss, thrives in wet spots near sump pumps or boggy areas where its high water retention shines.
• Use moss already growing on your property as a starter
• It’s naturally adapted to your climate and soil
• Local species outperform mail-order options in most cases
Prepare the Site Properly
:max_bytes(150000):strip_icc()/create-low-maintenance-moss-lawn-2152704-moss-type-f15b7c35a4d44dc3925e48b1c85525e2.jpg)
Moss won’t survive competition from grass, weeds, or leaf litter. Success starts with meticulous site prep, more important than any planting method.
Clear All Existing Vegetation
Remove every trace of grass, weeds, wild strawberries, and groundcovers like ajuga or hawkweed. Moss lacks roots and cannot push through debris. Use your fingers to pull small patches or cover larger areas with cardboard and mulch to smother grass over four to eight weeks.
Avoid Soil Amendments
Do not add compost, fertilizer, or organic matter. Moss thrives in low-nutrient, compacted soils, exactly what grass hates. Rich soil encourages weeds and defeats the purpose of a low-input lawn.
Compact the Soil Surface
Since moss anchors via rhizoids, not roots, it needs firm contact with soil. After clearing, lightly rake the surface then tamp it down with your feet or a hand tamper. Avoid tilling, loose soil prevents proper attachment.
Test and Adjust Soil pH
Moss prefers acidic soil between pH 5.0 and 5.5. Test your soil with a standard kit. If pH exceeds 6.0, apply elemental sulfur at recommended rates or top-dress with pine needle compost. Retest after a few days to confirm acidity.
• Never lime the area
• This raises pH and favors grass over moss
• Acidic conditions are non-negotiable for success
Plant Moss the Right Way
Three main methods exist for establishing a moss lawn: transplanting sheets, using plugs, or applying a slurry. Each has pros and cons depending on budget, scale, and timeline.
Transplant Moss Sheets for Fast Coverage
Lay pre-grown moss sheets directly onto prepared soil. Press firmly with hands or feet to ensure full contact. Overlap edges slightly or leave gaps for natural spread. This method gives instant results but requires more moss material.
Space Moss Plugs to Save Money
For large areas, use the plug method: place three to four inch moss clumps six to twelve inches apart. They’ll spread gradually over six to twelve months. It’s cost-effective and works well when using wild-harvested moss from your yard.
Apply Moss Slurry for Creative Spreading
Blend a handful of moss with water, buttermilk or plain yogurt, and a bit of organic clay until smooth like pancake batter. Paint or spray the mixture onto soil, rocks, or vertical surfaces. While large-scale results vary, anecdotal success shows slurry can germinate spores over time, especially in damp, shaded zones.
• Some gardeners use beer in the mix
• Yeast and sugars may boost adhesion and microbial activity
• Apply immediately for best results
Water and Protect During Establishment
The first four to six weeks are critical. Without proper moisture and protection, moss will dry out or wash away before rooting.
Mist Twice Daily for First Month
Keep moss consistently moist, never soggy. Use a fine mist nozzle or watering can with a rose head. Water morning and evening for the first two to four weeks. After that, reduce to two to three times per week if rain is scarce.
Prevent Foot Traffic Early
Avoid walking on new moss for at least a month. Even light foot traffic can dislodge unanchored patches. Use temporary stepping stones or paths to protect delicate areas during establishment.
• Once established, moss tolerates occasional walking
• One gardener reported preschoolers with Tonka trucks caused only temporary damage
• Patience during establishment pays off long-term
Shield From Debris and Animals
Cover fresh installations with light netting to deter birds, raccoons, or dogs. If your site gets direct sun, consider temporary shade cloth. Remove any fallen leaves immediately, moss cannot grow under smothering debris.
Maintain With Minimal Effort
Once rooted, moss lawns are nearly self-sustaining. Unlike grass, they require no mowing, feeding, or edging. Just a few smart habits keep them thriving.
Clear Leaves Regularly
This is the number one maintenance task. Fallen leaves block light and suffocate moss. Use a soft-bristled whisk broom, handheld leaf blower on low, or gentle raking, especially after frost when moss is less fragile.
Hand-Pull Invading Weeds
Grass or dandelions will try to reclaim space. Remove them by hand early. For stubborn patches, spot-treat with glyphosate carefully and wait seven to ten days before replanting moss.
Skip Fertilizer and Mowing
Moss grows slowly and rarely exceeds four inches. Never mow, it damages delicate structures. And never fertilize, excess nutrients promote weeds and harm moss.
Support Moss Through Seasons
• Spring: Moss may yellow slightly during spore release, this is normal
• Summer: Mist during dry spells, avoid afternoon sun
• Fall: Prioritize leaf removal
• Winter: Moss stays green and dormant under snow, no care needed
Design With Moss Creatively
A moss lawn isn’t just ground cover. It’s a design element that brings calm, texture, and natural beauty to your landscape.
Frame Moss With Stone or Pavers
Define edges with slate, flagstone, or gravel paths. This controls foot traffic and creates a clean, intentional look. Moss flowing between stepping stones adds a magical, forest-floor feel.
Mix Moss Varieties for Depth
Combine carpet moss with mood moss mounds or fern moss accents. Layer textures to create visual interest and mimic natural woodland ecosystems.
Use Moss on Slopes and Walls
Plant on compacted banks to prevent erosion. Moss also grows vertically. Apply slurry or sheets to logs, stumps, or retaining walls for living art.
Pair With Shade-Loving Plants
Complement moss with ferns, hostas, trillium, or azaleas. Together they form a lush, layered understorey that invites exploration and stillness.
• You’re curating calm, inviting people to slow down and take notice
• Moss pairs beautifully with woodland perennials
• Let your design reflect natural forest floors
Solve Common Moss Problems Fast

Even well-planned moss lawns face challenges. Catch issues early with these targeted fixes.
Moss Turns Brown? Check Moisture and Sun
Brown or brittle moss usually means drought or too much sun. Increase misting frequency or install shade cloth. If the site gets afternoon sun, consider relocating or accepting partial loss.
Moss Washes Away? Press It In Firmly
Heavy rain or strong watering can dislodge moss. Always press sheets into firm soil. Use slurry with clay or buttermilk as a binder. Avoid tilling, loose soil increases washout risk.
Grass Keeps Coming Back? Remove Completely First
Incomplete grass removal is the top reason for failure. Pull every runner manually or smother thoroughly with cardboard. Stay vigilant and hand-pull invaders before they spread.
Moss Isn’t Spreading? Improve Conditions
Slow growth often stems from dry soil, alkaline pH, or competition. Retest pH, improve moisture, and remove weeds. Consider applying slurry to boost spore germination.
Enjoy the Ecological Benefits
A moss lawn does more than look beautiful. It supports the environment and simplifies your life.
Reduce Lawn’s Environmental Impact
No mowing means zero emissions and noise. No fertilizers or herbicides eliminate chemical runoff. Moss conserves water, prevents erosion, and sequesters carbon over time.
Support Biodiversity
Moss provides microhabitats for spiders, beetles, earthworms, and beneficial insects. It’s a living ecosystem, not a sterile lawn.
Create a Safer, Softer Yard
Non-toxic and cushiony, moss is safe for kids and pets. It stays cool in summer and green in winter, ideal for quiet play or barefoot walks.
• If it’s a possibility, I can’t fathom anyone NOT wanting a moss lawn
• The environmental benefits are substantial
• Your yard becomes a thriving ecosystem
Frequently Asked Questions About Growing a Moss Lawn
How long does it take for moss to establish?
Most mosses begin attaching within two to four weeks. Full establishment takes two to three months with proper moisture and shade. Larger coverage fills in over six to twelve months depending on method used.
Can moss survive winter?
Yes. Moss is evergreen in many regions and survives snow and frost by going dormant. It remains alive under snow cover and revives quickly in spring.
Is moss safe for pets and kids?
Absolutely. Moss is non-toxic, soft, and ideal for play areas. It stays cool underfoot even on hot days and poses no health risks.
Will moss grow in partial sun?
Some species tolerate filtered light or morning sun, but consistent shade produces the best results. Carpet moss and haircap moss handle more light than most varieties.
How do I prevent leaf smothering?
Sweep or blow leaves regularly using soft tools like a whisk broom or leaf blower on low. Avoid aggressive raking that might tear moss. Weekly attention during fall prevents suffocation.
Can I start small?
Yes. Begin with a shaded corner, tree base, or area between stepping stones. Expand as moss spreads naturally. Starting small lets you test conditions before committing larger areas.
Key Takeaways for Growing Your Moss Lawn
A moss lawn isn’t a quick fix. It’s a mindful shift in how you view outdoor spaces, asking for patience, proper preparation, and respect for natural conditions. Match moss species to your specific site conditions, remove all competition before planting, and maintain consistent moisture during the critical establishment phase.
Start small, work with what nature provides, and let the moss do the rest. In return, you’ll receive a serene, sustainable landscape that thrives with almost no effort while supporting local biodiversity. The transformation from high-maintenance grass to a peaceful moss carpet is one of the most rewarding changes you can make to your yard.