A patchy lawn can turn your once-lush yard into an eyesore overnight. Whether you’re dealing with bare spots, thinning grass, or uneven color, the solution starts with understanding why the damage occurred. Simply tossing down grass seed will not fix the problem if soil compaction, poor watering, pests, or improper mowing are to blame. The good news is that with the right steps, timed correctly and executed properly, you can restore your lawn to full health.
This guide walks you through diagnosing the cause, choosing between seed and sod, preparing the soil, and maintaining your lawn so patches do not return. You will learn how to aerate, topdress, water effectively, and avoid common mistakes that doom repair efforts.
Diagnose the Root Cause of Your Patchy Lawn

Before grabbing seed or sod, you must identify what caused the thinning. Treating symptoms without fixing root causes leads to repeat damage and wasted money.
Test for Soil Compaction
Heavy foot traffic or repeated mowing compacts soil, blocking air, water, and nutrients. Grass struggles and dies in compacted zones, especially near walkways or driveways.
How to test: Push a screwdriver into the soil. If it is hard to penetrate more than 2 inches, compaction is likely your problem.
Solution: Core aeration is essential. Rent a machine that removes 2 to 3 inch plugs to relieve pressure and improve root growth.
Check Sprinkler Coverage
Dry patches often stem from poor irrigation. Misaligned or clogged sprinkler heads leave areas under-watered while others get too much.
How to test: Place tuna cans or rain gauges in a grid pattern across your lawn. Run your system for 20 minutes. If water levels vary by more than one-quarter inch, adjust or clean your heads.
Solution: Realign, replace, or add heads to eliminate dry zones. Water in the early morning to reduce evaporation and disease risk.
Measure Thatch Buildup
A layer of dead grass and roots accumulates over time. Thin thatch less than one-half inch actually helps protect the soil. Thick thatch超过 one-half inch suffocates roots and prevents water absorption.
How to test: Cut a small plug from your lawn and measure the brown layer between the soil and green grass.
Solution: Dethatch with a power rake or vertical mower in spring or fall. Follow with aeration and overseeding for best results.
Analyze Soil Quality and pH
Poor soil leads to weak grass that cannot thrive. Clay holds water but drains poorly, while sand drains fast but lacks nutrients. Most grasses prefer a pH between 6.0 and 7.0.
How to test: Use a home testing kit or send a soil sample to your local extension service for detailed analysis.
Solution: Amend based on results. Low pH requires lime. High pH needs sulfur. Low nutrients call for compost or starter fertilizer application.
Look for Pet Damage
Dog urine creates yellow patches with dark green rings around them. The high nitrogen burns grass in the center but acts as fertilizer at the edges.
Solution: Rinse spots immediately with water. Train pets to use a designated area. Consider pet-friendly grass blends or mulch zones in high-traffic dog areas.
Identify Pests and Disease
Grubs chew through roots, causing turf to lift easily like a carpet. Fungal diseases like brown patch create circular dead zones that spread quickly.
How to check for grubs: Lift damaged sod. If roots are gone and you see white C-shaped larvae, you have a grub infestation.
Solution: Treat with GrubEx or beneficial nematodes for grubs. Apply fungicide only after confirming diagnosis, and improve airflow to prevent recurrence.
Assess Shade Levels
Grass under trees or near buildings often thins due to insufficient light. Summer foliage makes the problem worse by blocking even more sunlight.
Solution: Use shade-tolerant seed blends containing fine fescue or ryegrass. Alternatively, switch to ground cover, mulch, or shade-loving plants in heavily shaded areas.
Review Your Mowing Habits
Cutting too short, known as scalping, stresses grass and exposes soil to weeds. Dull blades tear instead of cutting cleanly, weakening plants.
Best practice: Never remove more than one-third of blade height in a single mow. Keep mower blades sharp and raise the deck height in shade or drought conditions.
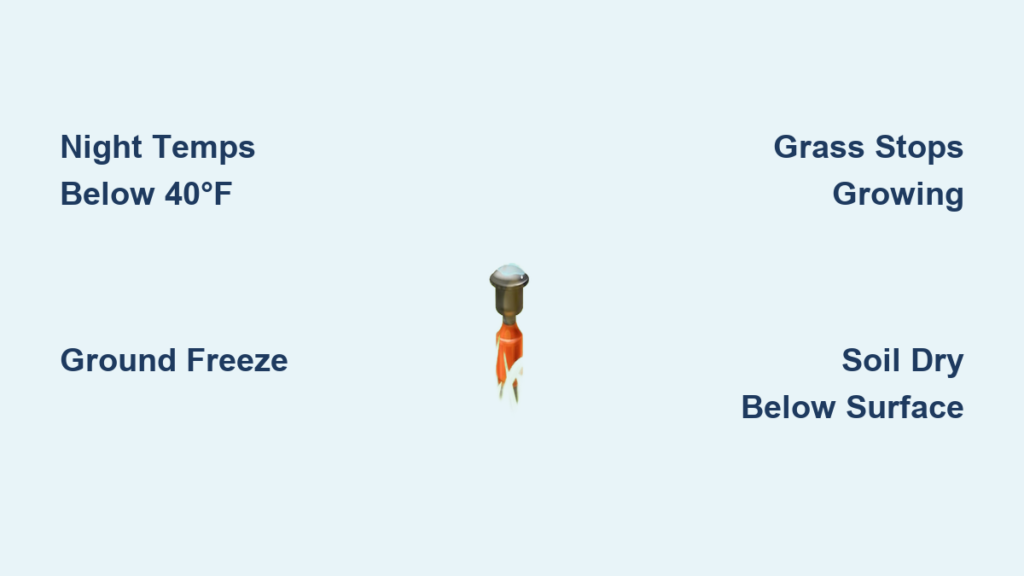
Choose the Right Season for Lawn Repair
Timing affects success more than most realize. Grass needs active growth to establish strong roots and survive transplant shock.
Fall Provides the Best Conditions
September through November offers ideal conditions for most lawns. Mild temperatures, consistent moisture, and strong root development make fall the optimal choice.
Ideal for: Cool-season grasses including Kentucky bluegrass, fescue, and ryegrass. Fall overseeding produces denser, healthier turf by spring.
Pro tip: Aerate and overseed in fall for the best results come spring.
Spring Works as a Backup
March through May works if you missed the fall window. Soil must be dry enough to walk on without sinking before starting repairs.
Best for: Cool-season lawns and early-season grub prevention efforts.
Warning: Avoid seeding in summer. Heat and drought kill seedlings quickly and waste your investment.
Summer Is Only for Warm-Season Grasses
June through August suits Bermuda, Zoysia, or St. Augustine, but only if you can commit to daily watering.
Never seed cool-season grasses in summer unless using specialized heat-tolerant varieties. Sod or plugs are safer bets during hot months.
Winter Is for Planning
December through February is for planning, not planting. Grass is dormant, soil is cold and wet, and seeds will not germinate.
Use winter wisely: Test your soil, service your equipment, and order supplies so you are ready for spring.
Prepare the Soil Properly
Healthy grass starts below the surface. Skip soil preparation and seeds will not germinate no matter how expensive your seed choice is.
Clear Debris and Dead Grass
Rake out dead material, weeds, and rocks. For large areas, use a dethatcher or sod cutter to remove thick thatch and old turf.
Goal: Expose bare soil for seed-to-soil contact, which is critical for germination success.
Loosen the Top 1 to 2 Inches
Use a garden claw or cultivator to lightly break up the surface. Do not over-till. Simply create a loose seedbed that seeds can settle into.
Visual cue: Soil should be crumbly, not dusty or muddy. Overworked soil creates a crust that prevents water absorption.
Aerate Compacted Areas
Core aeration is non-negotiable for high-traffic areas. This process removes plugs, allowing air, water, and roots to penetrate deep into the soil.
When to aerate: Spring or fall, when soil is moist but not soggy. Rent equipment from garden centers or hire a landscaping service for large areas.
Pro tip: Apply topdressing after aeration to fill holes and boost soil health simultaneously.
Topdress with Compost or Lawn Mix
Spread a one-quarter to one-half inch layer of compost or topdressing blend over bare or thin areas.
Homemade topdressing mix:
- 3 parts sandy loam
- 6 parts sharp sand
- 1 part peat-free compost
Brush the mixture into aeration holes to improve soil texture and moisture retention.
Choose Between Seed and Sod
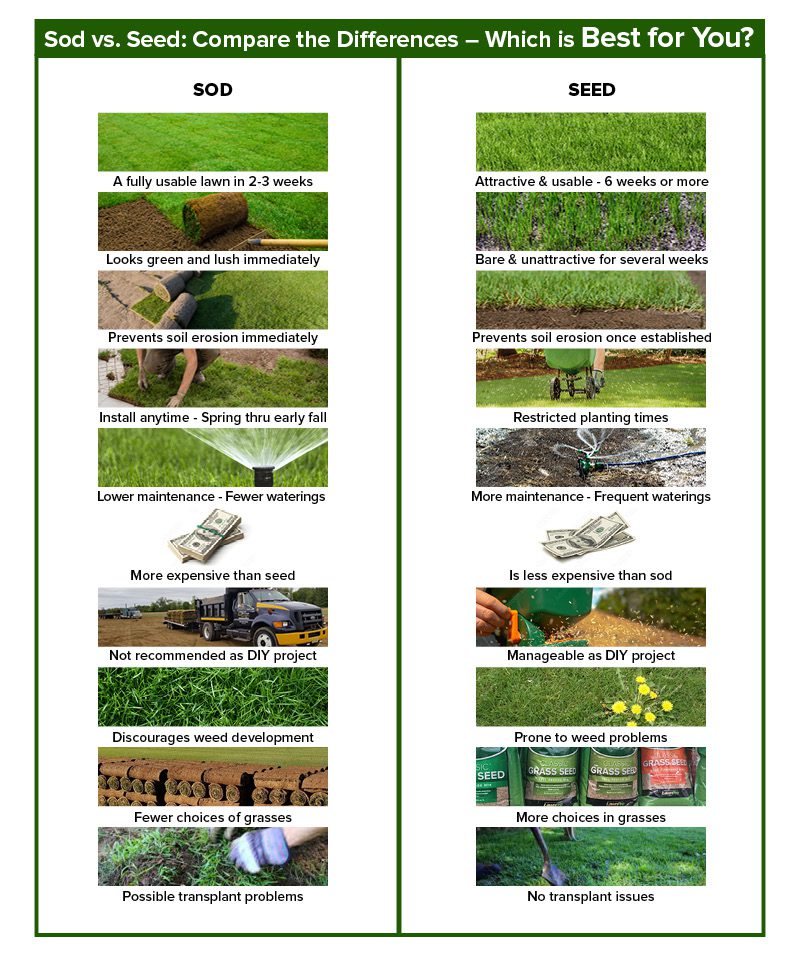
Your choice depends on the size of the area, your budget, and how quickly you need results.
Repairing with Grass Seed
Grass seed is cost-effective and integrates naturally with existing turf. This method works best for small to medium patches and overseeding thin lawns.
Pick the Right Grass Type
Different grass types suit different conditions. Match your existing lawn or choose based on your climate and site conditions.
Popular options:
- Perennial ryegrass offers fast results, germinating in 5 to 7 days
- Tall fescue handles shade, drought, and heavy traffic well
- Kentucky bluegrass creates a dense, uniform lawn but takes 14 to 21 days to germinate
- Bermuda thrives in full sun and warm climates
For shady areas, use fine fescue or shade-tolerant blends.
Seeding Procedure
- Loosen soil with a rake to create a receptive surface.
- Apply seed at 5 to 7 pounds per 1,000 square feet for patch repairs.
- Cover lightly with one-quarter inch of compost or topsoil.
- Press down firmly with your feet or a lawn roller.
- Water immediately and keep soil consistently moist.
Advanced technique: Pre-germinate seeds by placing them in moist compost under plastic wrap at 60 degrees Fahrenheit. Sow once small white roots appear for dramatically improved success rates.
Repairing with Sod
Sod provides instant results and works best for large bare spots, erosion control, or areas that need immediate use.
Sod Installation Steps
- Measure your area and buy fresh, moist sod.
- Cut out dead turf with a spade, creating square edges.
- Remove old grass and amend the soil underneath.
- Apply starter fertilizer at 30 grams per square meter.
- Lay sod, staggering joints like bricks.
- Press firmly by walking over it or using a roller.
- Water deeply immediately after installation.
Critical warning: Never lay sod during drought. It will dry out and fail to establish roots.
Water the Right Way
Improper watering kills more new lawns than pests or disease combined. Getting this step right makes or breaks your repair effort.
Watering Seeded Areas
- Days 1 through 14 require watering 2 to 3 times daily, in the morning and evening.
- Keep soil moist but never soggy.
- Use a fine spray to avoid washing seeds away.
- After germination, water less often but deeper to encourage root growth.
Watering Sodded Areas
- Day 1 demands immediate and thorough watering.
- Days 2 through 7 require daily watering, approximately 1 inch per day.
- Days 7 through 14 see roots starting to form, so reduce frequency.
- After 3 weeks, water deeply 1 to 2 times per week.
Important: Avoid evening watering. Wet foliage overnight increases fungal disease risk dramatically.
Fertilize for Strong Roots
Feeding at the right time promotes healthy growth. Feeding at the wrong time causes problems.
Apply Starter Fertilizer First
Use a high-phosphorus fertilizer to boost root development. Apply at seeding or right after sod installation.
Recommended options: 9-3-4 N-P-K ratio or Scotts starter blend.
Follow Up After 6 to 8 Weeks
Switch to a balanced fertilizer like Scotts Turf Builder. Feed every 6 to 8 weeks during the growing season.
Warning: Do not over-fertilize early. Excess nitrogen burns young grass and promotes weak top growth at the expense of roots.
Mow Without Damaging New Grass
Mowing too soon or too short ruins repair work and sets you back weeks.
Mowing Seeded Lawns
Wait until grass reaches 3.5 to 4 inches before the first mow. Your first cut should remove no more than one-third of the height. Keep blades sharp to prevent tearing tender young grass.
Mowing Sodded Lawns
Wait 2 to 3 weeks until sod cannot be lifted easily. First mow at the recommended height for your grass type, typically 2.5 to 4 inches for cool-season varieties and 1 to 3 inches for warm-season types.
Pro tip: Mow high. Longer grass shades out weeds and resists drought better than closely cut turf.
Prevent Weeds and Pests
New lawns are vulnerable and need protection at the right time.
Wait Before Applying Herbicides
Do not use weed killer until new grass has been mowed 3 to 4 times. Herbicides damage young turf that has not established strong roots.
Control Grubs Early
Apply GrubEx in spring or early summer. One treatment prevents grub damage for up to 4 months.
Fix Edges, Bumps, and Hollows
Uneven areas ruin lawn appearance and make mowing difficult.
Repair Lawn Edges
Cut damaged edges with square cuts. Lift the turf, amend the soil underneath, then replace or reseed. Rounded corners are easier to mow than sharp 90-degree angles.
Level Bumps and Hollows
For minor dips, make an H-shaped cut in the turf, lift the flap, add or remove soil, then re-lay. For larger areas, apply topdressing in thin layers over time rather than all at once.
Avoid These Common Mistakes
- Skipping soil prep leads to poor germination and wasted seed
- Using the wrong grass type creates mismatched growth and color
- Overwatering causes seeds to rot, while underwatering dries them out
- Mowing too soon uproots young grass before it establishes
- Fertilizing too early promotes weak top growth instead of roots
- Ignoring root causes guarantees patches return next season
Prevent Future Patches
A healthy lawn resists damage. Maintain it year-round to avoid repeat problems.
Core Maintenance Practices
- Aerate annually in fall or early spring to prevent compaction
- Overseed thin areas every fall for cool-season lawns or late spring for warm-season
- Create footpaths using stepping stones or mulch in high-traffic zones
- Train pets to use a designated bathroom area and rinse urine spots immediately
- Mow high and keep blades sharp, never removing more than one-third of blade height
- Fertilize regularly with balanced feed every 6 to 8 weeks during growing season
- Monitor for pests and disease and treat problems promptly before they spread
Tools You Will Need
- Rake or dethatcher for clearing debris and loosening soil
- Core aerator for relieving compaction
- Spade or edger for cutting out turf and shaping edges
- Cultivator for loosening small areas
- Spreader for applying seed and fertilizer evenly
- Lawn roller for pressing sod or seed into soil
- Sprinkler tester for checking irrigation coverage
Timeline for Success
Results vary by method and grass type. Ryegrass sprouts in 5 to 7 days, while bluegrass takes about 3 weeks. Full recovery typically occurs within one growing season regardless of method used.
Seeding timeline: Days 1 to 7 bring germination, days 7 to 14 show first sprouts, days 14 to 21 establish seedlings, and 2 to 3 months produce thick, established turf.
Sod timeline: Days 1 to 7 start root formation, days 7 to 14 develop root systems, days 14 to 21 create firm attachment, and 2 to 3 months establish fully ready turf.
Frequently Asked Questions About Patchy Lawns
Why does my lawn develop patches even after seeding?
Patches return when you treat symptoms without fixing root causes. Soil compaction, poor irrigation, pet damage, or pest infestations continue to kill grass unless addressed. Always diagnose the underlying problem before repairing.
What is the fastest way to fix a patchy lawn?
Sod provides the fastest visual results, with instant coverage and immediate use. However, seed integrates better long-term and costs significantly less. Choose based on your budget and timeline.
Can I repair a patchy lawn in winter?
Winter is not recommended for active repair. Grass is dormant and soil conditions are too cold and wet for germination. Use winter months to test soil, plan your approach, and order supplies for spring or fall repair.
How long does it take to fully restore a patchy lawn?
Noticeable improvement appears in 4 to 6 weeks. Full recovery typically takes one full growing season, depending on the extent of damage and growing conditions in your area.
What grass seed works best for patchy lawns?
A blended mix offers the best results. Perennial ryegrass provides fast germination, tall fescue adds drought and shade resistance, and Kentucky bluegrass creates dense, uniform coverage.
Why is the repaired patch a different color than my existing lawn?
New grass has not weathered or been mowed like established turf. Use the same seed supplier and product for color consistency. Taking sod from another part of your lawn ensures a perfect match.
Key Takeaways for Fixing Your Patchy Lawn
Successful lawn repair requires addressing root causes before treating visible symptoms. Soil compaction, poor irrigation, pet damage, pests, and improper mowing all create patchy conditions that return if ignored. Always diagnose the problem first, then choose your repair method based on budget, timeline, and lawn size.
Fall remains the best season for most repairs, providing ideal growing conditions for cool-season grasses. Proper soil preparation including aeration, topdressing, and soil testing creates the foundation for lasting success. Seed-to-soil contact is critical. Simply scattering seed without preparation guarantees poor results.
Water consistently through the first two weeks, then transition to deeper, less frequent watering. Match your grass type to your conditions, whether sun, shade, or heavy traffic. With patience and consistent care, your patchy lawn can become a lush, green carpet ready for play and relaxation all season long.