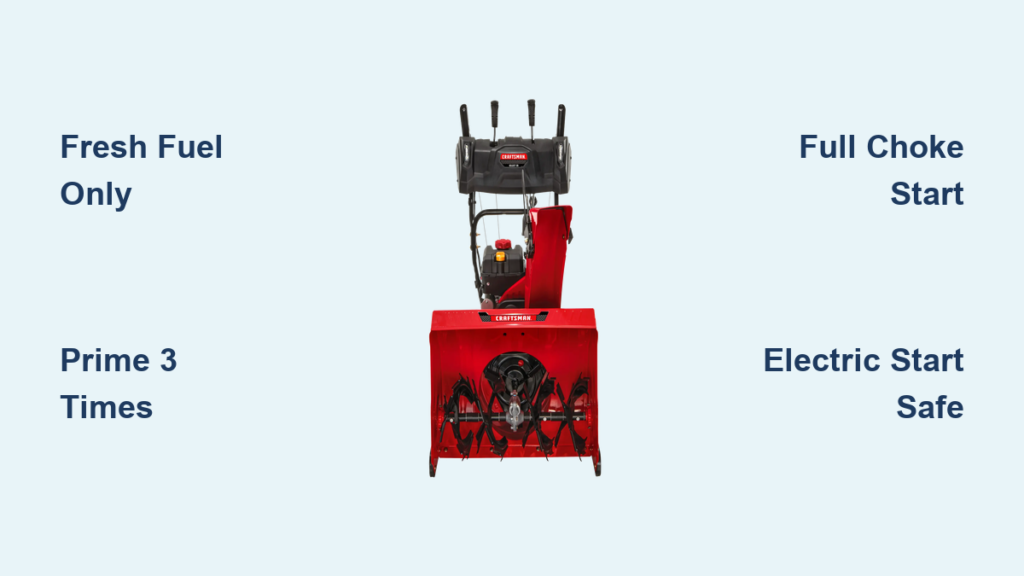
Nothing ruins a snowy morning faster than a snowblower that refuses to start. If you are wrestling with your Craftsman model after months in storage, you are not alone. Most starting problems trace back to a few simple causes: stale fuel, the wrong choke setting, or a missed priming step.
This article covers how to start a Craftsman snowblower in every situation. You will learn the exact cold start sequence, the fast restart method for short breaks, and the safe way to use the electric push-button system. You will also pick up the small habits that prevent failures all winter long.
Cold Start Your Craftsman Snowblower
When the engine has been sitting overnight or through the off-season, use this cold start procedure to get it firing quickly.
Fill the Tank With Fresh, Ethanol-Free Fuel
Pour in fresh gasoline, ideally labeled ethanol-free. Gasoline breaks down in as little as 3 months, and ethanol pulls in water that gums up the carburetor. Never pour in last season’s leftover fuel.
✅ Pro Tip: Add fuel stabilizer if the snowblower will sit more than a month.
Insert the Key and Position the Throttle
Push the ignition key in until it clicks fully. Set the throttle to low-to-medium rather than full throttle. A gentler setting protects the engine during the first moments of startup.
Turn the Choke to Full
Rotate the choke all the way to the “choke” symbol, which is usually a red or black plate icon. This restricts airflow and enriches the fuel mixture so a cold engine can catch.
Prime the Engine Correctly
Find the primer bulb near the engine. Press it three times, covering the vent hole each time with your finger. Press slowly and let the bulb rebound fully between pumps. Rushing reduces the fuel it actually moves.
⚠️ Do not over-prime: More than four presses can flood the engine.
Pull the Recoil Rope Properly
Pull the starter rope gently until you feel resistance, which confirms the piston is engaged. Then deliver one firm, steady pull. Avoid short, jerky tugs.
If the engine sputters and dies:
– Repeat the three-prime rule
– Turn the choke one click toward “run”
– Pull again
After two or three attempts, open the choke gradually and push the throttle to full once the engine runs smoothly.
Restart After a Short Shutdown
If you only stopped for a few minutes, the engine is still warm and you can skip the full cold routine.
Keep the Choke Off
Leave the choke in the “run” position. A warm engine does not need extra fuel to fire.
Set Throttle and Pull the Rope
Keep the throttle at low-to-medium, confirm the key is fully inserted, and pull the recoil rope with firm, steady force.
If it still refuses to start:
– Switch to half choke
– Prime once
– Pull again
– Once it fires, ease the choke fully off
✅ This approach saves time and helps avoid flooding during quick stops.
Use Electric Start Safely

Push-button start is simpler, but only when you follow the right steps.
Plug In and Prepare
Connect the power cord to a grounded outlet, then plug the other end into the snowblower’s electric start port. Use an outdoor-rated extension cord and inspect it for damage first.
Confirm Fuel and Throttle Settings
Make sure the fuel tank is at least 1/4 full. Set the throttle to low-to-medium and insert the key until it locks.
Engage Full Choke and Prime
Turn the choke dial to full choke. Press the primer bulb three times, sealing the vent hole each time.
Press the Start Button Correctly
Hold the start button for no more than 5 seconds. The engine should turn over and fire. If nothing happens:
- Release the button
- Wait 10 seconds to keep the starter motor from overheating
- Try again
Once the engine fires up:
1. Unplug the power cord immediately
2. Open the choke one click at a time, repeating three times
3. Push the throttle fully forward and let the engine warm
🔌 Expert Note: Test the electric start every month, even in summer, so you are never caught off guard when snow arrives.
Diagnose Common Starting Failures

Most Craftsman snowblowers fail to start for one of two reasons: bad fuel or a clogged carburetor.
Check for Old or Bad Gas
Gas older than 6 months loses volatility and leaves deposits throughout the fuel system. If the engine cranks but will not catch:
- Drain the old fuel
- Refill with fresh, ethanol-free gasoline
- Prime and restart using the cold start steps
Clean a Clogged Carburetor
A dirty carburetor is the next most common culprit. Watch for these signs:
– Engine sputters and dies
– Hard starting even with fresh fuel
– Strong fuel smell that hints at flooding
🛠️ Fix it:
1. Remove the carburetor bowl
2. Spray carburetor cleaner through every jet and passage
3. Reassemble and retry the start sequence📌 This advice also applies to MTD, Cub Cadet, Troy-Bilt, Yard Machines, and Yard-Man models, since they share similar engines.
Prevent Flooding and Over-Priming

Flooding happens when excess fuel floods the combustion chamber, usually from over-priming or holding the choke on too long.
Recognize a Flooded Engine
Look for these clues:
– No start after several pulls
– Wet gasoline smell near the air filter
– Gurgling sounds when pulling the rope
Wait It Out
If the engine is flooded, wait 20 minutes with the choke off and key out. Excess fuel can then evaporate. After the wait, try again with:
– No priming
– Choke off
– A steady pull
✅ Shortcut: Pull the spark plug, dry it off, and reinstall. This speeds up the recovery.
Safety Steps Before Starting
Never skip safety, even for a quick test run.
Start Outdoors Only
Always run the engine in a well-ventilated area. Never start it in a garage, shed, or other enclosed space, even with the door open. Carbon monoxide builds quickly.
Clear the Work Zone
Keep children, pets, and bystanders at least 10 feet away. Sweep away loose sticks, rocks, or debris that could get caught in the auger or chute.
Wear Proper Gear
Use gloves, eye protection, and non-slip boots. Tie back long hair and secure loose clothing.
⚠️ Critical: Never reach near the auger, even with the engine off. Packed snow can hide ice jams that snap loose.
Fuel and Storage Best Practices
Smart fuel management prevents the majority of starting headaches.
Choose Ethanol-Free Gas When Possible
Ethanol-blended fuel absorbs water and damages rubber and plastic parts. Choose ethanol-free gasoline, often sold as “rec fuel,” for a longer-lasting engine.
Decide How to Store the Fuel
You have two reliable options:
– Fill the tank and add stabilizer: Prevents moisture and rust inside the tank
– Drain the tank completely: Removes any risk of stale fuel
✅ Recommended: Fill the tank, add stabilizer, run the engine for 5 minutes to coat the carburetor, then shut it off.
Check the Fuel Shut-Off Valve
If your model has a fuel shut-off valve, make sure it is open before starting. A closed valve mimics fuel starvation and keeps the engine from firing.
Test Both Start Systems Regularly
Many owners only learn their electric start is dead when a storm is already underway.
Monthly Check Routine
Every four to six weeks during winter:
– Plug in and test the electric start
– Pull the recoil rope once, even if you do not start the engine
– Confirm the key turns smoothly
This keeps the contacts clean and the moving parts lubricated.
✅ Pro Tip: Coil the power cord loosely for storage. Never kink or crush it.
Troubleshoot No-Start Scenarios
When nothing happens, work through this quick checklist.
No Sound When You Press the Button
- Test the outlet with another device
- Inspect the cord for cuts or fraying
- Make sure the plug is fully seated in the snowblower port
Engine Cranks But Will Not Fire
- Remove the spark plug and inspect it for cracks or heavy carbon buildup
- Dry or replace a wet plug
- Test for spark with a tester, or simply install a new plug
Pull Cord Stiff or Won’t Retract
- Internal damage may be present
- Stop pulling and either disassemble the recoil or visit a technician
- Never force a stuck recoil
Final Tips for Reliable Starts
A Craftsman snowblower should start quickly and predictably when you follow a few simple habits.
Warm Up Before Heavy Use
Let the engine run at half throttle for 2 to 3 minutes before engaging the auger. Oil needs time to circulate, and a warm engine handles heavy snow without strain.
Keep the Air Filter Clean
A clogged air filter chokes the engine and causes hard starting. Wash foam filters in soapy water, and replace paper filters once a season.
Replace the Spark Plug Yearly
Install a new spark plug every season. It is a cheap safeguard against no-start mornings.
Know Your Model’s Quirks
Some Craftsman models respond better to:
– Two primes instead of three
– A slightly advanced throttle
– One long, smooth pull instead of sharp yanks
Pay attention to what works and repeat it.
Frequently Asked Questions About Starting a Craftsman Snowblower
Why does my Craftsman snowblower start and then die?
This usually points to stale fuel or a partially clogged carburetor. Drain the old gas, refill with fresh ethanol-free fuel, and clean the carburetor if the problem continues.
How many times should I press the primer bulb?
Three slow presses are enough for most cold starts, with each press covering the vent hole. Pressing more than four times can flood the engine.
Can I use electric start every time?
Yes, but also pull the recoil rope monthly. Using both systems keeps the parts clean and confirms the recoil still works if the electric start ever fails.
What fuel works best in a Craftsman snowblower?
Ethanol-free gasoline is the best choice. If only E10 is on hand, add a quality fuel stabilizer to limit moisture damage and staling.
How do I know if my engine is flooded?
Look for a strong fuel smell near the air filter, a wet spark plug, or gurgling sounds while pulling. If flooded, wait 20 minutes with the choke off, then try again without priming.
Is it safe to leave fuel in the tank over the summer?
It can be safe if you fill it, add stabilizer, and run the engine for 5 minutes to circulate the treated fuel. Otherwise, drain the tank before long-term storage.
Key Takeaways for Starting Your Craftsman Snowblower
Reliable starts come down to three habits: keep the fuel fresh, follow the choke and prime sequence, and test both starting systems before winter. Use the cold start for first runs, the quick restart for short breaks, and the electric start when you want push-button convenience.
Your next step is simple. Pick a calm afternoon, walk through the cold start sequence, and run the engine long enough to confirm everything works. That five-minute check today is what saves you from a frustrating morning when the first real snow finally hits.